FREE DINNER EBOOK! Get your copy!
  • Cookie Policy
  • GDPR Policy
  • Disclaimer
  • Terms Of Use
  • Visit my other site: Fun Cookie Recipes
feastful focus
  • Home
  • Dinner
  • Desserts
  • Drinks
  • Appetizers
  • Contact
  • About
  • Privacy Policy
  • Home
  • Dinner
  • Desserts
  • Drinks
  • Appetizers
  • Contact
  • About
  • Privacy Policy
  • Cookie Policy
  • GDPR Policy
  • Disclaimer
  • Terms Of Use
Visit my other site: Fun Cookie Recipes

HOME / CATEGORIES /

Latest

- 1 pound ground beef - 1 cup orzo pasta - 1 medium onion, finely diced - 2 cloves garlic, minced - 1 bell pepper, diced (any color you prefer) - 1 can (14.5 oz) diced tomatoes (including juices) - 2 cups beef broth - 1 teaspoon Italian seasoning - 1 teaspoon smoked paprika - Salt and pepper to taste - 1 cup fresh spinach (or kale), roughly chopped - 1 tablespoon olive oil for sautéing Each of these key ingredients plays a big role in creating a rich, tasty dish. Ground beef brings heartiness, while orzo adds a fun twist to your pasta experience. Fresh veggies keep the dish bright and colorful. Seasonings like Italian herbs and smoked paprika give it depth and warmth. - 1/2 cup shredded mozzarella cheese - Fresh herbs for garnish Adding cheese on top makes this dish even creamier and more indulgent. Fresh herbs like basil or parsley add a pop of color and freshness. - You can swap fresh spinach for kale if you prefer. Both greens work well and bring nutrients. - If you want to change the protein, try ground turkey or chicken. Both options keep the dish light while still being filling. These substitutions allow for creativity based on what you have on hand or your dietary needs. {{ingredient_image_2}} - Sautéing vegetables Start by heating 1 tablespoon of olive oil in a large skillet over medium heat. Once the oil is hot, add 1 finely diced medium onion and 1 diced bell pepper. Sauté these for about 5 minutes. Stir them often until they soften and smell good. Next, add 2 minced garlic cloves. Sauté for 1 more minute until you notice a nice aroma. - Cooking ground beef Raise the heat to medium-high. Add 1 pound of ground beef to the skillet. Cook it while breaking it apart with a spatula. Brown the beef for about 5 to 7 minutes until it's cooked through. Drain any extra fat from the skillet carefully. - Adding seasonings and tomatoes Now, sprinkle in 1 teaspoon of Italian seasoning, 1 teaspoon of smoked paprika, and salt and pepper to taste. Mix these in well. Then, add 1 can of diced tomatoes, with all the juices, and 2 cups of beef broth. Stir everything together and bring the mixture to a gentle simmer. - Cooking orzo and simmering Once simmering, add 1 cup of orzo pasta to the skillet. Lower the heat to low, cover the skillet, and let it cook for 10 to 12 minutes. Stir it occasionally to stop the orzo from sticking. Cook until the pasta is soft and most of the liquid is gone. - Adding greens and optional cheese After the orzo is cooked, fold in 1 cup of roughly chopped fresh spinach or kale. Let it wilt for about 2-3 minutes. If you like cheese, sprinkle 1/2 cup of shredded mozzarella on top. Cover the skillet again and let it sit for 2 more minutes. This will melt the cheese nicely. - Serving suggestions Serve your savory skillet hot. You can garnish with extra cheese or fresh herbs if you want. This meal is great served straight from the skillet for a cozy family-style dinner. - To cook orzo properly, use enough broth. It helps keep the pasta flavorful. - Stir the orzo every few minutes. This stops it from sticking to the skillet. - Add extra seasoning like red pepper flakes for heat. You can also try fresh herbs. - Use homemade broth for a richer taste. Store-bought works too but lacks depth. - Serve from the skillet for a cozy, family-style meal. It feels warm and inviting. - For a fancier look, plate servings in bowls. Garnish with fresh herbs like basil or parsley. This adds color and taste. Pro Tips Use Lean Ground Beef: Opt for lean ground beef (90% lean or higher) to reduce excess fat in the dish, making it healthier without sacrificing flavor. Add Extra Vegetables: Feel free to add other vegetables like zucchini or mushrooms to boost nutrition and enhance the dish’s flavor profile. Customize the Cheese: Experiment with different cheeses like feta or goat cheese for a different twist on flavors and textures. Make it Ahead: This dish can be made ahead of time and stored in the fridge for up to three days. Just reheat and enjoy for a quick meal! {{image_4}} You can swap out ground beef for ground turkey. It gives a lighter taste. Use the same amount, one pound. Or try vegetarian options like lentils or chickpeas. These add protein and fiber. They also bring a nice texture to your dish. Want some spice? Add red pepper flakes to the skillet. Start with a pinch and add more as you like. This will give your dish a warm kick. You can also play with herbs. Try using fresh basil or oregano for a fresh twist. If you need a gluten-free option, use zucchini noodles instead of orzo. Just spiralize the zucchini and sauté it briefly. For low-carb diets, this swap works wonders. It keeps the meal light while still being filling. - Refrigeration tips: Let the Ground Beef Orzo Skillet cool. Place it in an airtight container. Store it in the fridge for up to 3 days. Keeping it sealed helps maintain flavor and freshness. - Freezing guidelines: For longer storage, you can freeze the skillet. Transfer cooled dish to a freezer-safe container. It can last up to 3 months in the freezer. Label the container with the date for easy tracking. - Microwave vs. stovetop methods: To reheat in the microwave, place a serving in a microwave-safe bowl. Cover it with a damp paper towel to prevent drying. Heat for 1-2 minutes, stirring halfway through. For stovetop, add a splash of broth to a pan. Heat over low until warmed through, stirring often. - How long it lasts in the fridge and freezer: In the fridge, the Ground Beef Orzo Skillet stays fresh for about 3 days. In the freezer, it can last up to 3 months. Always check for any off smells or changes in texture before eating. It takes about 30 minutes to make Ground Beef Orzo Skillet. You spend 10 minutes on prep and 20 minutes cooking. This quick meal fits perfectly into a busy day. Yes, you can make this dish ahead of time. To meal prep, cook the skillet as directed. Let it cool, then store it in the fridge for up to three days. You can also freeze it for up to three months. Just thaw it in the fridge overnight before reheating. Serve this dish with a fresh salad or garlic bread. You can also pair it with steamed vegetables for a healthy side. For a heartier meal, add a side of roasted potatoes. Enjoy your flavorful meal! In this post, we explored how to make a delicious Ground Beef Orzo Skillet. We covered key ingredients like ground beef, orzo, and fresh veggies. You learned how to prepare, combine, and finish the dish, with helpful tips to enhance flavor and presentation. Remember, you can adjust ingredients based on your tastes. This dish is versatile and easy to store. Enjoy creating variations that fit your diet. Cooking can be simple and fun, so start your culinary adventure today!

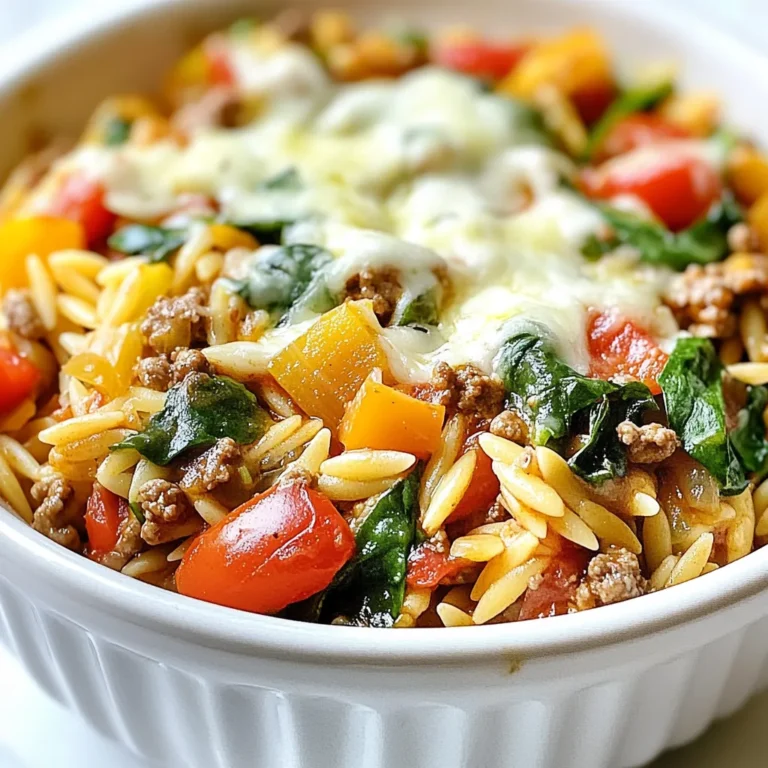
Ground Beef Orzo Skillet Flavorful and Easy Recipe

To make a tasty spicy chicken shawarma, you need the right ingredients. Here’s what you will need: - 1 lb (450g) boneless chicken thighs, cut into strips - 4 cloves garlic, minced - 3 tablespoons olive oil - 4 large pita or flatbreads These key items form the base of your delicious meal. Chicken thighs work best for their juicy texture. The spices bring out the bold flavors. Here are the spices you need: - 2 tablespoons ground cumin - 2 tablespoons ground coriander - 1 tablespoon ground paprika - 1 tablespoon ground turmeric - 1 tablespoon cayenne pepper (adjust for heat preference) - 1 teaspoon ground cinnamon - Salt and black pepper to taste Mix these spices with olive oil and minced garlic for a rich marinade. This mix makes the chicken flavorful and aromatic. Fresh veggies add crunch and color to your shawarma. Use these vegetables: - 1 cucumber, diced - 1 cup cherry tomatoes, halved - 1/2 red onion, thinly sliced - 1/2 cup plain yogurt or tahini sauce - Fresh parsley, chopped (for garnish) - Lemon wedges (for serving) These ingredients brighten the dish and balance the spices. The yogurt or tahini sauce gives creaminess that complements the spicy chicken. {{ingredient_image_2}} To start, gather your ingredients. In a large bowl, mix minced garlic, ground cumin, coriander, paprika, turmeric, cayenne pepper, cinnamon, and olive oil. Add a good pinch of salt and black pepper. Stir until everything blends into a smooth marinade. Now, add the chicken strips to the bowl. Toss them well, so every piece gets coated. This step is key for flavor. Cover the bowl with plastic wrap and place it in the fridge. Marinate for at least one hour. If you have more time, let it sit overnight. This will make the chicken taste even better. Next, you need to cook the marinated chicken. Heat a grill pan or a non-stick skillet over medium-high heat. Once it’s hot, add the chicken strips in batches. Make sure not to overcrowd the pan. Cook each side for about 6-8 minutes. You want the chicken to be well-cooked with a crispy outside. Once done, remove the chicken from the heat. Let it rest for a few minutes. This helps keep the juices inside. After resting, slice the chicken into smaller, bite-sized pieces. While your chicken is cooking, prepare your fresh fillings. Dice the cucumber, halve the cherry tomatoes, and slice the red onion. Place these in a bowl, so they’re ready for assembly. Now, warm your pita or flatbreads in a dry skillet for about one minute on each side. This makes them soft and easy to wrap. Lay one flatbread on a plate. Add a good portion of the spicy chicken in the center. Top it with cucumber, cherry tomatoes, and red onion for crunch. For a creamy finish, drizzle plain yogurt or tahini sauce over the filling. This balances the spices and adds great flavor. Finally, fold the sides of the pita over the filling. Then, roll it up tightly from the bottom. Your delicious shawarma wrap is ready! Serve it with fresh parsley on top and some lemon wedges on the side. Enjoy! To get the best flavor, marinate your chicken well. I recommend using a large bowl. First, mix garlic, cumin, coriander, paprika, turmeric, cayenne pepper, cinnamon, olive oil, salt, and black pepper. The spices create a rich blend. Toss in your chicken strips and coat them well. Cover the bowl. Let it sit in the fridge for at least one hour. If you can, marinate it overnight for even more flavor. When cooking, never overcrowd your pan. Preheat your grill or skillet first. This way, you get a nice sear. Cook the chicken strips for about 6-8 minutes on each side. You want them golden and crispy. After cooking, let the chicken rest for a few minutes. This helps keep the juices inside. Then, slice it into bite-sized pieces for easy wrapping. Serve your shawarma wraps with fresh veggies. I like diced cucumber, halved cherry tomatoes, and thinly sliced red onion. They add crunch. For sauce, use plain yogurt or tahini for creaminess. Warm your pita or flatbreads before filling. I also suggest adding a sprinkle of parsley and a lemon wedge. The lemon gives a nice zesty touch. Enjoy your meal! Pro Tips Marination Time Matters: For the best flavor, allow the chicken to marinate overnight. This enhances the spices' penetration, resulting in a juicier and more flavorful dish. Adjusting Heat Levels: If you enjoy a milder flavor, reduce the cayenne pepper in the marinade. You can also serve additional hot sauce on the side for those who prefer extra spice. Fresh Ingredients: Use the freshest vegetables possible for the filling. Crisp cucumbers and ripe tomatoes will elevate the overall taste and texture of your wraps. Perfect Wrapping Technique: When wrapping your pita, ensure you fold in the sides first before rolling it up. This helps keep all the delicious fillings secure inside. {{image_4}} If you want to switch things up, try using different meats. Beef or lamb can be great options. They both hold spices well and taste amazing. You can also use turkey for a lighter choice. Just adjust the cooking time to ensure they are cooked through. Vegetarians can enjoy shawarma too! Use grilled portobello mushrooms or roasted eggplant as the main filling. Chickpeas also work great. Just season them with the same spices for that shawarma flavor. Combine with fresh vegetables for a tasty wrap. Sauces can change the whole dish. You can use tahini sauce, which has a nutty taste. Plain yogurt is another option that adds creaminess. For a spicy kick, try harissa or sriracha. Each sauce brings a unique twist to your shawarma. Feel free to mix and match to find your favorite! To store leftover shawarma, first let it cool to room temperature. Place the chicken and veggies in an airtight container. If you have extra sauce, store it in a separate small container. This keeps the flavors fresh. You can keep the shawarma in the fridge for up to three days. When you want to eat leftover shawarma, reheat it gently. You can use a skillet over low heat. This warms it without making it dry. Add a splash of water to help steam the chicken. If you prefer, you can also microwave it. Just cover it with a damp paper towel. Heat in short bursts of 30 seconds until warm. If you like to plan meals, freezing shawarma works great. After cooking, let the chicken cool completely. Then, place it in freezer-safe bags. This keeps it safe for about three months. When you are ready, thaw it in the fridge overnight. Reheat as mentioned above to enjoy your tasty meal. Spicy chicken shawarma is a Middle Eastern dish. It features marinated chicken cooked on a grill or skillet. The chicken gets a burst of flavor from spices like cumin, paprika, and cayenne. You wrap the cooked chicken in pita with fresh veggies and sauce. This dish is both tasty and fun to make. To adjust the spice level, change the amount of cayenne pepper. If you want it milder, use less cayenne. Start with half a tablespoon and taste as you go. For more heat, add more cayenne or try a dash of hot sauce. Remember, you can always add heat, but you can't take it away! Yes, you can prepare the chicken ahead of time. Marinate the chicken the night before. This gives the spices more time to soak in. You can also cook it in advance and store it in the fridge. Just reheat it when you are ready to serve. This makes meal prep easy and quick! This article explored making spicy chicken shawarma. We covered key ingredients like spices and fresh veggies. I shared steps for marinating, cooking, and assembling your wraps. Plus, I gave tips for flavor, juiciness, and serving. You learned about variations like alternative proteins and vegetarian options. Lastly, we discussed storage and reheating. Enjoy making shawarma in your kitchen. It’s fun, tasty, and easy to share. Now, get started and impress your friends and family!

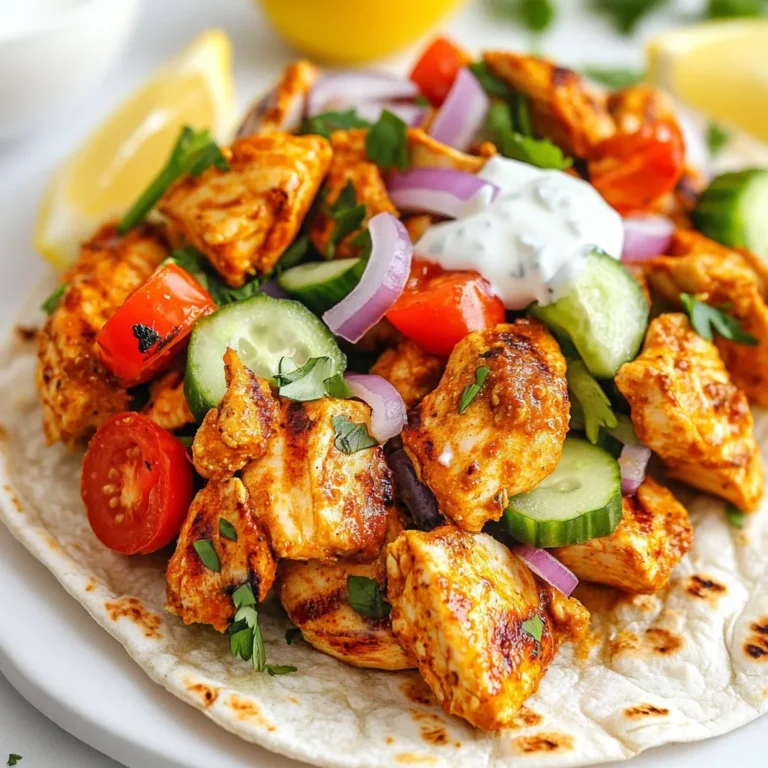
Spicy Chicken Shawarma Flavorful and Easy Recipe

- 8 oz rotini pasta - 1 cup cooked chicken breast, diced - 1 cup cherry tomatoes, halved - 1 cup diced cucumber - 1/2 cup diced red bell pepper - 1/4 cup red onion, finely chopped - 1/2 cup cooked bacon, chopped (optional) - 1/2 cup shredded cheddar cheese - 1/2 cup mayonnaise - 2 tablespoons Dijon mustard - 1 tablespoon apple cider vinegar - Salt and pepper to taste - Fresh parsley, chopped (for garnish) The pasta forms the base of the dish. Use 8 ounces of rotini pasta. This amount serves about six people. You will need one cup of cooked chicken breast cut into small pieces. For crunch and freshness, add one cup of cherry tomatoes and one cup of diced cucumber. Next, add 1/2 cup of diced red bell pepper for color. The red onion adds a nice bite, so use 1/4 cup of it, finely chopped. If you want a smoky flavor, add 1/2 cup of chopped cooked bacon. For richness, use 1/2 cup of shredded cheddar cheese. The dressing needs 1/2 cup of mayonnaise, along with 2 tablespoons of Dijon mustard and 1 tablespoon of apple cider vinegar. Finally, season with salt and pepper to taste and garnish with fresh parsley. You can swap out the chicken for turkey or ham if you prefer. For a vegetarian version, use chickpeas or grilled tofu instead of meat. If you want extra flavor, try adding olives or avocado. You can also use Greek yogurt instead of mayonnaise for a lighter dressing. For a spicier kick, add jalapeños or a dash of hot sauce. If you don’t have rotini, any pasta shape works well in this salad. {{ingredient_image_2}} Start by boiling water in a large pot. Add 8 oz of rotini pasta. Cook it according to the package instructions until it is al dente. This usually takes about 8 to 10 minutes. Once done, drain the pasta and rinse it under cold water. This stops the cooking process and cools the pasta down. In a big mixing bowl, combine the cooled pasta with other tasty ingredients. Add 1 cup of diced cooked chicken, 1 cup of halved cherry tomatoes, 1 cup of diced cucumber, 1/2 cup of diced red bell pepper, and 1/4 cup of finely chopped red onion. If you like bacon, toss in 1/2 cup of chopped cooked bacon. Finally, add 1/2 cup of shredded cheddar cheese for extra flavor. In a small bowl, mix together 1/2 cup of mayonnaise, 2 tablespoons of Dijon mustard, and 1 tablespoon of apple cider vinegar. Sprinkle in salt and pepper to fit your taste. Whisk the ingredients until the dressing is smooth and creamy. Pour the dressing over your pasta salad mix. Gently stir everything together. Make sure all the ingredients are coated with the dressing. This step is key for a tasty salad. Now it's time to taste your salad. Take a small spoonful and see if it needs more salt or pepper. Adjust the seasoning as needed. A little tweak can make a big difference! Cover the salad with plastic wrap or a lid. Place it in the fridge for at least 30 minutes. Chilling helps all the flavors blend together. Plus, it tastes great cold! Before serving, give the salad a good stir. For a nice touch, add some fresh chopped parsley on top. You can serve it in a big bowl or individual portions. For fun, add extra cherry tomatoes or a splash of lemon juice for a fresh twist. Enjoy the flavors! To make the best pasta salad, start with quality pasta. I prefer rotini because its shape holds the dressing well. Cook it just until it's al dente. This means it should be firm but not hard. After cooking, rinse it under cold water. This stops the cooking and cools it down. Mix your other ingredients while the pasta cools. Fresh veggies add crunch and flavor. Use ripe cherry tomatoes and crisp cucumbers for the best taste. To boost flavor, don’t skip the dressing. A mix of mayonnaise and Dijon mustard adds creaminess and tang. Add apple cider vinegar for a zesty kick. Season well with salt and pepper. Always taste your salad before serving. Adjust seasoning as needed. Fresh herbs like parsley brighten the dish. You can also add a squeeze of lemon for extra freshness. If you like spice, consider adding a pinch of red pepper flakes. Store any leftovers in an airtight container. This keeps your pasta salad fresh. Keep it in the fridge for up to three days. If you plan to make this salad ahead, store the dressing separately. Combine it just before serving to prevent sogginess. Always check for any off smells or changes in texture before eating leftovers. Enjoy your delicious club sandwich pasta salad even after the first meal! Pro Tips Cooking Pasta: Be sure to cook the rotini pasta until it's al dente, as it will continue to absorb moisture while cooling and marinating in the salad. Cooling the Pasta: Rinsing the pasta under cold water stops the cooking process and helps prevent it from becoming mushy in the salad. Flavor Boost: For an extra layer of flavor, consider adding a teaspoon of garlic powder or a splash of lemon juice to the dressing. Make Ahead: This pasta salad can be made a day in advance. Just remember to give it a good stir before serving to redistribute the dressing. {{image_4}} To make a vegetarian Club Sandwich Pasta Salad, swap out the chicken and bacon. You can use extra veggies instead. Try adding more cherry tomatoes, diced bell peppers, and even avocado for creaminess. Chickpeas are another great choice for protein. They add a nice texture and boost the salad's nutrition. For a gluten-free version, use gluten-free rotini pasta. Many brands offer great alternatives. You can still enjoy all the other ingredients as is. Just make sure the mayonnaise and any other dressings are also gluten-free. This way, you keep all the flavors without any worries. While the classic dressing is tasty, you can mix it up! Instead of mayonnaise, use Greek yogurt for a lighter twist. Combine it with lemon juice and fresh herbs for a zesty kick. You can also try a vinaigrette made with olive oil and balsamic vinegar. This gives a fresh taste and brightens up the salad. Don't be afraid to experiment! Each dressing adds a new layer of flavor. Store your Club Sandwich Pasta Salad in an airtight container. It stays fresh for up to three days in the fridge. Make sure to place it in the coldest part of your fridge. This helps keep the flavors intact and the ingredients crisp. Freezing this pasta salad is not ideal. The texture of the pasta and fresh veggies changes when frozen. If you must freeze it, separate the dressing and salad. Freeze only the pasta and chicken. Use it within a month for best taste. Each ingredient has its own shelf life. Here’s a quick guide: - Rotini pasta: Lasts up to two years in a dry place. - Cooked chicken: Safe for three to four days in the fridge. - Cherry tomatoes: Best used within a week for freshness. - Cucumber: Stays good for about a week. - Red bell pepper: Can last up to a week in the fridge. - Red onion: Good for two weeks when stored properly. - Bacon: Keep for about a week once cooked and stored. - Cheddar cheese: Stays fresh for about a week. - Mayonnaise: Lasts for a month after opening if refrigerated. - Dijon mustard: Can last for a year in the fridge. Knowing the shelf life helps you use fresh ingredients. This ensures a tasty pasta salad every time. Rotini pasta works best for this salad. Its shape holds onto the dressing and toppings well. You can also use fusilli or penne if you prefer. Both of these shapes will add a nice texture. Yes, you can make this salad ahead of time. It tastes even better after chilling. Prepare it a few hours before serving and let it sit in the fridge. The flavors will blend nicely together. To make this salad healthier, you can cut back on the mayonnaise. Use Greek yogurt instead for a lighter option. Add more veggies, like spinach or carrots, to boost fiber and nutrients. You can also skip the bacon to reduce fat. If you want to avoid mayonnaise, try using Greek yogurt or avocado. Both options add creaminess without the heaviness. You can also mix in a vinaigrette for a tangy twist. This blog post covered how to make a tasty pasta salad. You learned about the right ingredients and the step-by-step cooking guide. I shared tips for great flavor and safe storage. You also discovered fun variations to suit your taste. Remember, pasta salad is adaptable. Use the ideas shared to make it your own. Enjoy your cooking, and let your creativity shine in the kitchen!

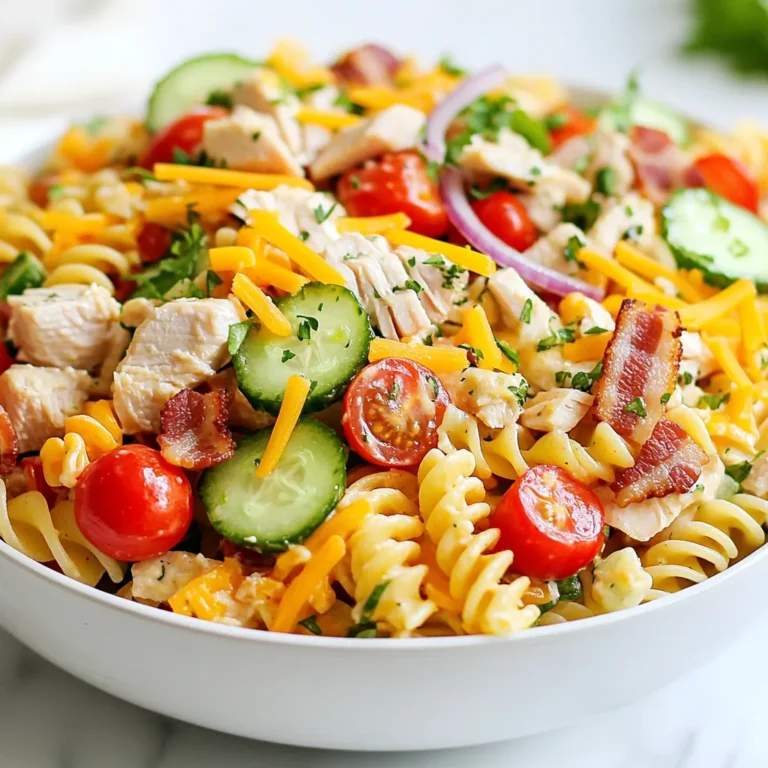
Club Sandwich Pasta Salad Fresh and Flavorful Dish

- 1 lb ground beef or turkey - 1 can (15 oz) black beans, drained and rinsed - 1 can (15 oz) diced tomatoes with green chilies - 1 packet taco seasoning - 1 cup corn kernels (fresh, frozen, or canned) - 2 cups tortilla chips, crushed - 2 cups shredded cheddar cheese - 1 cup sour cream or Greek yogurt - 1/2 cup green onions, chopped - Fresh cilantro for garnish (optional) For my Easy Taco Casserole, I choose ground beef or turkey as the base. The meat brings rich flavor. Black beans add protein and texture. Diced tomatoes with green chilies give a nice kick. Taco seasoning ties everything together with spices. I add corn for sweetness. Tortilla chips create a crunchy layer. Shredded cheddar cheese melts beautifully on top, making it creamy. Sour cream or Greek yogurt adds coolness. Finally, green onions and cilantro offer freshness and color. This mix of ingredients makes for a hearty dish. Each bite is tasty and satisfying. You can also play with the amounts based on your taste. {{ingredient_image_2}} - Preheat the oven to 350°F (175°C). - In a large skillet, brown 1 lb of ground beef or turkey. Use medium heat. Break the meat apart as it cooks. Drain any extra fat to keep it light. - Add 1 packet of taco seasoning, 1 can of diced tomatoes with green chilies, 1 can of black beans (drained and rinsed), and 1 cup of corn kernels to the skillet. - Season with salt and pepper. Stir well. Let this cook for about 5 minutes. This step helps the flavors mix nicely. - In a baking dish, place half of the crushed tortilla chips at the bottom. This makes a strong base. - Spread half of the meat mix over the chips. Then sprinkle half of the shredded cheddar cheese on top. - Repeat this layering process. Add the rest of the chips, then the meat mixture, and finish with the remaining cheese. - Place your baking dish in the oven. Bake for 25-30 minutes. - Look for bubbly and golden cheese. This means it’s done! - After baking, let it cool for a few minutes. This helps the layers stay together when you serve it. How to avoid a soggy casserole To keep your taco casserole crunchy, avoid too much moisture. Use drained beans and canned tomatoes. You can also bake the casserole longer. This lets extra liquid evaporate. Layering the tortilla chips at the bottom helps, too. They soak up some juices while cooking. Tips for browning meat perfectly For the best flavor, use a large skillet. Heat it over medium-high heat before adding the meat. Break the meat into small pieces as it cooks. This helps it brown evenly. Stir often to avoid burning. If you see too much fat, drain it. This keeps your casserole tasty and light. Ideas for garnishes Garnish your taco casserole for extra color and taste. Chopped green onions add crunch. Fresh cilantro gives a pop of flavor. A dollop of sour cream or Greek yogurt cools the dish. You can also add lime wedges for a zesty kick. These toppings make your casserole look and taste amazing! Best sides to serve with taco casserole Pair your taco casserole with simple sides. A fresh garden salad adds crispness. Corn on the cob or Mexican rice works well, too. You can even serve tortilla chips with salsa for dipping. These sides balance the flavors and make your meal more fun! Pro Tips Use Lean Meat: Opt for lean ground beef or turkey to keep your casserole lighter and healthier. Layering is Key: Ensure even distribution of ingredients in each layer for balanced flavors and textures throughout the dish. Customize Your Spice Level: Adjust the amount of taco seasoning or add fresh jalapeños for a spicier kick, depending on your preference. Let it Rest: Allow the casserole to cool for a few minutes after baking to help the layers set, making it easier to serve. {{image_4}} - Leaner meat options: You can swap ground beef for ground turkey or chicken. This change cuts fat but keeps flavor. - Vegetarian alternatives: Use lentils or quinoa instead of meat. These options add protein and make the dish hearty. - Additional spices to add: Try adding cumin or smoked paprika. These spices deepen the flavor and add warmth. - Unique toppings for extra flavor: Consider adding sliced jalapeños or diced avocado. These toppings can give your casserole a fresh twist. You can also top it with salsa or guacamole for added zing. Experimenting with these variations can make your Easy Taco Casserole even more exciting! To keep your taco casserole fresh, store it in the fridge. Use an airtight container. Let the casserole cool completely before sealing it. This prevents condensation and sogginess. It will stay good for 3-4 days. If you want to keep it longer, consider freezing it. Reheating taco casserole is easy. Preheat your oven to 350°F (175°C). Place the casserole in a baking dish. Cover it with foil to trap moisture. Bake for about 20 minutes or until hot. This will help it stay moist and tasty. If you want to use a microwave, heat it in short intervals. Stir in between to avoid dry spots. Enjoy your delicious leftovers! The total cook time for Easy Taco Casserole is about 45 minutes. This includes 15 minutes for prep and 30 minutes for baking. You’ll spend a little time browning the meat and mixing the ingredients. Then, you’ll layer everything in a dish and let the oven do the work! Yes, you can prepare this dish ahead of time! To do this, cook the meat and mix in the other ingredients. Then, layer it in the baking dish but do not bake yet. Cover it tightly and store it in the fridge for up to 24 hours. When you are ready, just bake it as directed. This makes it perfect for busy nights! Taco Casserole pairs well with many side dishes. Here are a few ideas: - Fresh guacamole - Crunchy tortilla chips - A simple green salad - Mexican rice - Refried beans These sides add flavor and balance to your meal. If you like heat, there are easy ways to spice up your casserole! Here are some tips: - Add jalapeños to the meat mixture. - Use spicy taco seasoning instead of regular. - Top with hot salsa before serving. - Sprinkle crushed red pepper flakes on top. These additions will kick up the heat and make it extra tasty! In this article, we covered how to make an Easy Taco Casserole. We explored the essential ingredients, step-by-step instructions, and helpful tips. You learned how to layer and bake the casserole to perfection. I also shared some variations for different diets and ways to store and reheat leftovers. Taco casserole is tasty and simple. It’s great for family dinners or potlucks. Enjoy experimenting with flavors and toppings. Your next meal can be a hit with this recipe!

Easy Taco Casserole Tasty and Quick Dinner Idea

- 1 whole chicken (3-4 pounds) - 1 cup unsalted butter, softened to room temperature - 10 cloves of garlic, finely minced - 1 tablespoon fresh rosemary, finely chopped - 1 tablespoon fresh thyme, finely chopped - Zest and juice of 1 lemon - Salt and freshly ground black pepper, to taste - 1 teaspoon smoked paprika - Fresh parsley, chopped, for garnish - 1 onion, cut into quarters - 1 cup low-sodium chicken broth Using fresh ingredients is key to great flavor. Fresh garlic, herbs, and chicken bring out the best taste. They also improve the dish's aroma and texture. When you use fresh herbs like rosemary and thyme, the dish becomes vibrant. The lemon zest adds brightness, making each bite exciting. Fresh ingredients ensure your Roasted Garlic Butter Chicken is juicy and savory. If you can't find a specific ingredient, don't worry! You can swap some items easily. For example, if you don't have fresh rosemary, dried rosemary works too. Just use less since dried herbs are stronger. You can also use other herbs like sage or oregano for unique flavors. If you want a lighter option, you can use olive oil instead of butter. Chicken thighs can replace whole chicken if you prefer smaller pieces. These swaps can help you create a tasty dish with what you have on hand. {{ingredient_image_2}} First, set your oven to 425°F (220°C). Preheating is key. A hot oven helps the chicken cook evenly. It also gives the skin a nice, crispy finish. Next, grab a mixing bowl. Combine 1 cup of softened butter, 10 minced garlic cloves, and 1 tablespoon each of chopped rosemary and thyme. Add the zest and juice of 1 lemon, salt, pepper, and 1 teaspoon of smoked paprika. Mix well to create a rich garlic herb butter. This butter will add lots of flavor to the chicken. Now, take your whole chicken and pat it dry with paper towels. This step is important for crispy skin. Rub the garlic herb butter all over the chicken. Make sure to get under the skin for the best taste. Then, place quartered onion inside the chicken’s cavity. If there's leftover butter, spoon it in too. Place the chicken breast-side up in a roasting pan. Pour 1 cup of low-sodium chicken broth into the pan. This broth keeps the chicken moist and creates a tasty sauce. Put the pan in the oven. Roast the chicken for about 1 hour and 15 minutes. Use a meat thermometer to check that the internal temperature reaches 165°F (75°C). The skin should turn a beautiful golden brown. Every 20 minutes, open the oven and baste the chicken. Use the melted garlic butter from the pan. Basting adds flavor and keeps the chicken moist. This step makes a big difference! Once the chicken is done, carefully take it out of the oven. Let it rest for 10-15 minutes. This waiting time helps the juices spread throughout the meat, making it tender and juicy. After resting, carve the chicken and serve it with the pan juices. Enjoy your delicious roast! To get crispy skin, start with a dry chicken. Use paper towels to remove moisture. A dry bird will roast better. Next, rub the garlic herb butter under the skin. This adds flavor and helps with crispiness. Finally, roast at a high temperature. Set your oven to 425°F. This will give you a golden and crunchy skin. Basting is key for flavor and moisture. Open the oven every 20 minutes to baste. Use a spoon to drizzle the melted garlic butter over the chicken. This keeps the meat juicy and adds richness. Make sure to use the juices from the pan. They are packed with flavor and will enhance your dish. Don't waste any garlic herb butter! Use the extra to flavor vegetables or bread. Spread it on corn or toss it with potatoes. You can also mix it into pasta for a quick sauce. The garlic flavor will elevate any dish. It’s a great way to use what you have. Timing is very important for a perfect roast. Aim for about 1 hour and 15 minutes. Check the chicken with a meat thermometer. The internal temperature should reach 165°F. This ensures the chicken is safe to eat. Let it rest for 10-15 minutes after roasting. This helps the juices stay inside the meat, making it tender and juicy. Pro Tips Pat Dry for Crispiness: Make sure to thoroughly pat the chicken dry with paper towels before applying the garlic herb butter. This helps achieve that coveted crispy skin during roasting. Use a Meat Thermometer: To ensure perfectly cooked chicken, use a meat thermometer inserted into the thickest part of the thigh. The internal temperature should reach 165°F (75°C). Experiment with Herbs: Feel free to substitute or add other herbs like oregano or basil to the garlic herb butter for unique flavor profiles that suit your taste. Save the Pan Juices: After roasting, don’t discard the pan juices! They can be used as a delicious sauce or gravy to drizzle over the carved chicken for added flavor. {{image_4}} You can enhance your roasted garlic butter chicken by adding vegetables. Root veggies like carrots, potatoes, or turnips work great. Chop them into even pieces. Toss them with some olive oil, salt, and pepper. Arrange them around the chicken in the roasting pan. They will soak up the chicken juices and become tender and tasty. You can also add broccoli or Brussels sprouts for a colorful touch. Feel free to play with herbs in this recipe. You can swap rosemary and thyme for herbs like oregano or sage. Fresh herbs give great flavor, but dried herbs work too. Use about one-third of the amount if using dried herbs. Mixing in a bit of basil or parsley can add freshness. Experiment with your favorites to find the best taste for you. Both the oven and air fryer can cook this dish well. The oven gives a nice, even roast. It can handle larger chickens too. An air fryer cooks faster and gives a crispy skin. Set the air fryer to 375°F (190°C). Cook for about 50 minutes or until the chicken is done. Both methods yield juicy chicken, so choose the one that fits your time and tools. After enjoying your roasted garlic butter chicken, you might have some leftovers. First, let the chicken cool down to room temperature. Then, place it in an airtight container. You can keep the chicken in the fridge for up to three days. Make sure to store any leftover garlic herb butter separately. This butter adds great flavor when reheating. If you want to keep it longer, you can freeze it. When you’re ready to eat your leftover chicken, it’s best to reheat it gently. Preheat your oven to 350°F (175°C). Place the chicken in a baking dish and cover it with foil. This helps keep the moisture in. Heat it for about 20-30 minutes or until it’s warm all the way through. You can also use a microwave for quick reheating. Just cover it with a damp paper towel to avoid drying it out. Heat in short bursts of 1-2 minutes. If you want to save your roasted chicken for later, freezing is a great option. First, let the chicken cool completely. Cut the chicken into pieces for easier storage. Wrap each piece tightly in plastic wrap, then place them in a freezer bag. Be sure to remove as much air as possible. You can freeze the chicken for up to three months. When ready to eat, thaw it in the fridge overnight before reheating. Roast a whole chicken for about 1 hour and 15 minutes. This time works well for a 3-4 pound bird. Always check the chicken's internal temperature. It should reach 165°F (75°C) for safe eating. Yes, you can use chicken pieces. Adjust the cooking time based on the size of the pieces. Smaller pieces will cook faster, about 30-45 minutes, depending on thickness. You can serve many sides with this dish. Some great options are: - Roasted vegetables - Mashed potatoes - Rice pilaf - A fresh green salad These sides complement the chicken's rich flavors. To check if the chicken is fully cooked, use a meat thermometer. Insert it into the thickest part of the thigh, avoiding the bone. It should read 165°F (75°C). The juices should run clear, not pink. Yes, you can prepare the garlic herb butter ahead of time. Rub it on the chicken and store it in the fridge for up to 24 hours. Roast it just before serving for the best flavor and texture. This guide shows you how to roast a delicious garlic butter chicken. We covered key ingredients and their freshness, easy steps, tips for success, and fun variations. Don’t forget proper storage and reheating methods to enjoy leftovers. Cooking can be fun and simple. With practice, you’ll master roasting chicken and impress everyone. Enjoy every bite and the great flavors you create!

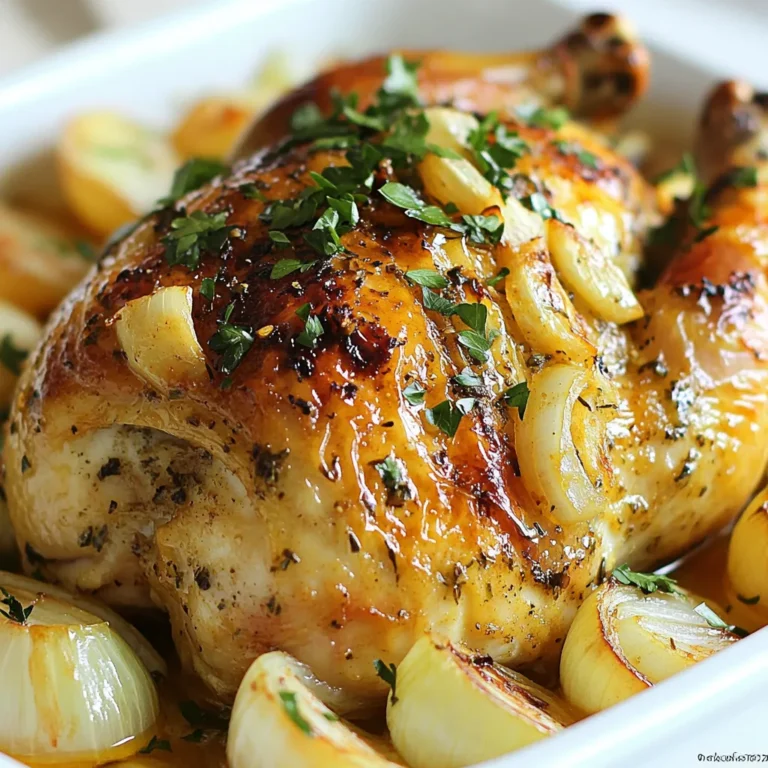
Roasted Garlic Butter Chicken Savory and Juicy Dish

- 4 boneless, skinless chicken breasts - 1 cup shredded coconut - 1 cup panko breadcrumbs - 1 tablespoon garlic powder - 1 tablespoon onion powder - 1 teaspoon paprika - 1 teaspoon salt - ½ teaspoon black pepper - 2 large eggs - ½ cup milk - 1 cup shredded mozzarella cheese - 1 ripe pineapple, sliced into rounds - 1 tablespoon olive oil - Fresh cilantro leaves (for garnish) Each ingredient plays a vital role in making Malibu Chicken tasty. The chicken breasts form the base of the dish. They are lean and cook well. Shredded coconut adds a sweet, tropical flavor. Panko breadcrumbs give a light, crispy texture. Garlic and onion powders add depth. Paprika brings a warm color and slight smokiness. Salt and black pepper enhance all flavors. Eggs and milk create a binding mixture for the coating. Mozzarella cheese melts beautifully, adding creaminess. Pineapple rounds bring a juicy, sweet contrast. Olive oil helps with cooking and flavor. Fresh cilantro adds a burst of freshness at the end. You can easily swap some ingredients if needed. For chicken, use turkey breasts for a leaner option. Almond flour or crushed nuts can replace panko for a gluten-free version. If you dislike coconut, try using crushed cornflakes or breadcrumbs. You can skip the cheese for a dairy-free meal. Instead of pineapple, mango slices offer a similar taste. For the garnish, parsley can replace cilantro if you prefer a milder flavor. These swaps keep the dish simple and delightful while suiting different tastes. {{ingredient_image_2}} 1. Preheat your oven to 375°F (190°C). This step is key for even cooking. 2. Take two large eggs and crack them into a shallow bowl. Add ½ cup of milk. Whisk them together until smooth. 3. In another shallow bowl, combine these dry ingredients: 1 cup shredded coconut, 1 cup panko breadcrumbs, 1 tablespoon garlic powder, 1 tablespoon onion powder, 1 teaspoon paprika, 1 teaspoon salt, and ½ teaspoon black pepper. Mix them well. 4. Grab each chicken breast. First, dip it into the egg mixture, letting any extra egg drip off. 5. Then, coat the chicken with the coconut-panko mix. Press down gently so it sticks well. 1. Place the coated chicken breasts on a greased baking sheet. Make sure to space them out well. 2. Sprinkle 1 cup of shredded mozzarella cheese over each chicken piece. This adds a nice melty layer. 3. Arrange sliced pineapple rounds around the chicken. Brush them lightly with 1 tablespoon of olive oil. This helps enhance flavor and keeps them from sticking. 4. Bake in the preheated oven for 25-30 minutes. Check that the chicken reaches an internal temperature of 165°F (74°C). The coating should look golden brown. 5. Once done, take the baking sheet out of the oven. Let the chicken rest for a few minutes to keep the juices inside. - Make sure to press the coconut-panko mix onto the chicken. This helps it stay on during baking. - Use fresh, ripe pineapples for best flavor. They add sweetness and moisture. - For extra crunch, bake until the coating is a deep golden brown. This will give it a nice crisp texture. - Letting the chicken rest before serving keeps it juicy. Enjoy the flavors! One common mistake is not coating the chicken well. Make sure you press the coconut-panko mix onto the chicken firmly. This helps it stick and get that nice crunch. Also, don’t skip preheating the oven. A hot oven cooks the chicken evenly. Lastly, avoid overcrowding the baking sheet. Keep space between the chicken pieces for better air flow. To make this dish milder, reduce the garlic and onion powder. If you want a spicy kick, add cayenne pepper to the coating. For a fruity twist, try different fruits like mango or peaches instead of pineapple. You can also switch the mozzarella for pepper jack cheese for a bit of heat. Baking is the easiest way to cook this Malibu Chicken. It keeps the chicken moist and the coating crispy. If you want to try frying, use a deep skillet with oil at 350°F. Fry until golden brown, then drain on paper towels. Grilling can add a smoky flavor. Just make sure to monitor the heat so the chicken cooks through. Pro Tips Use Fresh Ingredients: Always opt for fresh chicken and ripe pineapple for the best flavor and texture in your dish. Perfect the Coating: For an extra crispy texture, allow the coated chicken to sit for a few minutes before baking. This helps the coating adhere better. Experiment with Cheese: While mozzarella adds a nice stretch, consider trying other cheeses like provolone or pepper jack for a unique twist. Garnish with Citrus: Adding a squeeze of lime or lemon juice over the finished chicken enhances the tropical flavors beautifully. {{image_4}} You can spice up your Malibu Chicken with various fruits. Try adding mango or kiwi for a sweet twist. You can also use peaches or strawberries, which pair well with coconut. These fruits not only add flavor but also brighten your dish. Slice the fruits and arrange them around the chicken before baking. This makes your meal look fresh and inviting. If you want a lighter option, bake instead of fry. Baking cuts down on oil and calories. You can still get a crispy texture by using panko breadcrumbs. Just remember to watch the cooking time closely. You can also use chicken thighs for more flavor while keeping it healthy. Want to kick up the heat? Add a pinch of cayenne pepper to the coating mix. This gives your dish a nice kick without overpowering the coconut flavor. You can also mix in fresh herbs like basil or parsley. These herbs add depth and freshness to the meal. Don't be afraid to play with flavors and find what you love! To store Malibu Chicken, let it cool first. Place the chicken in an airtight container. You can keep it in the fridge for up to three days. Make sure to separate the chicken from the pineapple. This will keep everything fresh and tasty. If you want to save Malibu Chicken for later, freezing works well. Wrap each piece tightly in plastic wrap. Then, place them in a freezer bag. This will help keep the chicken moist. You can freeze it for up to three months. Just remember to label the bag with the date. When you’re ready to eat, reheating is key. Preheat your oven to 350°F (175°C). Place the chicken on a baking sheet. Cover it with foil to prevent it from drying out. Heat for about 15-20 minutes. The cheese will melt, and the chicken will stay juicy. Enjoy your flavorful meal! Malibu Chicken started in the 1970s in California. It became popular due to its tasty flavors. The dish combines chicken with tropical ingredients like coconut and pineapple. This fun blend reflects California's vibrant food scene. Many love it for its crunch and sweetness. Yes, you can make Malibu Chicken ahead of time. Prepare the chicken and coat it, then store it in the fridge. You can bake it later when you’re ready. This way, you save time and still enjoy a fresh meal. Just remember to check the cooking time if it’s cold from the fridge. Many casual dining places serve Malibu Chicken. You can find it in restaurants that focus on American cuisine. Look for places that offer tropical or beach-themed menus. Some chain restaurants also have this dish, so keep an eye out for it! Malibu Chicken pairs well with many side dishes. Here are some great options to try: - Coconut rice - Grilled vegetables - Coleslaw - Fresh fruit salad - Mashed potatoes These sides complement the dish's tropical flavors and add a nice touch to your meal. Enjoy mixing and matching! This blog post covered all the key details for making Malibu Chicken. We talked about ingredients, their uses, and how to swap them out. I shared step-by-step cooking instructions and tips for the best texture. We explored variations for different tastes and storage methods to keep it fresh. Finally, I answered common questions to guide you. With these insights, you can create a tasty Malibu Chicken meal that's perfect for any occasion. Enjoy your cooking adventure!

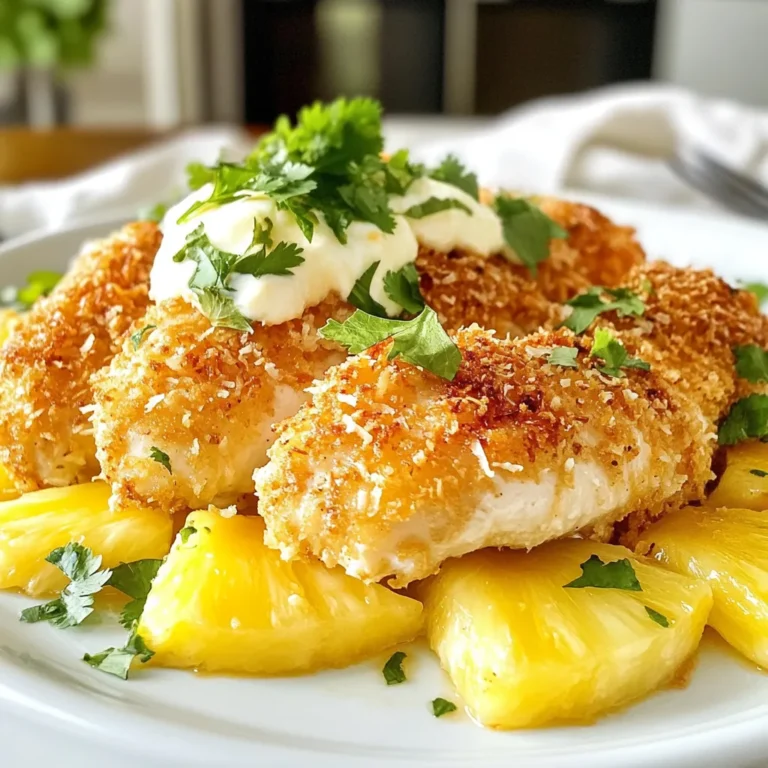
Malibu Chicken Recipe Simple and Flavorful Dish

- 1 pound boneless, skinless chicken thighs, diced into bite-sized pieces - 2 tablespoons extra virgin olive oil - 3 medium carrots, peeled and sliced into thin rounds - 2 celery stalks, sliced into half-moons - 6 cups low-sodium chicken broth - 1 teaspoon dried thyme - 1 teaspoon dried basil - 1 bay leaf - Salt and freshly cracked black pepper - 1 cup heavy cream or half-and-half - 2 cups fresh spinach, tightly packed - Fresh parsley, finely chopped (for garnish) To make Marry Me Chicken Soup, you need fresh and tasty ingredients. The chicken thighs give the soup a rich flavor. I love using boneless, skinless varieties. They cook quickly and are easy to eat. Olive oil adds a nice, smooth touch. Next, you need fresh veggies. Carrots and celery add crunch and sweetness. They also give the soup a beautiful color. Garlic and onion are key too. They bring out flavors in every bowl. For the broth, low-sodium chicken broth works best. It keeps the soup flavorful without being too salty. Use fresh herbs like thyme and basil for added aroma. A bay leaf enhances the taste even more. Finally, cream or half-and-half makes it rich and creamy. Spinach adds a pop of green and some nutrients. Don't forget the parsley for garnish. It adds a nice touch when serving. This soup is filled with love and warmth, perfect for any day. {{ingredient_image_2}} - Heat 2 tablespoons of extra virgin olive oil in a large pot over medium heat. - Once hot, add 1 pound of diced boneless, skinless chicken thighs. - Season the chicken with salt and freshly cracked black pepper. - Sauté the chicken until it turns golden brown, which takes about 5-7 minutes. - After cooking, remove the chicken from the pot and set it aside. - In the same pot, add 1 medium finely chopped onion, 3 sliced carrots, and 2 sliced celery stalks. - Sauté these vegetables until they soften and the onion becomes clear, which takes about 5 minutes. - Stir occasionally to cook them evenly. - Next, add 3 cloves of minced garlic, 1 teaspoon of dried thyme, and 1 teaspoon of dried basil. - Stir well and cook for 1 minute to blend the flavors. - Carefully pour in 6 cups of low-sodium chicken broth. - Use a wooden spoon to scrape any brown bits from the pot for extra flavor. - Add 1 bay leaf and bring the mixture to a boil. - Once boiling, reduce the heat to low and let it simmer gently. - Return the sautéed chicken to the pot, allowing it to mingle with the broth and veggies. - Simmer for 15-20 minutes until the chicken is fully cooked and tender. - Once cooked, discard the bay leaf from the pot. - Pour in 1 cup of heavy cream and add 2 cups of fresh spinach. - Stir gently and cook for another 2-3 minutes until the spinach wilts. - Taste the soup and adjust seasoning with salt and freshly cracked black pepper if needed. - Serve hot in bowls, garnished with freshly chopped parsley for a bright touch. - How to achieve tender chicken: Use boneless, skinless chicken thighs. They stay juicy and tender. Sauté them in olive oil until golden brown. Remove and set aside to keep them moist. - Tips for the right soup consistency: The cream adds richness. If you want it lighter, use half-and-half. Stir in the cream at the end. This keeps it smooth and creamy. - Ideas for additional spices: Add a pinch of red pepper flakes for heat. A dash of smoked paprika gives depth. Fresh herbs like basil or dill can brighten the flavor. - Best types of olives or cheeses to pair: Feta cheese adds a nice tang. Black olives give a salty bite. Both enhance the dish and add layers of flavor. - Best sides to accompany the soup: Crusty bread is great for dipping. A simple green salad adds freshness. These sides make the meal feel complete. - Recommended garnishes for presentation: Fresh parsley adds color. You can also sprinkle some grated Parmesan. A drizzle of olive oil can enhance the look and flavor. Pro Tips Use Fresh Herbs: Fresh herbs can elevate the flavor of your soup. If you have fresh thyme or basil, feel free to use them instead of dried for a more vibrant taste. Customize Your Vegetables: Don't hesitate to add other vegetables like bell peppers or zucchini. They can add extra nutrition and flavor, making the soup even heartier. Make It Ahead: This soup actually tastes better the next day as the flavors meld. Make a big batch and enjoy the leftovers for a quick meal! Thicken It Up: If you prefer a thicker soup, consider adding a slurry of cornstarch and water or blending a portion of the soup and returning it to the pot for a creamier texture. {{image_4}} You can easily make Marry Me Chicken Soup lighter. Instead of heavy cream, use half-and-half. It gives the same creamy texture but with fewer calories. You can also add more veggies. Consider using zucchini, bell peppers, or green beans. They boost nutrition and add color. More vegetables make the soup heartier and more filling. Want to change the protein? Turkey works well instead of chicken. It has a similar taste and texture. For a plant-based option, use tofu. Just make sure to cube it small. You can also make this soup vegetarian. Swap the chicken broth with vegetable broth. It keeps the flavor rich and satisfying. Add spices for a new flavor profile. For a Mediterranean twist, try dried oregano and lemon zest. They brighten the soup and add depth. You can also incorporate Asian flavors. Add fresh ginger and soy sauce for a unique taste. These twists give the soup an exciting new life and keep it interesting. After you finish your Marry Me Chicken Soup, let it cool down. This helps prevent condensation. Use a large spoon to scoop the soup into containers. Choose airtight containers to keep it fresh. Glass or BPA-free plastic containers work great. Avoid using metal containers, as they can affect the soup's taste. When reheating, I recommend using the stovetop. Pour the soup into a pot over low heat. Stir it often to keep it from sticking. You can also use the microwave. Just cover the bowl and heat in short bursts. Check the soup often, so it heats evenly. If you want to freeze the soup, do this before adding the cream. It lasts well for up to three months. Thaw it in the fridge before reheating. In the fridge, this soup lasts for about five days. Check for changes in smell or color. If it smells sour or has a strange look, it's best to toss it. Keeping your soup in good containers helps it stay fresh longer. Always trust your senses; if it seems off, don’t eat it. Yes, you can use frozen chicken thighs. To defrost them safely, place the chicken in the fridge overnight. If you need it fast, you can use the cold water method. Just seal the chicken in a plastic bag and submerge it in cold water. Change the water every 30 minutes until thawed. When cooking, add a few extra minutes to the cooking time to ensure the chicken is fully cooked. Yes, you can make this soup ahead of time. It actually tastes better the next day as the flavors mix. To prepare in advance, follow the recipe up to adding the cream. Store the soup in the fridge without the cream. When ready to serve, reheat the soup and stir in the cream and spinach. If you want a lighter option, use half-and-half instead of heavy cream. You can also use coconut milk for a dairy-free choice. Other options include Greek yogurt or sour cream, but add them slowly to avoid curdling. These alternatives will still give you a creamy texture. Yes, you can adapt this recipe for a slow cooker. Start by sautéing the chicken and veggies as the recipe says. Then, transfer everything to the slow cooker. Add the chicken broth, herbs, and bay leaf. Cook on low for 6-8 hours or high for 3-4 hours. Stir in the cream and spinach just before serving. This blog post covered how to make a delicious chicken soup. We discussed the main ingredients, from chicken thighs to fresh spinach. I provided step-by-step cooking instructions to ensure success. You explored tips for great texture and flavor, and even variations to suit your taste. Remember, you can easily adjust this soup for your health needs or spice preferences. I hope you feel ready to create your own comforting bowl of soup. Enjoy every warm, tasty bite!

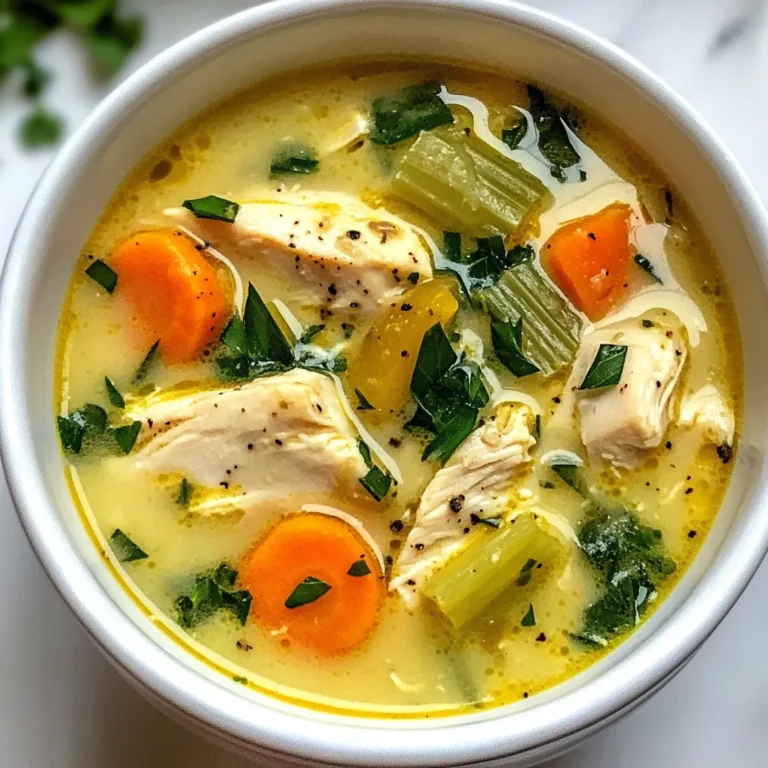
Marry Me Chicken Soup Comforting and Creamy Recipe

For this Hawaiian Chicken Sheet Pan, gather these ingredients: - 4 bone-in, skin-on chicken thighs - 1 cup fresh pineapple, diced into bite-sized pieces - 1 red bell pepper, sliced into strips - 1 yellow bell pepper, sliced into strips - 1 large red onion, cut into wedges - 3 cloves garlic, finely minced - 1 tablespoon olive oil - 1 tablespoon soy sauce (low-sodium preferred) - 1 tablespoon honey - 1 teaspoon fresh ginger, freshly grated - 1 teaspoon sesame oil - Salt and freshly ground black pepper, to taste - 2 green onions, finely chopped (for garnish) - 1 tablespoon sesame seeds (for garnish) When cooking, I always look for the best products. Here are some I recommend: - Use high-quality chicken from a trusted source. - Choose ripe, fresh pineapple for the best flavor. - Look for organic bell peppers when possible. - Select low-sodium soy sauce to control salt taste. - Find unrefined honey for natural sweetness. Using fresh ingredients makes a big difference. Fresh chicken tastes better and cooks evenly. Fresh fruits and veggies add vibrant colors and flavors. When you choose fresh, you also get more nutrients. This dish shines with the right ingredients, so always go for quality. Fresh ingredients help create a meal that you and your loved ones will enjoy. {{ingredient_image_2}} Start by preheating your oven to 400°F (200°C). This ensures your oven is ready when you finish prepping. In a large bowl, whisk together olive oil, soy sauce, honey, minced garlic, grated ginger, and sesame oil. Mix until smooth. This marinade adds lots of flavor to the chicken. Next, add your chicken thighs to the bowl. Make sure they are fully coated in that tasty marinade. Cover the bowl and let it sit for 15-20 minutes. This marinating time is key for juicy, flavorful chicken. While the chicken soaks up the marinade, prepare your sheet pan. Line it with parchment paper for easy cleanup later. On the pan, spread out diced pineapple, sliced red and yellow bell peppers, and onion wedges. Season with salt and pepper, then toss everything together gently. Once your chicken is well marinated, place it on top of the vegetables and pineapple, skin side up. This helps the skin get crispy while baking. Now, slide the sheet pan into the preheated oven and bake for 25-30 minutes. Check the chicken's internal temperature with a meat thermometer; it should reach 165°F (74°C). The skin should look golden and crispy. If you want an extra crunch, switch your oven to broil for 2-3 minutes. Keep a close watch so it doesn’t burn. After baking, take the pan out of the oven and let it rest for a few minutes. This resting time allows the juices to settle in the chicken, making it moist. While it rests, sprinkle the dish with chopped green onions and sesame seeds. This adds color and a burst of flavor to your meal. Enjoy your Hawaiian Chicken Sheet Pan with fluffy white rice or steamed jasmine rice for a delightful meal that’s simple and full of flavor. To get the best flavor, marinate your chicken thighs well. I recommend at least 15-20 minutes. This lets the garlic, ginger, and soy sauce soak in. For a deeper taste, try marinating overnight in the fridge. Just remember to cover the bowl. This keeps the chicken juicy and full of flavor. Crispy skin makes a big difference! To get it right, place the chicken skin side up on the pan. Bake at 400°F for 25-30 minutes. If you want it extra crispy, switch to broil for 2-3 minutes. Keep an eye on it! The skin should turn a nice golden brown. Serve your Hawaiian Chicken directly from the sheet pan. It looks great and is easy for everyone. For a fuller meal, pair it with fluffy rice. You can also add a simple green salad for freshness. Garnish with green onions and sesame seeds for a pop of color and crunch. Enjoy the fun, vibrant flavors! Pro Tips Marinate Longer for More Flavor: If time allows, marinate the chicken for up to 2 hours in the refrigerator. This enhances the flavor and tenderness of the meat. Use Fresh Ingredients: Fresh garlic, ginger, and pineapple will elevate the dish with vibrant flavors, making it taste restaurant-quality. Experiment with Vegetables: Feel free to add other colorful vegetables like zucchini or snap peas for added nutrition and a variety of textures. Keep an Eye on the Broil: When broiling, stay close to the oven to ensure the skin gets crispy without burning. It only takes a minute or two! {{image_4}} You can switch up the veggies in this dish. Try using zucchini or broccoli for a change. Carrots add a nice crunch and sweetness, too. Feel free to mix in some snap peas or baby corn for a colorful twist. The best part? You can use whatever you have in your fridge! While I love using bone-in, skin-on chicken thighs, you can use other cuts. Boneless chicken thighs will cook faster and still taste great. Chicken breasts are also an option, but they may dry out quicker. Just keep an eye on the cooking time to ensure everything stays juicy and tender. Want to change the flavor a bit? Add some spice! A sprinkle of red pepper flakes brings heat that pairs well with the sweet pineapple. You can replace honey with brown sugar for a deeper sweetness. If you love a tangy kick, add lime juice or vinegar to the marinade. These small tweaks can make a big difference! You can store your Hawaiian chicken in the fridge. First, let it cool to room temperature. Then, place it in an airtight container. It will stay fresh for up to four days. If you want to keep it longer, freezing is a great option. For freezing, wrap the chicken and veggies tightly in plastic wrap. Then, place them in a freezer-safe bag. This helps avoid freezer burn. You can freeze it for up to three months. When ready to eat, thaw it overnight in the fridge. To reheat, place the chicken and vegetables in an oven-safe dish. Preheat your oven to 350°F (175°C). Cover the dish with foil to keep moisture in. Heat for about 20-25 minutes or until it's warm all the way through. You can also use a microwave, but the oven gives better texture. You can check if the chicken is done by using a meat thermometer. The chicken should reach an internal temperature of 165°F (74°C). You can also look for a golden brown color on the skin. If the juices run clear when you cut into it, that means it is cooked. Yes, you can use boneless chicken thighs. They will cook faster than bone-in thighs. Just reduce the baking time to about 20-25 minutes. Make sure they also reach 165°F (74°C) for safety. Hawaiian Chicken Sheet Pan pairs well with many sides. Here are some great options: - Fluffy white rice - Steamed jasmine rice - Quinoa for a healthy twist - A simple green salad - Grilled corn on the cob These sides will balance the sweet and savory flavors of the chicken and veggies. Enjoy! We covered the key steps to make a great Hawaiian Chicken Sheet Pan meal. Fresh ingredients are vital for flavor. Knowing how to prepare and cook makes a real difference. I shared tips for marinating and tricks for crispy skin. Plus, I showed how to make it your own with variations. Don't forget the right storage methods for leftovers. Enjoy this dish with your favorites. With practice, you’ll impress everyone at your table.

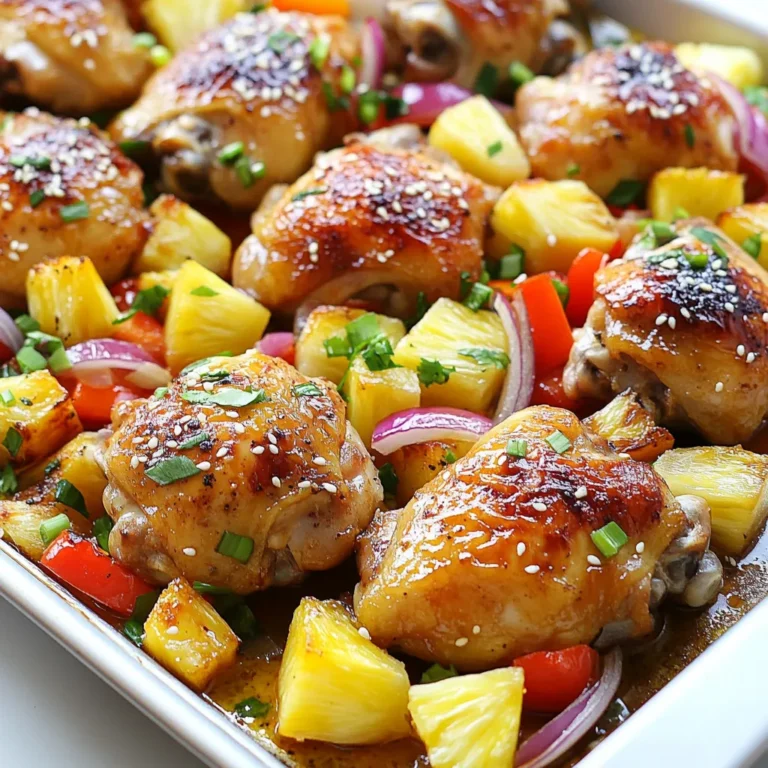
Hawaiian Chicken Sheet Pan Flavorful and Simple Meal

- 4 boneless, skinless chicken breasts - 1/3 cup pure honey - 1/4 cup fresh lemon juice (about 2 lemons) - 5 cloves of garlic, minced finely - 2 tablespoons low-sodium soy sauce - 1 teaspoon Dijon mustard - 1 teaspoon extra virgin olive oil - Salt and freshly cracked black pepper to taste These ingredients form the base of our dish. The chicken brings protein, while honey and lemon give a sweet and tangy flavor. Garlic adds depth and aroma. Soy sauce adds umami, and Dijon mustard gives a slight kick. Olive oil helps with cooking and adds richness. - Fresh parsley, chopped (for garnish) - Lemon slices (for garnish) Garnishes make your dish pop. Fresh parsley adds color and freshness. Lemon slices brighten the plate and enhance flavors. They also offer a visual appeal that invites you to dig in. Accurate measuring is key for great results. Use a liquid measuring cup for honey and lemon juice. For dry ingredients, like salt and pepper, use measuring spoons. Always level off your measuring cups and spoons for precision. This ensures your marinade tastes just right. If you want a little more or less flavor, adjust to your taste. Cooking should be fun and personal! {{ingredient_image_2}} Start by gathering your ingredients. You will need honey, lemon juice, garlic, soy sauce, Dijon mustard, and olive oil. In a medium bowl, mix them well. Use a whisk to blend everything together. This mix creates a sweet and tangy flavor that makes the chicken shine. Don't forget to add a pinch of salt and black pepper for taste. Take your chicken breasts and place them in a large resealable bag or a shallow dish. Pour the marinade over the chicken. Make sure each piece is well coated. Seal the bag or cover the dish tightly. Refrigerate it for at least 30 minutes. If you can, let it marinate for 1 to 2 hours. This step helps the chicken absorb all the great flavors. You have two great options for cooking: grilling or baking. If you choose to grill, preheat your grill to medium-high heat. Place the marinated chicken on the grill. Cook for 6 to 7 minutes on each side. Remember to baste with the leftover marinade for extra flavor during the last few minutes. If you prefer to bake, set your oven to 375°F (190°C). Arrange the chicken on a baking sheet lined with parchment paper. Bake for 25 to 30 minutes. Use a meat thermometer to check if the chicken reaches 165°F (75°C). This ensures it’s safe to eat. Once cooked, remove the chicken from heat. Let it rest for about 5 minutes. This step helps keep the juices locked in. Serve the chicken with fresh parsley and lemon slices for a nice finish. Enjoy your meal! Marinating chicken is key to great taste. I recommend marinating for at least 30 minutes. For the best flavor, aim for 1-2 hours. The honey, lemon, and garlic soak into the meat. This makes each bite full of flavor. If you can, prep the marinade the night before. Let it work its magic overnight for a deeper taste. Cooking chicken perfectly is easy with the right timing. For grilling, cook each side for 6-7 minutes. If baking, aim for 25-30 minutes. Use a meat thermometer to check for doneness. The safe temperature is 165°F (75°C). Rest the chicken for 5 minutes after cooking. This keeps it juicy and tender. To keep chicken moist, don't overcook it. Use the marinade to baste while cooking. This adds flavor and moisture. Also, let the chicken rest after cooking. Cutting it too soon can let the juices escape. Lastly, consider using a meat thermometer. This helps you cook to the right temperature every time. Pro Tips Marinate Longer for Depth: For a more robust flavor, marinate the chicken for 1-2 hours, or even overnight if time permits. This allows the flavors to penetrate deeply. Use a Meat Thermometer: To ensure the chicken is perfectly cooked, use a meat thermometer to check for an internal temperature of 165°F (75°C). Customize Your Marinade: Feel free to add herbs like thyme or rosemary for an extra layer of flavor or spice it up with a pinch of red pepper flakes. Rest Before Slicing: Allow the chicken to rest for 5 minutes after cooking. This helps the juices redistribute, resulting in a juicier bite. {{image_4}} You can boost your Honey Lemon Garlic Chicken by adding veggies. Bell peppers, broccoli, and carrots work well. Chop them into bite-sized pieces. Toss them in the marinade with the chicken. This adds color, flavor, and nutrition to your meal. You can roast or grill the veggies alongside the chicken. They will soak up the tasty marinade too! If you prefer other proteins, use shrimp or tofu. Shrimp cooks fast and takes on flavor quickly. Just marinate it for 15-20 minutes. For tofu, use firm or extra-firm tofu. Press it to remove excess water, then cube it. Marinate the tofu just like the chicken. Both swaps keep the dish tasty and fun. Want some heat? Add red pepper flakes or hot sauce to the marinade. Start with a pinch and taste as you go. You can also use fresh jalapeños for a fresh kick. If you prefer mild flavors, stick to the basic recipe. This lets you make the dish just how you like it! After enjoying your Honey Lemon Garlic Chicken, store any leftovers in an airtight container. This will keep the chicken fresh and safe. Allow the chicken to cool before sealing. It’s best to refrigerate it within two hours of cooking. Proper storage helps prevent spoilage and keeps flavors intact. To reheat your chicken, use the oven for even cooking. Preheat your oven to 350°F (175°C). Place the chicken in a baking dish and cover it with foil. This keeps moisture in and prevents drying. Heat for about 15-20 minutes or until warm. You can also use a microwave, but be careful not to overcook it. If you want to save your Honey Lemon Garlic Chicken for later, freezing is a great option. Wrap each piece tightly in plastic wrap, then place it in a freezer bag. Label the bag with the date. This way, you can enjoy your chicken for up to three months. When ready to eat, thaw it in the fridge overnight before reheating. Yes, you can use bone-in chicken. The cooking time will change. Bone-in chicken often needs more time to cook through. Make sure to adjust the cooking time to 30-40 minutes in the oven. On the grill, cook for about 8-10 minutes per side. Always check the internal temperature. It should reach 165°F (75°C) for safety. If you lack fresh lemons, you can use bottled lemon juice. Use the same amount as in the recipe. The flavor might differ slightly, but it will still taste good. You can also try lime juice as a substitute. Both options give a tangy taste that works well with honey and garlic. To check if the chicken is done, use a meat thermometer. Insert it into the thickest part of the chicken. It should read 165°F (75°C). If you don’t have a thermometer, cut into the chicken. The meat should be white and juices should run clear. If it’s pink or looks raw, cook it longer. This blog covered key steps for a tasty chicken dish. We discussed essential ingredients, marinade preparation, and the best cooking methods, like grilling or baking. I shared tips to keep your chicken juicy and variations to suit your taste. You learned how to store leftovers and answered common questions. Follow these steps, and you’ll create delicious meals. Cooking can be fun, simple, and satisfying with practice. Enjoy your culinary adventure!

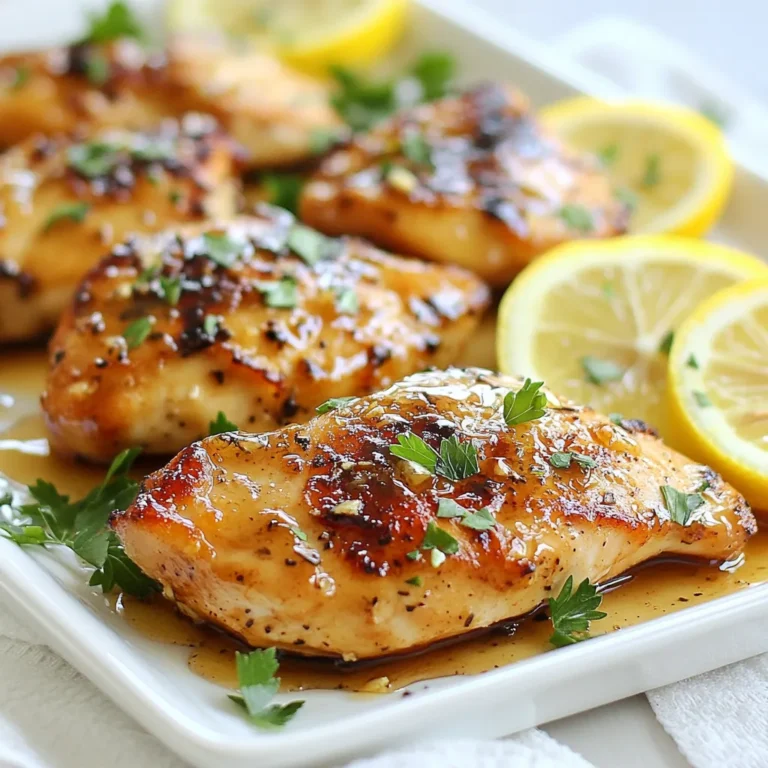
Honey Lemon Garlic Chicken Flavorful Dinner Recipe

- 1 lb ground turkey - 1 cup jasmine rice - 2 tablespoons soy sauce Ground turkey is a lean protein that cooks quickly. It absorbs all the flavors well. Jasmine rice is fragrant and fluffy, making it a perfect base. The soy sauce adds umami and saltiness to our dish. - 2 cloves garlic, minced - 1 tablespoon fresh ginger, grated - 1 red bell pepper, sliced into thin strips - 1 cup broccoli florets Garlic and ginger bring warmth and depth to the dish. Red bell pepper adds sweetness and crunch. Broccoli not only adds color but also a healthy touch. These veggies create a tasty mix that complements the turkey. - 1 tablespoon sesame oil - 1 tablespoon sriracha - 2 tablespoons honey Sesame oil gives a nutty flavor and richness. Sriracha adds a kick, and you can adjust it to your spice level. Honey balances the heat with sweetness, making the sauce delightful. This mix creates a robust flavor for your rice bowls. {{ingredient_image_2}} - Rinse 1 cup of jasmine rice under cold water. - Cook the rice as per package instructions. - Once cooked, fluff with a fork and set aside. - Heat 1 tablespoon of sesame oil in a large skillet over medium heat. - Add 2 cloves of minced garlic and 1 tablespoon of grated ginger. Stir often until fragrant, about 1 minute. - Add 1 pound of ground turkey to the skillet. - Break it apart with a spatula while cooking. - Cook for 5-7 minutes until browned and cooked through. - Season with salt and pepper to taste. - Pour in 2 tablespoons of soy sauce, 1 tablespoon of sriracha, and 1 tablespoon of honey. - Stir well and let the mixture simmer for 2-3 minutes. - Boil water in a separate pot. - Add 1 cup of broccoli florets and blanch for about 2 minutes. - Quickly add sliced red bell pepper and cook for another minute. - Drain and set aside. - Scoop a portion of jasmine rice into each bowl. - Top with the turkey and vegetable mixture. - Garnish with chopped green onions and sesame seeds for extra flavor. To make fluffy jasmine rice, rinse it well under cold water. This step removes extra starch. Cook the rinsed rice according to package instructions. Once it's done, fluff it with a fork. This helps separate the grains. If you want to switch it up, try brown rice or quinoa for a healthy twist. You can change the spice level by adjusting the sriracha. If you like it milder, use less sriracha. You can also add a pinch of sugar to balance the heat. For extra flavor, try adding a splash of lime juice or a sprinkle of crushed peanuts. These add depth and excitement. I prefer using a large skillet for this dish. It gives you plenty of space to mix everything. A wok also works well if you have one. For meal prep, cook the rice and turkey ahead of time. Store them separately. This saves time on busy days and keeps your meal fresh. Pro Tips Use High-Quality Soy Sauce: Opt for a good-quality soy sauce for a more robust flavor in your turkey mixture, enhancing the overall taste of the dish. Customize the Spice Level: Feel free to adjust the amount of sriracha according to your spice tolerance; adding it gradually allows you to achieve your desired heat. Perfectly Cooked Rice: Rinse the jasmine rice thoroughly before cooking to remove excess starch, ensuring fluffier rice that complements the turkey nicely. Vibrant Vegetables: For the best texture and color, ensure not to over-blanch the vegetables; they should be bright and tender-crisp for optimal crunch. {{image_4}} You can swap ground turkey for other proteins. Chicken works well in this dish. Just use ground chicken instead of turkey. It has a similar taste and texture. Tofu is a great option for a vegetarian meal. Crumble firm tofu and cook it like turkey. It absorbs flavors nicely. Feel free to play with vegetables. Use seasonal veggies like zucchini or snap peas. They add fresh taste and color. You can also try your favorite stir-fry vegetables. Carrots, bok choy, or bell peppers all work great. Just make sure to blanch them briefly for the best texture. You can change the sauce to suit your taste. Try adding teriyaki sauce or hoisin sauce for a sweet twist. If you like heat, add more sriracha or red pepper flakes. Fresh herbs can also elevate the dish. Cilantro or basil adds a bright note. Experimenting with flavors keeps meals exciting! To keep your Bang Bang Ground Turkey Rice Bowls fresh, store them in the fridge. Use airtight containers to prevent moisture loss. It’s best to separate the rice and turkey mixture. This way, the rice won’t get soggy. You can keep leftovers for up to three days. If you want to save them longer, freezing is a great option. Just place the turkey mixture in a freezer-safe bag. Make sure to label it with the date. This helps you keep track of how long it’s been stored. Reheating your rice bowls can be simple. You can use the microwave for quick results. Place the rice and turkey mixture in a bowl. Add a splash of water to help steam it. Cover with a microwave-safe lid. Heat for one to two minutes, stirring halfway. If you want, you can also reheat on the stove. Heat a skillet over medium heat. Add a little oil, then toss in the mixture. Stir until it’s hot. This method keeps the texture nice and helps the flavors shine. In the fridge, your Bang Bang Ground Turkey Rice Bowls last about three days. After that, they might spoil. Watch for signs of spoilage, like an off smell or mold. If the rice feels hard or dry, it’s time to toss it. Similarly, if the turkey looks discolored or smells strange, don’t eat it. Staying aware of these signs ensures you enjoy your meal safely. Yes, you can make this dish ahead of time. Cook the turkey and veggies, then cool them down. Store them in an airtight container in the fridge. When you’re ready to eat, just reheat and serve over rice. This helps save time on busy days. Many sides go well with these rice bowls. Here are a few ideas: - Steamed edamame - Cucumber salad - Asian-style slaw - Roasted sweet potatoes These sides add freshness and balance to the meal. To make this recipe gluten-free, swap regular soy sauce for tamari. Tamari is a gluten-free soy sauce. You can also check labels for gluten-free sriracha. These small changes keep the flavor while meeting gluten-free needs. Yes, this recipe is kid-friendly. The flavors are mild, and you can adjust the spice. If your kids prefer less heat, use less sriracha. They can also help mix the ingredients. This makes cooking fun and engaging for them. Yes, you can serve this dish cold. It works well as a cold meal. Just chill the turkey and veggies after cooking. Serve them over cold rice or lettuce for a refreshing twist. In this blog post, I walked you through making Bang Bang Ground Turkey Rice Bowls. We covered key ingredients like ground turkey, jasmine rice, and flavorful sauces. I shared steps to prepare the rice, sauté aromatics, and create a vibrant bowl. In the end, this dish is easy to make and fun to personalize. Experiment with flavors or vegetables to suit your taste. Enjoy your cooking!

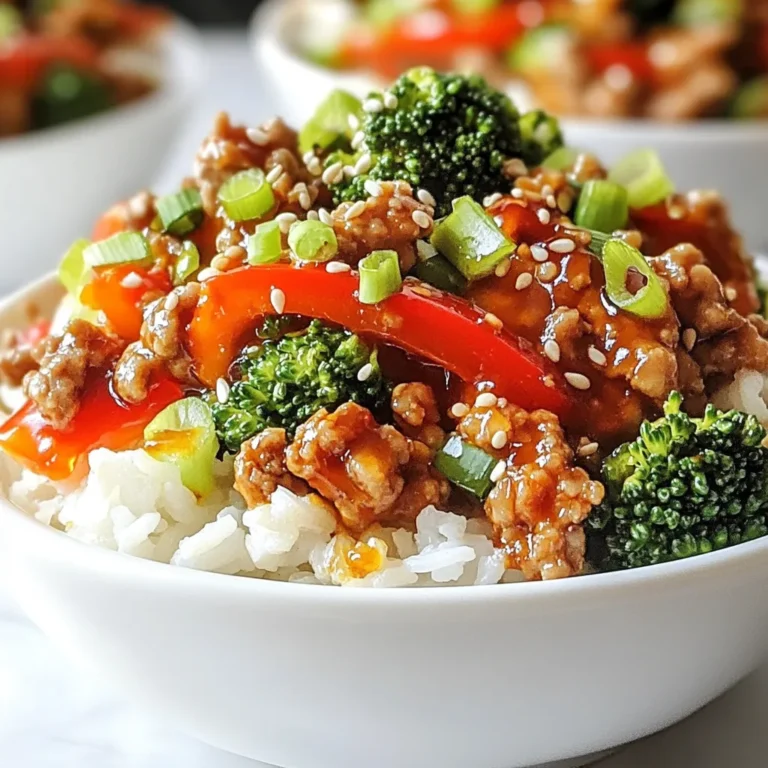
Bang Bang Ground Turkey Rice Bowls Flavorful Delight

PREV 1 … 16 17 18 NEXT
feastful focus

explore

DessertsDinnerAppetizersDrinks

Our Policies

  • Cookie Policy
  • Copyright Policy
  • Disclaimer
  • GDPR Policy
  • Terms Of Use
Back to Top
  • About
  • Contact Us
  • Privacy Policy
© 2025 feastful focus