FREE DINNER EBOOK! Get your copy!
  • Cookie Policy
  • GDPR Policy
  • Disclaimer
  • Terms Of Use
  • Visit my other site: Fun Cookie Recipes
feastful focus
  • Home
  • Dinner
  • Desserts
  • Drinks
  • Appetizers
  • Contact
  • About
  • Privacy Policy
  • Home
  • Dinner
  • Desserts
  • Drinks
  • Appetizers
  • Contact
  • About
  • Privacy Policy
  • Cookie Policy
  • GDPR Policy
  • Disclaimer
  • Terms Of Use
Visit my other site: Fun Cookie Recipes

HOME / CATEGORIES /

Latest

- 12 oz cheese tortellini - 1 tablespoon olive oil - 3 cloves garlic, minced - 1 (14.5 oz) can diced tomatoes, undrained - 1 cup heavy cream - 1 teaspoon Italian seasoning - Salt and freshly ground pepper to taste - ½ cup fresh basil, finely chopped - ¼ cup grated Parmesan cheese - Optional: red pepper flakes for a touch of heat Each ingredient plays a key role in this dish. The cheese tortellini gives a soft, cheesy bite that feels comforting. Olive oil enhances the flavors and helps cook the garlic. Fresh garlic adds a strong, savory taste that makes the dish pop. Diced tomatoes bring acidity and sweetness, which balance the creaminess. Heavy cream creates that rich, velvety sauce that clings to the tortellini. Italian seasoning adds a mix of herbs that make every bite taste fresh. Salt and pepper bring out all the flavors. Fresh basil adds brightness and a hint of sweetness. Finally, Parmesan cheese gives a salty finish that ties it all together. If you like a bit of heat, consider adding red pepper flakes. They can give this dish a nice kick without overpowering the other flavors. To start, bring a large pot of salted water to a boil. Salt helps the tortellini taste great. Once the water is boiling, add 12 oz of cheese tortellini. Cook them according to the package instructions, usually about 3 to 5 minutes. You want them al dente, or firm to the bite. After cooking, drain the tortellini and set them aside. Next, grab a large skillet and heat 1 tablespoon of olive oil over medium heat. Once hot, add 3 cloves of minced garlic. Sauté the garlic for about 1 minute. Stir constantly to avoid browning it. When the garlic smells great, pour in a can of diced tomatoes (14.5 oz), juice included. Bring this to a gentle simmer, stirring now and then. Now, slowly stir in 1 cup of heavy cream and 1 teaspoon of Italian seasoning. Let this sauce simmer for 3 to 5 minutes, stirring occasionally, until it thickens and turns creamy. Taste the sauce and season with salt, freshly ground pepper, and optional red pepper flakes for extra heat. Now it’s time to bring it all together. Gently add the cooked tortellini to the skillet. Toss them in the creamy tomato sauce until they are well coated. Next, fold in ½ cup of finely chopped fresh basil and ¼ cup of grated Parmesan cheese. Stir until everything is mixed well. Let the dish cook for an additional 1 to 2 minutes. This helps the flavors meld beautifully. Enjoy your creamy tomato basil tortellini! To make the sauce creamy, add more heavy cream. If you want less richness, use less cream. Adjust salt and pepper to balance the flavors. A pinch of sugar can help reduce acidity from tomatoes. Taste as you go to find your perfect mix. Cook the tortellini until they are al dente. This keeps them firm and chewy. If you overcook them, they may turn mushy. When cooking garlic, avoid browning it. Browned garlic can taste bitter. Cook it just until fragrant for the best flavor. Serve the tortellini in wide, shallow bowls. This creates a beautiful look. For a nice touch, sprinkle extra Parmesan cheese on top. Fresh basil leaves add a pop of color. Drizzle some olive oil for extra flavor and shine. {{image_4}} If you need to switch things up, consider these options: - Gluten-free tortellini options: Look for brands that use rice or corn flour. These options taste great and fit into a gluten-free diet. - Dairy alternatives: For a dairy-free version, use coconut cream or almond milk instead of heavy cream. Nutritional yeast can add a cheesy flavor too. Want to make the dish more filling? Try these ideas: - Adding protein: Toss in cooked chicken or shrimp for a hearty meal. Just add them in when you combine the tortellini with the sauce. - Incorporating other vegetables: Spinach or bell peppers work well. Add them to the sauce while it simmers for extra color and nutrients. To elevate your meal even more, consider these pairings: - Complementary side dishes: A fresh salad or garlic bread makes a great side. They add texture and flavor to your dinner. - Wine recommendations: A light red wine, like Pinot Noir, pairs nicely. It balances the richness of the cream and enhances the tomato flavor. To keep your creamy tomato basil tortellini fresh, store it in an airtight container. Place it in the fridge within two hours after cooking. This helps prevent bacteria growth. Use the leftovers within three to four days for the best taste. When reheating, use low heat to avoid overcooking. If you want to save some for later, freezing is a great option. Start by letting it cool completely. Then, transfer it to a freezer-safe container. Make sure to leave some space at the top for the sauce to expand. You can freeze it for up to three months. When you’re ready to eat, thaw it in the fridge overnight. Reheat it gently on the stove over low heat. You might want to add a splash of cream or water to help restore the creamy texture. Creamy tomato basil tortellini lasts about three to four days in the fridge. In the freezer, it can stay good for up to three months. To enjoy the best flavor and texture, consume it within these time frames. It takes about 25 minutes. You spend 10 minutes prepping and 15 minutes cooking. This quick time makes it a great weeknight meal. You can have a delicious dinner in no time! Yes, you can use fresh tomatoes! Use about 2 cups of diced fresh tomatoes. Remove the seeds for less liquid. This choice adds a fresh taste to your dish. Just cook them longer to break them down. Yes, this dish is vegetarian. It contains no meat or meat-based products. The creamy sauce and cheese add richness. You get a filling meal without any animal protein. Good side dishes include a simple salad or garlic bread. A fresh green salad adds crunch and balance. Garlic bread is perfect for soaking up the creamy sauce. Both pair well and complete your meal nicely. You can! Use dairy-free cream and cheese. Almond or coconut cream works well. Look for dairy-free cheese options too. This way, you keep the creamy texture without dairy. Enjoy all the flavors while meeting your dietary needs! You can easily make a creamy tomato basil tortellini dish. We covered the main ingredients, step-by-step instructions, and tips to perfect your sauce. I shared variations and storage tips for leftovers. With all these ideas, you can make this dish your own. Whether you want to impress guests or enjoy a cozy meal, this recipe fits. Dive in, explore your options, and enjoy every bite. Now, let your kitchen creativity shine!

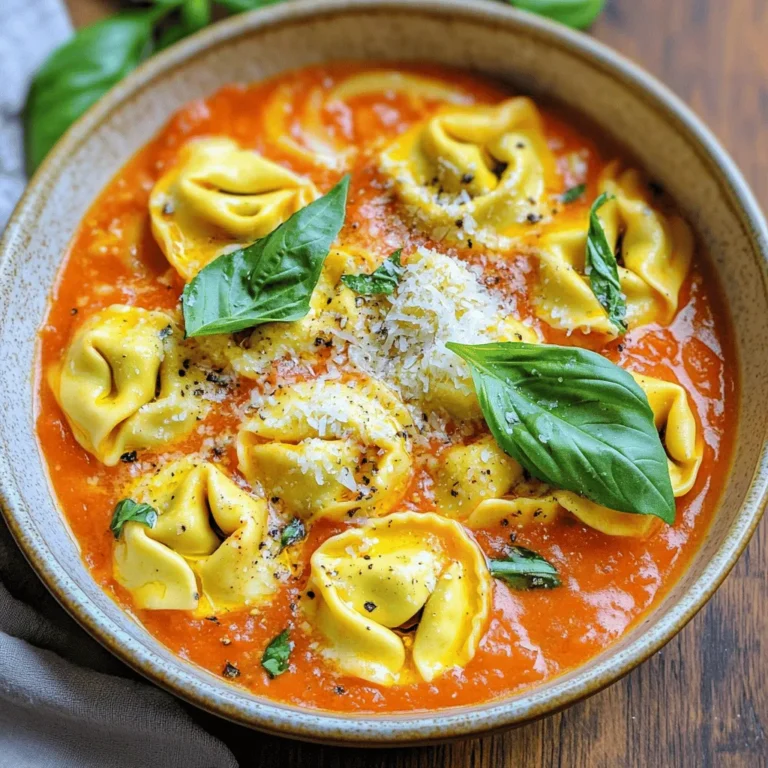
Creamy Tomato Basil Tortellini Delicious Weeknight Meal

For this recipe, you will need: - 1 lb large shrimp, peeled and deveined - 8 small corn tortillas - 1 cup shredded romaine lettuce - 1/2 cup ripe tomatoes, diced - 1/4 cup red onion, finely diced - 1/4 cup fresh cilantro, chopped - 1 lime, cut into wedges The key seasonings and oils for flavoring the shrimp include: - 2 tablespoons extra virgin olive oil - 1 tablespoon Cajun seasoning - 1 teaspoon garlic powder - 1 teaspoon smoked paprika - 1/2 teaspoon sea salt - 1/4 teaspoon freshly ground black pepper These ingredients create a tasty mix that makes the shrimp burst with flavor. The olive oil helps the spices stick while adding a rich taste. To take your tacos to the next level, consider these toppings: - Sour cream or creamy avocado slices (optional) - Extra lime wedges for squeezing These toppings add a refreshing touch and enhance the overall flavor. You can mix and match these toppings to suit your taste. Enjoy the vibrant colors and fresh tastes! To start, gather your shrimp. You need one pound of large shrimp, peeled and deveined. In a spacious bowl, mix the shrimp with two tablespoons of extra virgin olive oil. Add one tablespoon of Cajun seasoning, one teaspoon of garlic powder, and one teaspoon of smoked paprika. Toss in half a teaspoon of sea salt and a quarter teaspoon of black pepper. Stir well until the shrimp are fully coated. This mix gives the shrimp a vibrant flavor. Next, preheat your air fryer to 400°F (200°C) for about five minutes. This step helps the shrimp cook evenly. A hot air fryer seals in the flavors and gives the shrimp a slight crunch. Once the air fryer is ready, place the shrimp in a single layer in the basket. Cook them for six to eight minutes. Halfway through, shake the basket to ensure even cooking. The shrimp will turn opaque when fully cooked. This means they are ready to enjoy! While the shrimp are cooking, it’s time to warm your tortillas. Heat a skillet over medium heat. Place each small corn tortilla in the skillet for about 30 seconds on each side. You want them soft and pliable. This step ensures they hold all the tasty filling. Now it’s time to make the tacos! Take a warm tortilla and add a generous portion of cooked shrimp in the center. Top it off with shredded romaine lettuce, diced tomatoes, red onion, and a sprinkle of fresh cilantro. For extra flavor, squeeze fresh lime juice over the tacos. If you like, add sour cream or creamy avocado slices on the side. Enjoy your delicious creation! To choose fresh shrimp, look for a few key signs. Fresh shrimp should smell like the ocean, not fishy. Their shells should be firm and shiny. If the shrimp feel slippery, they might not be fresh. Always check the color; it should be bright and even. For the best taste, buy shrimp that are still in their shells and devein them at home. Using an air fryer is a game changer for shrimp tacos. Preheat your air fryer to 400°F (200°C) for even cooking. Keep the shrimp in a single layer in the basket. This helps them cook evenly and get that nice color. Shake the basket halfway through to avoid sticking. Cook shrimp for 6-8 minutes, until they turn opaque. Overcrowding the basket can lead to uneven cooking, so cook in batches if needed. Boost the flavor of your tacos with some simple tips. Fresh lime juice brightens every bite. Adding a sprinkle of cilantro adds a fresh touch. For those who enjoy creaminess, consider sour cream or avocado slices. You can also mix in some diced jalapeños for a spicy kick. Try using different toppings like slaw or pickled onions to add crunch and zing. These small touches will elevate your meal and impress your family and friends. {{image_4}} You can swap shrimp for chicken or fish. Chicken thighs work well. Just cut them into bite-sized pieces. For fish, try firm types like salmon or cod. Adjust cooking time to 8-10 minutes for chicken and 6-8 minutes for fish in the air fryer. If you want a meat-free option, go for black beans or grilled veggies. Use 1 can of drained black beans, seasoned well. For veggies, grill bell peppers, zucchini, and corn. Cook them in the air fryer for about 10 minutes for nice char. These options taste amazing and keep the meal light. To change the spice level, adjust the Cajun seasoning. For milder tacos, use half the seasoning or skip it. You can add a pinch of smoked paprika for flavor without the heat. For extra spice, add cayenne pepper or hot sauce to the shrimp. This way, you can cater to everyone’s taste. After cooking, let the shrimp cool. Place any leftover shrimp in an airtight container. Store it in the fridge for up to two days. If you want to keep it longer, freeze the shrimp. In the freezer, it can last for up to three months. Just remember to thaw it in the fridge before using. To reheat shrimp, use the air fryer for best results. Preheat it to 350°F (175°C). Place the shrimp in the basket and heat for about 3-4 minutes. You can also use the microwave if you're in a hurry. Heat on medium for about 30 seconds, but be careful not to overcook them. Keep taco ingredients separate when storing. Store tortillas in a sealed bag to prevent them from drying out. The lettuce and other fresh veggies should go in a container with a lid. This keeps them crisp. If you use toppings like sour cream or avocado, store them in small containers. This way, everything stays fresh until you're ready to eat again. Yes, you can use frozen shrimp. Just thaw them before cooking. Place the shrimp in a bowl of cold water for about 10 minutes. Once thawed, peel and devein them if needed. Pat them dry to remove excess moisture. This step helps the seasoning stick better. Corn tortillas are best for these tacos. They add a nice flavor and texture. They hold up well with the shrimp and toppings. You can also use flour tortillas if you prefer a softer bite. Warm them in a skillet to enhance their taste. To make these tacos dairy-free, skip the sour cream. Instead, use avocado slices or a dairy-free yogurt. These options will add creaminess without dairy. You can also add more fresh toppings like extra cilantro or lime juice for flavor. Air fryer Cajun shrimp tacos are easy and tasty. We covered the key ingredients, seasonings, and toppings. I shared clear steps for prep, cooking, and assembly of these delicious tacos. You learned tips for choosing fresh shrimp and enhancing flavors. We explored variations and storage tips to enjoy leftovers. These tacos are perfect for any meal. I hope you try this simple recipe soon!

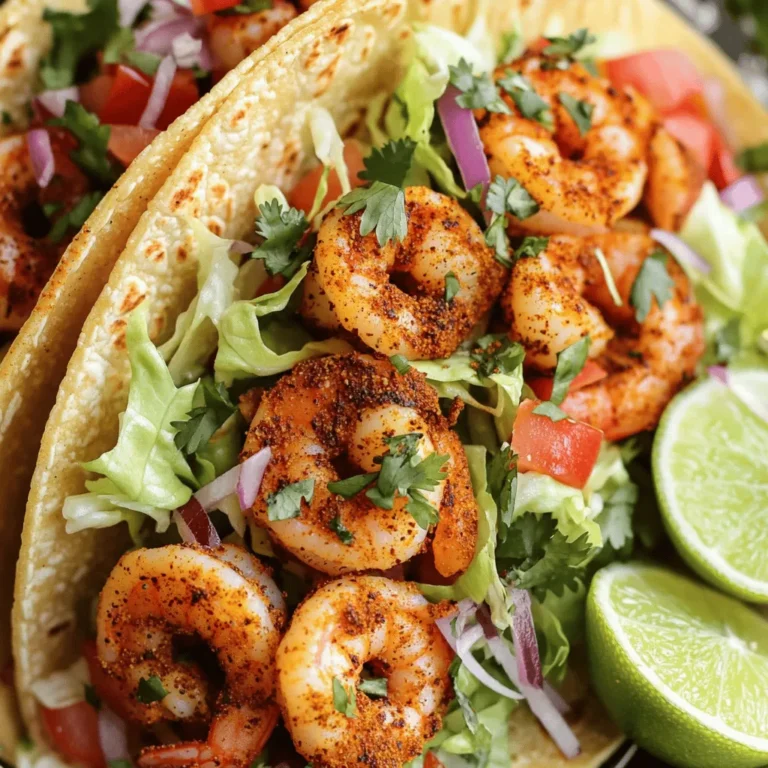
Air Fryer Cajun Shrimp Tacos Flavorful and Easy Meal

- 1 cup cottage cheese - 2 large eggs - 1/2 cup almond milk (or your preferred milk) - 1 teaspoon vanilla extract - 1 cup all-purpose flour - 2 tablespoons sugar (or your choice of sweetener) - 1 tablespoon baking powder - 1/2 teaspoon salt - 1/2 cup semi-sweet chocolate chips - Butter or oil for frying Gather these ingredients before you start. Cottage cheese gives these pancakes a nice protein boost. Eggs help bind everything together. Almond milk keeps the batter light. The vanilla adds that warm, sweet touch we all love. For the dry mix, all-purpose flour is key to fluffy pancakes. Sugar sweetens the deal, and baking powder makes them rise. A pinch of salt helps enhance all the flavors. Optional chocolate chips bring that rich, sweet flavor. Butter or oil is for frying, giving a nice golden color. You can mix and match these items based on your likes. If you want a dairy-free treat, use plant-based milk and cheese. Enjoy making your pancake masterpiece! - Combine 1 cup of cottage cheese, 2 large eggs, 1/2 cup of almond milk, and 1 teaspoon of vanilla extract in a large bowl. - Whisk until the mixture is well incorporated and slightly smooth in texture. This step makes your pancakes light and fluffy. - Sift together 1 cup of all-purpose flour, 2 tablespoons of sugar, 1 tablespoon of baking powder, and 1/2 teaspoon of salt in a separate bowl. - Ensure there are no lumps in the mixture. This helps the pancakes rise and stay fluffy. - Gradually fold the dry ingredients into the wet mixture. Be gentle while mixing to prevent overmixing. - Add 1/2 cup of semi-sweet chocolate chips and mix gently. This gives your pancakes a sweet, chocolatey burst. - Preheat a non-stick skillet or griddle over medium heat. Add a small amount of butter or oil to coat the surface evenly. - For each pancake, pour about 1/4 cup of batter onto the skillet. Cook for 2-3 minutes until bubbles form and edges set slightly. - Flip the pancakes and cook for an additional 2-3 minutes until they are golden brown and cooked through. - Continue with the remaining batter, adding more butter or oil as needed for each batch. Enjoy the delightful aroma of pancakes cooking! To get fluffy pancakes, you must not overmix the batter. Overmixing makes the pancakes dense. When combining wet and dry ingredients, stir gently. It's okay if there are a few lumps. The heat level is key. Cook pancakes on medium heat. If it's too low, they may turn soggy. If too high, they can burn. Wait for bubbles to form before flipping. This shows they are ready to turn. For a beautiful stack, place pancakes on a plate in a neat pile. Drizzle warm maple syrup over them for a sweet touch. You can add more chocolate chips on top for fun. A sprinkle of powdered sugar can add a nice finish too. To brighten your dish, serve with fresh berries or banana slices. The color and taste of fruit pair well with the chocolate. This makes breakfast look and taste great! You can use a pancake maker or a griddle for cooking. These tools can help you make many pancakes at once. They also ensure even cooking. If you want to save time, try batch cooking. Make a bigger batch and store pancakes for later. You can easily heat them up for quick meals. This is a smart way to enjoy pancakes any day! {{image_4}} You can make these pancakes gluten-free. Simply swap regular flour for gluten-free flour. This change works well and keeps the pancakes tasty. You may need to adjust the liquid a bit. Start with less milk and add more if needed. This helps keep the batter thick but not too runny. For a dairy-free option, use plant-based cottage cheese. Almond or soy milk works great as well. This keeps the pancakes soft and fluffy. You might want to add a bit more vanilla extract for flavor. Try a splash of maple syrup too. It adds sweetness and makes them extra yummy. You can spice things up by adding cinnamon or nutmeg to the batter. Just a pinch will give a warm flavor. If you want, try different types of chocolate. Dark chocolate chips or white chocolate can change the taste. Mix and match to find your favorite combo! To keep your chocolate chip cottage cheese pancakes fresh, store them in the fridge. Place them in an airtight container or cover them tightly with plastic wrap. They will stay good for about 3 to 4 days. For even longer storage, you can freeze the pancakes. Just stack them with parchment paper between each one. Then, put them in a freezer-safe bag. They can last up to 2 months in the freezer. When you are ready to eat your pancakes, reheating is simple. You can use a microwave, stovetop, or toaster oven. For the microwave, place a pancake on a plate. Heat it for about 30 seconds or until warm. If you want a crispy edge, use the stovetop. Heat a skillet over medium heat and place a pancake in it. Cook for about a minute on each side. The toaster oven is another great option. Set it to 350°F and toast until warm, about 3 to 5 minutes. This keeps the texture nice and fluffy. Enjoy your pancakes warm! Use low-fat or regular cottage cheese for the best results. Avoid fat-free versions. They may make the pancakes too dry. The creaminess in regular or low-fat cottage cheese enhances flavor and texture. Yes, you can replace eggs with mashed bananas or unsweetened applesauce. Use 1/4 cup of either per egg. This keeps the pancakes moist and adds a slight sweetness. For a vegan option, try flaxseed meal mixed with water. You can change the sugar amount in the recipe. Start with less sugar and taste the batter. You can also use honey, maple syrup, or a sugar substitute. Just keep in mind that some options are sweeter than others. Yes, you can prepare the batter in advance. Store it in the fridge for up to 24 hours. For cooked pancakes, stack them with parchment paper in between. Keep them in an airtight container in the fridge for up to three days. This blog post covered how to make delicious pancakes with cottage cheese and eggs. I shared the main ingredients, dry mix, and optional add-ins to take your pancakes to the next level. You learned step-by-step instructions to cook them perfectly and tips for fluffiness and serving. Remember, you can adapt the recipe for dietary needs, store leftovers, and reheat them easily. Enjoy your cooking adventure and make these pancakes your own!

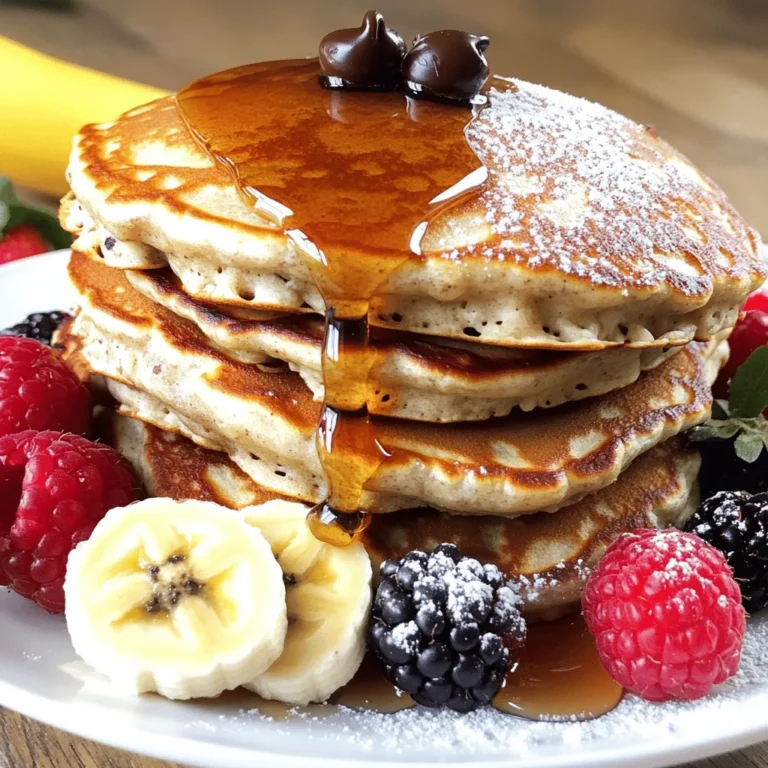
Chocolate Chip Cottage Cheese Pancakes Delightful Recipe

- 4 salmon fillets (about 6 oz each) - 2 medium sweet potatoes, peeled and cut into 1-inch cubes - 3 tablespoons pure maple syrup - 2 tablespoons Dijon mustard - 1 tablespoon extra virgin olive oil - 2 cloves garlic, finely minced - 1 teaspoon smoked paprika - Salt and pepper, to taste - Fresh parsley, chopped (for garnish) You can swap salmon for other fish like trout or cod. If you want a vegetarian option, try chickpeas or tofu instead of salmon. For the sweet potatoes, butternut squash works well too. If you do not have Dijon mustard, honey mustard or whole grain mustard are good choices. Maple syrup can be replaced with agave nectar for a similar sweetness. If you need a garlic substitute, try garlic powder or shallots. This dish serves four people. Each serving contains about: - Calories: 400 - Protein: 30g - Carbohydrates: 35g - Fat: 15g - Fiber: 5g - Sugar: 8g This meal is rich in omega-3 fatty acids from the salmon and packed with vitamins from the sweet potatoes. It is a balanced dish that offers a good mix of nutrients. Start by preheating your oven to 400°F (200°C). This step is key for roasting. A hot oven will help caramelize the sweet potatoes and cook the salmon evenly. In a large bowl, mix together 3 tablespoons of maple syrup, 2 tablespoons of Dijon mustard, and 1 tablespoon of olive oil. Next, add 2 minced garlic cloves and 1 teaspoon of smoked paprika. Sprinkle in salt and pepper. Whisk everything until it blends well. This marinade adds a sweet and tangy flavor that enhances both the salmon and sweet potatoes. Add the cubed sweet potatoes to your bowl of marinade. Toss them well until they’re fully coated. This ensures they soak in all that tasty goodness. Line a large baking sheet with parchment paper for easy cleanup. Spread the sweet potatoes on one half of the sheet. On the other half, place the salmon fillets skin-side down. Brush the remaining marinade over the salmon to coat it nicely. Slide the baking sheet into the oven. Bake for 20 to 25 minutes. The salmon should flake easily when done and reach an internal temperature of 145°F (63°C). The sweet potatoes will become tender and caramelized, adding texture to your dish. After baking, take the baking sheet out of the oven. Let it cool for about 5 minutes. This helps keep the salmon moist and flavorful. Finally, sprinkle chopped fresh parsley over the salmon and sweet potatoes. This adds a bright touch and makes your meal look inviting. To make the best marinade, start with fresh ingredients. Use pure maple syrup for sweetness. Choose Dijon mustard for a nice tang. Mix in minced garlic for depth. Smoked paprika adds a hint of warmth. Always taste the marinade. Adjust salt and pepper to suit your preference. You can add herbs like thyme or rosemary for extra flavor. Let the marinade sit for a bit before using. This helps the flavors blend well. When cooking salmon, use skin-on fillets. The skin helps keep the fish moist. Make sure the salmon is at room temperature before baking. This ensures even cooking. For sweet potatoes, cut them into uniform pieces. This helps them cook evenly. Toss them well in the marinade. Spread them out on the baking sheet. Avoid crowding; this helps them caramelize nicely. Check both the salmon and sweet potatoes at the 20-minute mark. They should be tender and cooked through. Presentation makes a big difference. Use a large platter for serving. Arrange salmon and sweet potatoes side by side. Drizzle leftover juices over the top. This adds flavor and a nice shine. Sprinkle with fresh parsley for a pop of color. You can also add lemon wedges on the side. This gives a fresh touch. Serve with a simple green salad for a complete meal. {{image_4}} You can switch the salmon for other proteins. Chicken breasts work well and absorb flavors nicely. Tofu is another great option for a plant-based meal. Just make sure to adjust the cooking time. Chicken needs about 25-30 minutes, while tofu takes about 15-20 minutes. Both options still taste amazing with the maple-mustard glaze. Feel free to mix up the vegetables. Brussels sprouts, carrots, or green beans can shine in this dish. Cut them into similar sizes as the sweet potatoes for even cooking. You can also add some red onion for extra sweetness. Roasting a mix gives you different textures and flavors that pair well with the salmon. You can easily change the flavor of this dish. For a fresh twist, try adding dill or thyme. Both herbs complement the fish nicely. If you like heat, add a pinch of cayenne pepper to the marinade. A splash of lemon juice can brighten the dish, too. These small changes can create new tastes while keeping the essence of the dish. To store leftovers, let the dish cool first. Place the salmon and sweet potatoes in an airtight container. Keep them in the fridge for up to three days. Make sure the container is sealed to keep the flavors fresh. If you have leftovers of the marinade, you can store that too, but only for a day or two. To reheat the dish, preheat your oven to 350°F (175°C). Place the salmon and sweet potatoes on a baking sheet. Cover them with foil to keep moisture in. Heat for about 10-15 minutes, or until warm. You can also use a microwave. Just place the food in a microwave-safe dish and heat for two to three minutes. Check to see if it’s hot enough, and stir if needed. You can freeze this dish if you want to save it for later. First, make sure it’s completely cool. Pack the salmon and sweet potatoes in a freezer bag or container. Remove as much air as possible to prevent freezer burn. This dish can last for up to three months in the freezer. When you’re ready to eat, thaw it in the fridge overnight, then reheat as described above. You should cook salmon in the oven for 20-25 minutes. This time gives you tender, flaky fish. The salmon should reach an internal temperature of 145°F (63°C). Check the salmon with a fork. If it flakes easily, it is ready to eat. Yes, you can use other methods like grilling or pan-searing. If you grill, cook the salmon for about 6-8 minutes per side. For pan-searing, start skin-side down in a hot pan. Cook for 4-6 minutes, then flip and cook for another 4-6 minutes. Sweet potatoes are very healthy! They are high in fiber, which helps digestion. They also contain vitamins A and C, which are good for your skin and immune system. Plus, they have antioxidants that can help fight disease. Yes, you can prep this dish ahead of time. Cut the sweet potatoes and mix the marinade the night before. Store them in the fridge until you're ready to cook. Just remember to bring them to room temperature before baking! You learned about key ingredients, how to prepare, and serve a flavorful dish. We covered everything from the perfect marinade to storage tips. Cooking salmon with sweet potatoes can be easy and tasty. Remember, you can switch up proteins and veggies to fit your taste. With these tips, you can enjoy a healthy meal any day. Enjoy creating your own delicious version and impress your family and friends! Happy cooking!

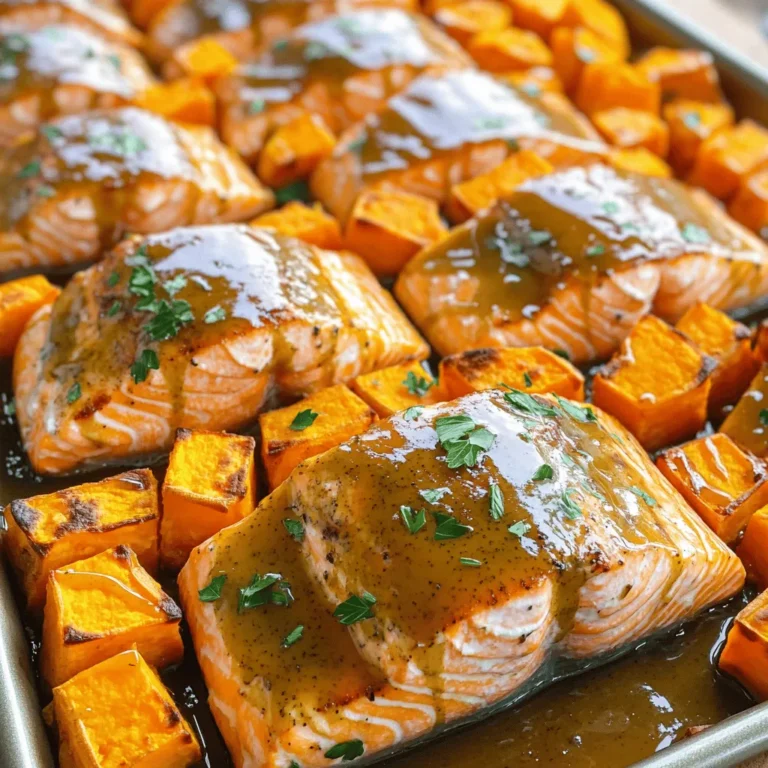
Sheet-Pan Maple Mustard Salmon & Sweet Potatoes Delight

- 2 pounds chicken wings - 4 tablespoons extra virgin olive oil - 1 tablespoon garlic powder - 1 teaspoon onion powder - 1 teaspoon smoked paprika - Sea salt and freshly cracked black pepper - ½ cup freshly grated Parmesan cheese - 2 tablespoons fresh parsley, finely chopped - Hot sauce Gathering the right ingredients is key to making Garlic Parmesan Wings in your air fryer. Start with fresh chicken wings. They help create that perfect crispy texture. Extra virgin olive oil adds flavor and helps the wings brown nicely. Garlic powder gives the wings a bold taste. The onion powder adds a hint of sweetness. Smoked paprika provides a warm, smoky flavor that makes everything pop. Don't forget sea salt and freshly cracked black pepper. These simple seasonings elevate the taste of your wings. After cooking, toss the wings in freshly grated Parmesan cheese. It melts and coats the wings beautifully. For a bright touch, sprinkle with fresh parsley. This not only looks nice but adds freshness. If you like a kick, have hot sauce ready. It pairs well with the rich garlic and cheese. These ingredients combine to create a tasty and satisfying dish that everyone will love. - Preheat air fryer to 380°F (190°C). This step is key for crispy wings. The hot air cooks the wings evenly and quickly. - Mixing ingredients for coating In a large bowl, add 2 pounds of chicken wings. Pour in 4 tablespoons of extra virgin olive oil. Then add 1 tablespoon of garlic powder, 1 teaspoon of onion powder, and 1 teaspoon of smoked paprika. Season with sea salt and black pepper. - Coating the chicken wings evenly Use your hands or a spatula to mix. Make sure every wing is well-coated. This ensures all the flavors stick to the wings during cooking. - Arranging wings in the air fryer Place the seasoned wings in a single layer in the air fryer basket. Avoid overcrowding so the hot air can circulate properly. - Cooking time and tips for even browning Air fry the wings for 25-30 minutes. Shake the basket halfway through. This helps them brown evenly and become crispy. - Tossing wings with Parmesan Once cooked, move the wings to a bowl. Sprinkle ½ cup of freshly grated Parmesan cheese over the hot wings. Toss gently until all wings are coated in cheese. - Garnishing with parsley Finish by adding 2 tablespoons of finely chopped fresh parsley. This not only looks nice but adds a fresh taste. Serve these garlic Parmesan wings hot, with your favorite dipping sauce on the side! To make crispy wings, you need to oil and season them well. The olive oil is key. It helps the wings crisp up in the air fryer. Use enough oil to coat each wing, but don’t drown them. Seasoning is just as important. Garlic powder and smoked paprika add great taste. Airflow matters too. Place the wings in a single layer in the air fryer. If your basket is small, cook them in batches. This ensures hot air can circulate around each wing. Good airflow leads to even cooking and crispness. Wing sizes vary, so cooking times may change. Smaller wings need less time, while larger wings need more. Check for doneness by cutting into a wing. The meat should be white, not pink. A meat thermometer can help too. The internal temperature should reach 165°F (74°C). If you have extra-large wings, consider increasing the cooking time by a few minutes. Just keep an eye on them to avoid overcooking. You can spice things up with extra seasonings. Consider adding cayenne pepper for heat or Italian herbs for a twist. Experiment to find your favorite mix. For cheese, Parmesan is classic, but other options work too. Try Pecorino Romano for a sharper taste or even a mix of cheeses for depth. Feel free to get creative with flavors to suit your taste! {{image_4}} You can change the flavor of your wings with different spice mixes. If you like heat, try spicy garlic parmesan wings. Just add cayenne pepper or chili powder to your seasoning mix. This will give your wings a nice kick. For a fresh twist, consider lemon garlic herb wings. Mix in lemon zest, dried oregano, and thyme. This brightens up the flavor and brings a new taste to your wings. You don't have to use an air fryer for these wings. Baking them in the oven is simple and still gives you great results. Preheat your oven to 400°F (200°C). Spread the seasoned wings on a baking sheet. Bake them for about 40-45 minutes, flipping halfway through. If you prefer grilling, you can still enjoy garlic parmesan wings. Preheat your grill and cook the wings over medium heat. Grill for 25-30 minutes, turning often to avoid burning. Pair your garlic parmesan wings with different dipping sauces to enhance the flavor. Ranch dressing is a classic choice. If you like something spicier, serve with hot sauce. You can also try blue cheese dressing for a bold taste. When it comes to side dishes, celery sticks and carrot sticks are great options. They add freshness and crunch. You can even serve these wings with a side of coleslaw for a nice contrast. Enjoy experimenting! To keep your garlic parmesan wings fresh, follow these tips. First, let the wings cool to room temperature. Place them in an airtight container. Store them in the fridge for up to three days. If you want to keep them longer, freezing is a great option. For freezing, wrap the wings tightly in plastic wrap. Then, place them in a freezer-safe bag. They can stay frozen for up to three months. When you're ready to enjoy leftover wings, you have a few options. The best method is to use the air fryer again. Preheat it to 375°F (190°C). Place the wings in a single layer. Heat them for about 10-15 minutes. This method keeps them crispy and delicious. You can also use the oven. Preheat it to 350°F (175°C). Spread the wings on a baking sheet and cover them with foil. Bake for about 15-20 minutes. If you want them extra crispy, remove the foil for the last 5 minutes. Enjoy your wings just like they were fresh! Cook chicken wings in the air fryer for 25 to 30 minutes. Preheat your air fryer to 380°F (190°C) first. Place the wings in a single layer for even cooking. Shake the basket halfway through to promote crispiness. When the wings are golden brown, they are ready to enjoy! Yes, you can use frozen chicken wings! Add an extra 5 to 10 minutes to the cooking time. Make sure to check for doneness. The wings should reach an internal temperature of 165°F (74°C). For best results, don’t overcrowd the basket. This will help them cook evenly. Garlic parmesan wings taste great with various dips. Ranch dressing is a classic choice. Blue cheese dressing also works well. If you like some heat, try a spicy hot sauce. You can mix and match to find your perfect flavor combination! This post covered how to make delicious air fryer chicken wings. We explored key ingredients, like chicken wings and olive oil, and shared step-by-step instructions for perfect cooking. I also provided tips for crispy wings and flavor variations, plus advice on storing and reheating. By following this guide, you can enjoy tasty wings any time. Experiment with different spices and sauces to find your favorite. You’ll impress friends and family with your skills in the kitchen! Enjoy your cooking adventure!

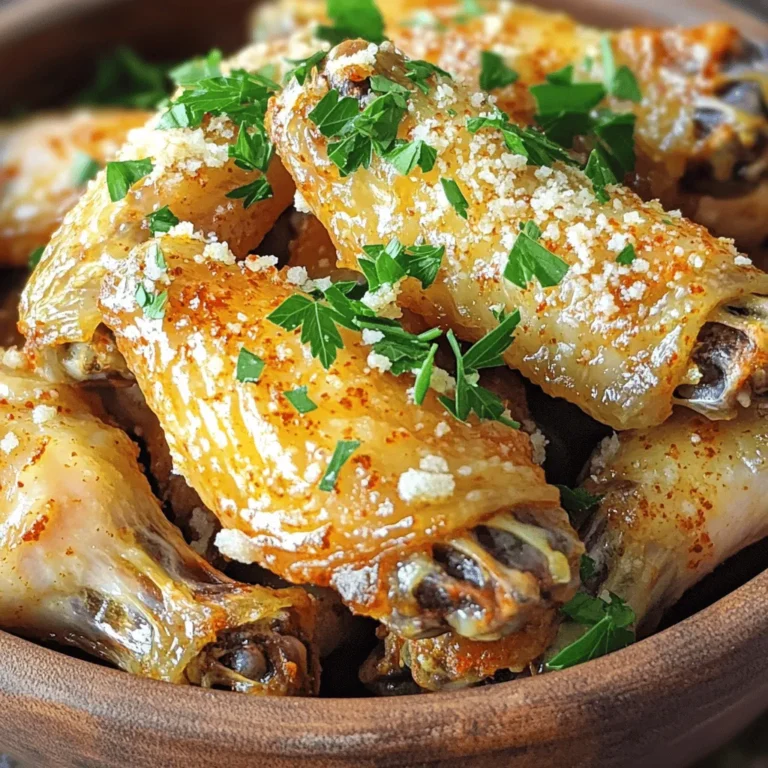
Garlic Parmesan Wings Air Fryer Crispy Treat

To make creamy mushroom gnocchi, gather these key ingredients: - 1 lb potato gnocchi - 2 tablespoons olive oil - 1 medium onion, finely chopped - 3 cloves garlic, minced - 8 oz cremini mushrooms, sliced - 1 cup heavy cream - 1/2 cup grated Parmesan cheese - Salt and pepper to taste - Fresh parsley, chopped (for garnish) - 1 teaspoon dried thyme - 1/4 teaspoon red pepper flakes (optional for a kick) These ingredients blend to create a rich and tasty dish. The gnocchi provides a soft base. The mushrooms add earthy flavors, while the cream and cheese help create a smooth sauce. You can enhance this dish with fun add-ins. Try adding: - Spinach or kale for some greens - Sun-dried tomatoes for a touch of sweetness - Grilled chicken or shrimp for protein - A splash of white wine for depth - Fresh lemon zest for a bright note These choices can change the taste and look of your meal. Feel free to mix and match based on what you love. For easy cooking, you will need some tools: - A large pot for boiling gnocchi - A large skillet for the sauce - A wooden spoon for mixing - A colander for draining - A sharp knife and cutting board Having the right tools makes cooking easier. Keep everything ready to enjoy a smooth cooking experience! To start, boil water in a large pot. Add a pinch of salt. Once the water is bubbling, add 1 pound of potato gnocchi. Cook them following the package directions. In about 2-3 minutes, they will float to the top. This means they are ready! Drain the gnocchi and set them aside. Next, take a large skillet and heat 2 tablespoons of olive oil over medium heat. Add 1 finely chopped medium onion and cook it until it becomes soft and clear. This should take about 3-4 minutes. Then, stir in 3 minced cloves of garlic. Cook for another minute, letting the garlic release its aroma. Now it’s time for the mushrooms! Add 8 ounces of sliced cremini mushrooms to the skillet. Cook them for 5-7 minutes until they turn golden brown and release their juices. After that, pour in 1 cup of heavy cream and stir well. Gradually mix in 1/2 cup of grated Parmesan cheese. Keep stirring until the cheese melts and the sauce thickens, about 3-5 minutes. Once the sauce is ready, add the cooked gnocchi to the pan. Gently toss the gnocchi with the creamy mushroom sauce. Make sure every piece is coated in that rich goodness. Serve the creamy mushroom gnocchi on deep plates. For a finishing touch, sprinkle fresh chopped parsley on top. You can also add extra Parmesan for more flavor. Enjoy this delightful dish with your loved ones! To cook gnocchi just right, use a big pot. Fill it with salted water and bring it to a boil. Add the gnocchi and watch closely. When they float, they are done, usually in 2-3 minutes. Drain them gently and set aside. This keeps them soft and fluffy. For extra flavor, try adding dried thyme and red pepper flakes. Thyme gives a nice earthiness. Red pepper flakes add a tasty kick. You can also use fresh herbs like basil or rosemary for a fresh touch. A little extra Parmesan on top gives a rich finish, too. This creamy mushroom gnocchi is already vegetarian. To make it even better, add veggies like spinach or peas. These add color and nutrition. You can also use vegetable broth instead of water for cooking the gnocchi. This will boost the flavor without adding meat. {{image_4}} You can switch up the creamy sauce for a fresh twist. Try a basil pesto sauce. It adds a bright, herbal flavor. You can also use a tomato sauce for a different taste. A simple garlic and olive oil sauce keeps it light and tasty. Each sauce can change the whole vibe of the dish. Want to make your gnocchi even better? Consider adding spinach or kale for some greens. Sun-dried tomatoes bring a hint of sweetness. You can also toss in cooked chicken or shrimp for protein. Don't forget about nuts like pine nuts or walnuts for crunch. These add-ins create layers of flavor. If you need gluten-free gnocchi, look for brands made with rice or corn. They cook just like regular gnocchi. You can also make your own using gluten-free flour and potatoes. This way, you can enjoy the dish without worries. Always check the labels to ensure your ingredients are gluten-free. To store leftover creamy mushroom gnocchi, let it cool first. Place it in an airtight container. Make sure to cover it well. Store it in the fridge for up to three days. The gnocchi will stay fresh and tasty. When you're ready to eat again, reheat the gnocchi gently. You can use a skillet over low heat. Add a splash of cream or water to keep it moist. Stir it often to heat evenly. You can also use the microwave. Heat it in short bursts, stirring in between. This keeps the sauce creamy and delicious. If you want to freeze the gnocchi, do it before you cook it. Place the uncooked gnocchi on a baking sheet. Freeze it until firm, then transfer to a freezer bag. It can last up to three months. When you’re ready to use it, cook it straight from the freezer. Just add a few extra minutes to the cooking time. I like to use potato gnocchi for this recipe. It has a soft and fluffy texture. The potato flavor pairs well with the creamy sauce. You can find it in the store or make it at home. If you want a gluten-free option, look for gluten-free potato gnocchi. Absolutely! You can swap cremini mushrooms for any mushrooms you enjoy. Button mushrooms or shiitake mushrooms work well too. Each type adds a unique flavor and texture. Just remember to slice them thinly for even cooking. To lighten up the dish, you can use half-and-half instead of heavy cream. This will reduce the fat content but still give you a creamy texture. You can also add more veggies, like spinach or peas, for extra nutrients. Yes, you can prepare the components ahead of time. Cook the gnocchi and sauce separately. Store them in the fridge for up to two days. When you’re ready to eat, just reheat and combine them. This makes for an easy weeknight meal! This blog post covered how to make creamy mushroom gnocchi. We looked at key ingredients and ways to enhance the dish. I shared step-by-step instructions on cooking and mixing the flavors together. You learned tips for perfecting your gnocchi, and how to make variations. We also discussed storage and answered common questions. In closing, this dish is simple and offers great taste. Enjoy experimenting with the ingredients for your perfect meal.

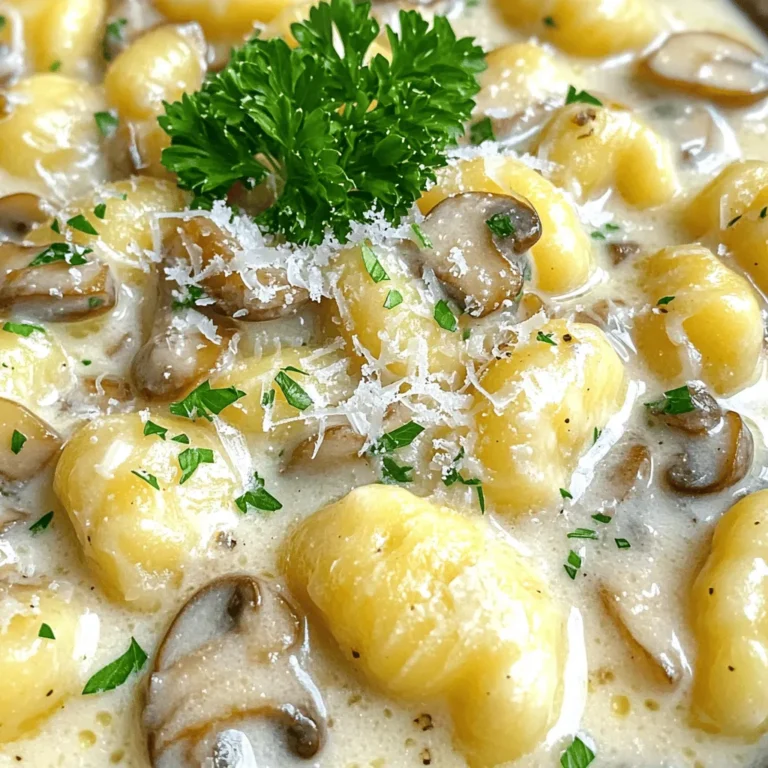
Creamy Mushroom Gnocchi Delightful and Simple Recipe

- 2 boneless, skinless chicken breasts, cut into bite-sized pieces - 1 cup fresh pineapple, diced into small chunks - 1 red or yellow bell pepper, sliced into strips - 1 cup snap peas, trimmed and cleaned - 2 green onions, chopped into fine pieces - 2 cloves garlic, minced finely - 1 tablespoon fresh ginger, grated - 3 tablespoons soy sauce (low sodium recommended) - 1 tablespoon honey - 1 tablespoon cornstarch mixed with 2 tablespoons water to form a slurry - 2 tablespoons vegetable oil (or any neutral oil) - Salt and freshly ground black pepper to taste - Sesame seeds for garnish In this recipe, chicken serves as the main protein. It gives the dish a hearty base. Fresh pineapple brings sweet, tropical notes. The bell pepper adds color and crunch. Snap peas contribute freshness and texture. The garlic and ginger mix well to create a fragrant aroma. Soy sauce and honey form a tasty glaze. Cornstarch helps thicken the sauce and makes it shiny. Using vegetable oil allows for high-heat cooking without burning. You can adjust the amount of salt and pepper to suit your taste. Sesame seeds finish the dish with a nice touch. This combination of ingredients creates a colorful and flavorful stir fry. {{ingredient_image_2}} Cooking the Chicken First, heat 1 tablespoon of vegetable oil in a large skillet over medium-high heat. Wait until the oil shimmers. Add the chicken pieces to the pan. Season them well with salt and black pepper. Stir-fry the chicken for about 5-7 minutes. You want it to be fully cooked and golden brown. Once done, place the chicken on a plate and set it aside. Seasoning Tips For great flavor, use fresh ground black pepper. Salt enhances the chicken's taste. You can also add a pinch of garlic powder for extra flavor. Sauteing Garlic and Ginger In the same skillet, add another tablespoon of oil. Once hot, add the minced garlic and grated ginger. Stir them for about 30 seconds. You want the aroma to fill your kitchen. Adding Vegetables Next, toss in the sliced bell pepper and snap peas. Stir-fry these for about 3-4 minutes. The goal is to keep them crisp but tender. After that, add the diced pineapple and mix everything well. Mixing Sauce and Chicken In a small bowl, whisk the soy sauce and honey together. Pour this mixture over the stir-fry. Make sure every piece is coated. Add the cooked chicken back into the skillet. Thickening the Stir Fry Pour the cornstarch slurry into the pan. Stir everything together for another 2 minutes. This will thicken the sauce. The mixture should become glossy and shiny. Finally, fold in the chopped green onions. This adds freshness and flavor to your dish. Best Practices for Stir-Frying Stir-frying is quick and fun. Use high heat for best results. Keep all your ingredients ready before you start. This makes cooking smooth and fast. Always use a large skillet or wok. This allows the food to cook evenly. Stir constantly to prevent burning. This also helps keep the food crispy. Achieving Perfectly Cooked Chicken For great chicken, cut it into small pieces. This helps it cook quickly and evenly. Season with salt and pepper before cooking. Use enough oil to coat the pan. Heat the oil until it shimmers. This shows it's hot enough. Cook the chicken for 5-7 minutes. It should turn golden brown and be cooked through. Adjusting Sweetness and Savory Notes You can change the sweetness to fit your taste. If you like it sweeter, add more honey. If you prefer savory, add more soy sauce. Taste as you go. This helps you find the right balance for your dish. Using Fresh versus Canned Pineapple Fresh pineapple gives a bright taste and better texture. Canned pineapple is sweet and easy to use. If using canned, drain it well. This prevents the dish from being too watery. Fresh is always best, but canned works in a pinch. Pro Tips Fresh Ingredients: Use fresh pineapple for a sweeter and more vibrant flavor. Canned pineapple may work, but it can be less juicy and flavorful. Balanced Flavors: Adjust the soy sauce and honey according to your taste preference. If you like it sweeter, add more honey; for a saltier profile, increase the soy sauce. Uniform Cooking: Cut your chicken and vegetables into similar sizes to ensure even cooking. This helps maintain the texture and flavor of each ingredient. Serving Suggestions: Pair your stir-fry with steamed rice, quinoa, or even noodles for a complete meal. Top with extra sesame seeds for added crunch and flavor. {{image_4}} You can switch the chicken for other proteins. Tofu works well for a vegetarian dish. It soaks up flavors nicely. Shrimp is another great option. It cooks fast and adds a nice taste. For vegetables, feel free to be creative. Broccoli, carrots, or zucchini are good choices. They add color and crunch to the dish. You can mix and match based on what you have at home. Try a sweet and sour twist for a new taste. You can add more pineapple or some vinegar for tanginess. This gives the dish a fun flavor boost. Adding spices can also change the game. A sprinkle of chili flakes adds heat. If you like spicy food, this is a great choice. You can also add a bit of pepper for extra zing. When you have extra Pineapple Chicken Stir Fry, store it properly. Here are some tips: - Refrigeration Tips: Place leftovers in an airtight container. They will stay fresh for up to 3 days in the fridge. Make sure to cool them down before sealing the container. This step helps to keep the food safe and tasty. - Freezing Guidelines: If you want to keep it longer, freeze the stir fry. Use a freezer-safe container or a heavy-duty freezer bag. It can last for about 2 to 3 months. When freezing, try to remove as much air as possible. This helps prevent freezer burn and keeps the flavor intact. To enjoy your leftovers, reheating is key. Here are the best methods: - Best Methods for Reheating Stir Fry: The best way to reheat Pineapple Chicken Stir Fry is on the stove. Use a non-stick skillet over medium heat. Add a splash of water or broth to help steam the food and keep it moist. Stir often. This keeps the flavors fresh. For microwave reheating, place the stir fry in a microwave-safe bowl. Cover it with a lid or damp paper towel. Heat in short bursts, stirring in between. This method helps avoid hot spots and keeps the dish warm throughout. To make your Pineapple Chicken Stir Fry less sweet, reduce the honey. You can also swap fresh pineapple for canned pineapple in juice, not syrup. This change cuts the sugar. Another option is to add more soy sauce. The soy sauce adds saltiness, which balances the sweetness. You can even add a splash of rice vinegar for a tangy kick. Yes, you can use frozen vegetables. They are quick and easy. Just remember to thaw them first. Drain any extra water to avoid a soggy stir fry. Cooking times may vary, so keep an eye on them. Frozen vegetables may cook faster than fresh ones. Look for stir-fry blends with snap peas and bell peppers for added flavor. Serving suggestions include fluffy rice or quinoa. Both options soak up the sauce well. You can also use noodles for a hearty meal. Another choice is to serve it in lettuce wraps for a fun twist. Add a side of fresh fruit or a salad to balance your meal. Each option adds variety and makes your dinner special. In this post, we covered how to make Pineapple Chicken Stir Fry. We discussed the key ingredients, step-by-step cooking instructions, and useful tips. You learned about different variations, storing leftovers, and answered common questions. This dish is tasty and easy to prepare. Experiment with flavors and ingredients to make it your own. Enjoy your stir fry creation anytime!

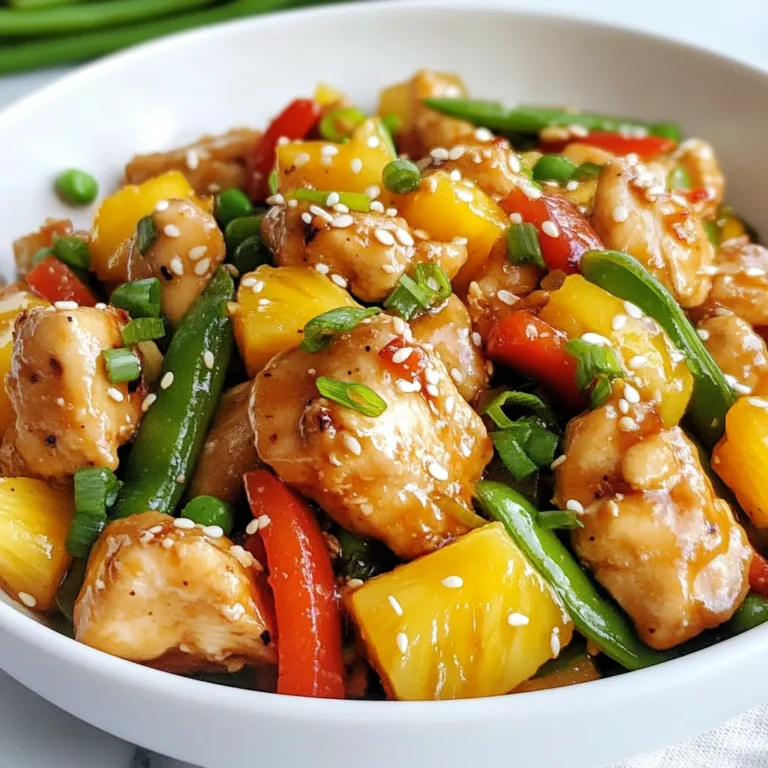
Pineapple Chicken Stir Fry Flavorful and Easy Recipe

- 4 medium-sized apples, cored (Honeycrisp or Granny Smith recommended) - 1/2 cup brown sugar, firmly packed - 1/4 cup rolled oats - 1 teaspoon ground cinnamon - 1/4 teaspoon freshly grated nutmeg - 1/4 cup chopped pecans or walnuts (optional for a crunchy texture) - 1/4 cup unsalted butter, melted - 1/4 cup raisins or dried cranberries (optional for added sweetness) - 1/2 cup apple juice or water (to create steam during baking) I love using Honeycrisp and Granny Smith apples for this recipe. Honeycrisp apples are sweet and juicy. Their crisp texture makes them perfect for baking. Granny Smith apples bring a nice tartness that pairs well with brown sugar. Both hold their shape well when baked. You can boost the flavor with a few add-ins. Chopped pecans or walnuts add a nice crunch. If you want extra sweetness, toss in some raisins or dried cranberries. These add-ins make the dish more interesting and delicious. Feel free to mix and match. The goal is to create a filling you enjoy! First, set your oven to 350°F (175°C). This step makes sure your apples bake evenly. A hot oven helps caramelize the sugar and makes the apples tasty. In a medium bowl, mix the following: - 1/2 cup brown sugar, firmly packed - 1/4 cup rolled oats - 1 teaspoon ground cinnamon - 1/4 teaspoon freshly grated nutmeg - 1/4 cup chopped pecans or walnuts (optional) Stir these ingredients well. This mix will create a sweet and crunchy filling for your apples. Next, take your four cored apples. Place them upright in a greased baking dish. If you use parchment paper, cleanup will be easier. Now, fill each apple with the brown sugar mixture. Press it down gently to pack it in tight. This helps the flavors blend as they bake. Now, drizzle 1/4 cup melted butter over each apple. This step adds flavor and helps the filling stay moist. Pour 1/2 cup of apple juice or water into the bottom of the dish. This juice creates steam, keeping the apples soft. Cover the dish tightly with aluminum foil. Bake in the preheated oven for 25 minutes. After that, carefully remove the foil. Bake for another 15-20 minutes. You want the apples to be tender, and the filling should bubble and turn caramelized. Once done, take the dish out and let the apples cool for a few minutes. This helps avoid burns when serving. Enjoy your delicious brown sugar baked apples! To make the best brown sugar baked apples, start with good apples. I recommend using Honeycrisp or Granny Smith. These apples have a nice balance of sweet and tart flavors. They hold their shape well during baking. Look for apples that are firm, with smooth skin. Avoid soft or bruised apples, as they won't bake well. Fresh apples will enhance the taste of your dessert. For perfectly baked apples, follow these steps. First, core the apples but leave the bottoms intact. This keeps the filling inside. Next, pack the brown sugar mixture tightly into each apple. This helps create a rich, gooey filling. Bake the apples covered with foil for the first part. This traps steam and keeps them moist. Remove the foil later to caramelize the top. Bake until the apples are soft and the filling bubbles. Serve your baked apples warm for the best flavor. Drizzle the sticky caramel sauce from the dish over the apples. For a special treat, add a scoop of vanilla ice cream or a dollop of whipped cream. The cold creaminess pairs well with the warm apples. You can also sprinkle some extra nuts on top for crunch. Enjoy this cozy dessert with friends and family! {{image_4}} You can swap brown sugar for other sweeteners. Try maple syrup or honey for a unique taste. Both work well and add different flavors. Honey gives a floral note, while maple syrup adds depth. Adjust the amount based on your taste preference. Use less if you prefer a lighter sweetness. While pecans and walnuts add a nice crunch, feel free to explore other nuts. Almonds or hazelnuts can bring new flavors to your baked apples. Chopped nuts add texture and richness. Just make sure to chop them small so they mix well with the filling. Spices can elevate your baked apples. Consider adding ginger or allspice for warmth. A pinch of cloves can also deepen the flavor. Mix and match spices to find your favorite blend. Just a little can make a big difference in taste. Enjoy experimenting! Store any leftover baked apples in an airtight container. Place them in the fridge. They will stay fresh for up to three days. Make sure to keep the apples covered to avoid drying out. To reheat, preheat your oven to 350°F (175°C). Place the apples in a baking dish. Add a splash of apple juice or water to keep them moist. Cover with foil to prevent drying. Bake for about 15 minutes or until heated through. You can also heat them in the microwave for one to two minutes. You can freeze baked apples for later use. Allow them to cool completely before freezing. Wrap each apple in plastic wrap. Place them in a freezer-safe bag or container. They can last in the freezer for up to three months. To enjoy, thaw overnight in the fridge and reheat as mentioned above. Yes, you can use other sugars. Try white sugar or coconut sugar. Brown sugar gives a rich flavor, but others can work too. Just know, the taste may change. White sugar will be less sweet than brown. Coconut sugar adds a caramel note. You can also mix sugars if you like. Check the apples after 40 to 45 minutes of baking. The apples should be soft when you poke them with a fork. The filling will bubble and caramelize. If the apples are still firm, bake them longer. Keep an eye on them to avoid burning. They should be tender but not mushy. Yes, this recipe can easily be vegan. Substitute the butter with coconut oil or vegan butter. Use maple syrup or agave nectar instead of brown sugar. The rest of the recipe stays the same. You can enjoy these baked apples without any animal products! You learned about the key ingredients for baked apples and how to choose the best types. I shared easy step-by-step instructions for perfect results. You can explore fun variations and tasty add-ins for more flavor. Plus, I provided tips on storing leftovers and reheating them well. Baked apples are simple to make and always delicious. Now, use these ideas to impress your friends and family with your baking skills! Enjoy the process and make it your own.

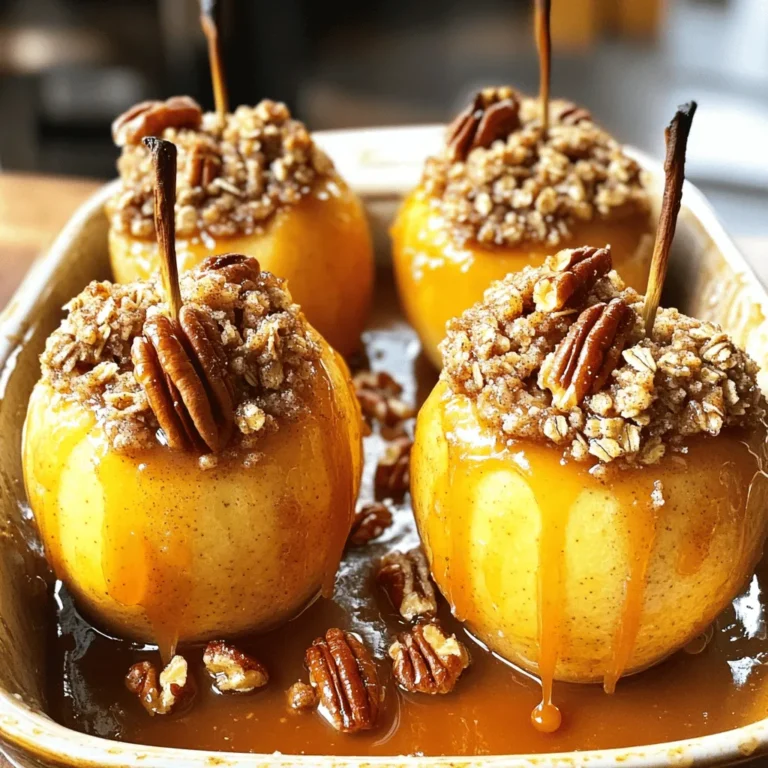
Brown Sugar Baked Apples Delicious Fall Dessert Recipe

To make Minute Thai Peanut Noodles, you need a few simple ingredients. These items create a rich and flavorful dish that is quick to prepare. Here is what you will need: - 8 oz. rice noodles - 1/4 cup creamy peanut butter - 3 tablespoons soy sauce - 1 tablespoon fresh lime juice - 2 tablespoons honey or maple syrup - 1 tablespoon sriracha (or to taste for desired heat) - 1 clove garlic, minced - 1/4 cup warm water (adjust for consistency) - 1 red bell pepper, julienned - 1 carrot, shredded - 1 cup snap peas, trimmed - 1/4 cup green onions, chopped - Chopped peanuts and fresh cilantro for garnish Each ingredient adds a unique taste and texture. The rice noodles form the base of the dish. Creamy peanut butter gives the sauce its rich flavor. Soy sauce and lime juice add depth and balance. Honey or maple syrup sweetens the sauce just right. Sriracha brings the heat, while garlic adds a punch. The vegetables not only brighten the dish but also add crunch. Red bell pepper, carrot, and snap peas make it colorful and healthy. Finally, garnishing with chopped peanuts and cilantro gives it a fresh finish. Gather these ingredients to enjoy a delightful meal in minutes! To start, cook the rice noodles. Follow the package instructions for timing. Once they are soft, drain the noodles. Rinse them under cold water. This step keeps them from sticking together. Set the noodles aside while you make the sauce. Next, grab a medium bowl. In it, mix the creamy peanut butter, soy sauce, lime juice, honey, sriracha, and minced garlic. Stir these well until you see a smooth mix. If the sauce is too thick, add warm water. Adjust the water until you get your desired sauce thickness. Now, heat a non-stick skillet over medium heat. Add the red bell pepper, carrot, and snap peas. Sauté these veggies for about 2-3 minutes. You want them to be tender but still crisp. This way, they keep their bright colors and fresh flavors. Lower the heat. Add the cooked rice noodles to the skillet. Pour your peanut sauce over them. Gently toss all the ingredients together. Do this for about 2-3 minutes until everything is well-coated and heated through. Finally, remove the skillet from the heat. Add the chopped green onions for a burst of flavor. For serving, dish the noodles into bowls. Top each bowl with chopped peanuts and fresh cilantro. This adds crunch and a lovely aroma. Enjoy your meal! To make the best peanut sauce, think about thickness. If you want it thicker, use less water. If you prefer a thinner sauce, add more water. This way, you can control how it coats your noodles. If you don't have peanut butter, you can use almond butter or sunflower seed butter instead. These options still give a rich flavor. Cooking noodles can be tricky. To avoid sticky noodles, rinse them with cold water after cooking. This stops them from cooking more and helps keep them separate. For the best texture, cook them just until they are al dente. Check the package for cooking times, but usually, 4 to 5 minutes is enough. You can switch up the veggies in your dish. Try using broccoli, bell peppers, or zucchini for a twist. When sautéing, heat your skillet first, then add a little oil. This helps the veggies cook evenly and stay crisp. Stir them for just a few minutes until they are bright and tender. {{image_4}} You can easily change up your Minute Thai Peanut Noodles by adding protein. Here are a few great options: - Tofu: Firm tofu works best. Press it to remove extra moisture. Cut it into cubes and sauté until golden brown. - Chicken: Cook diced chicken in the skillet before adding veggies. This gives the dish a nice flavor. - Shrimp: Add shrimp to the skillet. Cook until they turn pink. Shrimp cooks fast, so keep an eye on them. You can make your noodles even tastier by adding new flavors: - Spices: Try adding ginger or crushed red pepper for a unique twist. A pinch of curry powder can also kick things up a notch. - Other Sauces: Swap out soy sauce for tamari if you prefer. You could even mix in some hoisin sauce for a sweet touch. - Heat Level: If you love spicy food, add more sriracha. Start with a little and taste as you go. This way, you can control the heat. This recipe is flexible for various diets. Here are some easy swaps: - Gluten-Free: Use gluten-free soy sauce or tamari. Check your rice noodles to ensure they are gluten-free. - Vegan Alternatives: Replace honey with maple syrup for a full vegan dish. Tofu works great as a protein option, keeping everything plant-based. To keep your Minute Thai Peanut Noodles fresh, follow these tips: - Cool Down: Let the noodles cool to room temperature before storing. - Airtight Containers: Use airtight containers to prevent moisture loss. - Separate Sauce: Store the peanut sauce separately if possible. This helps keep the noodles from getting soggy. - Label and Date: Always label your containers with the date. This helps you remember when you made them. When it's time to reheat your noodles, follow these methods to keep them tasty: - Stovetop Method: Heat a non-stick skillet over low heat. Add a splash of water or broth to keep the noodles moist. Stir gently until warmed through. - Microwave Method: Place noodles in a microwave-safe dish. Add a few drops of water and cover with a damp paper towel. Heat in 30-second intervals, stirring in between. - Moisture Tips: If your noodles seem dry, add a little more sauce or a splash of water as you reheat. This adds moisture back into the dish, keeping it delicious and enjoyable. It takes about 20 minutes to make these noodles. You’ll spend 10 minutes preparing the ingredients. Cooking the noodles and mixing everything takes another 10 minutes. This quick recipe is perfect for busy days. Yes, you can swap rice noodles for other noodles. Try soba, whole wheat, or even egg noodles. Just keep an eye on cooking times, as they can vary. Each noodle type brings its own flavor and texture. Absolutely! You can make these noodles ahead of time. Cook the noodles and veggies, then store each in separate containers. They stay fresh for up to four days in the fridge. Just reheat and add the sauce when you’re ready to eat. These noodles pair well with many sides. Consider serving them with a fresh salad or spring rolls. Grilled chicken or shrimp also complements the dish nicely. Don’t forget to add some extra lime wedges for a zesty kick! You learned how to make delicious Minute Thai Peanut Noodles using simple ingredients. We covered the key steps, from cooking the rice noodles to creating the perfect peanut sauce. I also shared tips for using different proteins and vegetables to switch things up. Remember, storing leftovers properly helps maintain their taste. Enjoy your cooking journey, and don’t hesitate to experiment with flavors and textures. You'll make these noodles a family favorite in no time!

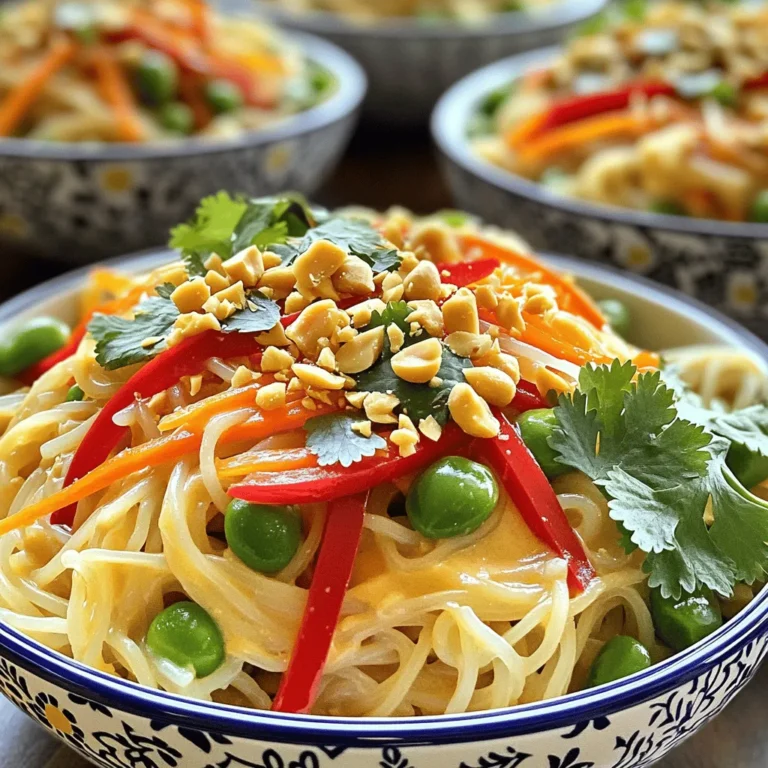
Minute Thai Peanut Noodles Easy and Flavorful Recipe

- 1 block firm tofu, pressed and cut into cubes - 1 cup barbecue sauce, store-bought or homemade - 2 bell peppers, sliced into strips - 1 medium red onion, thinly sliced - 2 cups broccoli florets, fresh or frozen - 1 medium zucchini, sliced into half-moons - 3 tablespoons extra virgin olive oil - 1 teaspoon onion powder - 1 teaspoon smoked paprika - Salt and freshly ground black pepper to taste - Fresh cilantro or parsley, chopped, for garnish First, set your oven to 400°F (200°C). This heat gets the oven ready for roasting. Good heat makes all the difference. Next, grab a large mixing bowl for the tofu. You will need to press the tofu first. This step removes extra water and helps the tofu soak up flavors. Cut the firm tofu into bite-sized cubes. In the mixing bowl, add half of your favorite barbecue sauce. Toss the tofu cubes gently until each piece is coated. Let the tofu marinate for 15 minutes. This step allows the tofu to absorb the tasty sauce. While the tofu soaks in the sauce, prepare your veggies. Take a large baking sheet and spread out the sliced bell peppers, red onion, broccoli florets, and zucchini. Drizzle the veggies with olive oil. Sprinkle with onion powder, smoked paprika, salt, and pepper. Toss the veggies with your hands or a spatula. Ensure they are well coated. Once the tofu has marinated, add it to the baking sheet with the veggies. Spread everything evenly on the sheet. Place the baking sheet in your preheated oven and bake for 25 minutes. After that time, take it out and drizzle the rest of the barbecue sauce on top. Stir gently so the sauce covers everything. Put the baking sheet back in the oven for another 15 minutes. This makes the tofu crispy and the veggies tender. When ready, remove it from the oven and let it cool for a few minutes. Enjoy your warm dish with some fresh cilantro or parsley on top! To get veggies that are soft yet crisp, follow these tips: - Cut them evenly: Aim for similar sizes. This helps them cook at the same rate. - Don’t overcrowd the pan: Leave space between veggies. This allows hot air to move around. - Use high heat: Roasting at 400°F (200°C) makes them caramelize nicely. For tofu that is crispy on the outside, do this: - Press the tofu: Remove as much water as possible. This helps it soak up the sauce and get crispy. - Marinate well: Coat the tofu in BBQ sauce for at least 15 minutes. This adds flavor and aids in browning. - Spread out the tofu: Place it in a single layer on the sheet. This ensures even cooking and crispiness. Choosing the right BBQ sauce makes a big difference. Here are some ideas: - St. Louis Style: Sweet and tangy, great for a classic taste. - Texas Style: Spicy and bold, perfect for those who like heat. - Homemade BBQ Sauce: Mix ketchup, vinegar, brown sugar, and spices for a quick sauce. Experiment with your favorite flavors to find the perfect match! {{image_4}} If you want to mix things up, try using tempeh or seitan. These proteins have different textures and flavors. Tempeh is nutty and chewy, while seitan is very meaty. Both absorb flavors well. Adjust the cook time based on the protein you choose. For example, tempeh may need a bit more marinating time. Feel free to play with the veggies! Carrots, sweet potatoes, or Brussels sprouts work great. You can also add green beans or asparagus for a seasonal twist. Just remember to cut them into similar sizes. This helps them cook evenly. Try mixing colors for a vibrant dish that looks as good as it tastes. You have many options for BBQ sauce. Look for a vegan brand that you love. If you want to make your own, combine ketchup, apple cider vinegar, and maple syrup. Spice it up with garlic powder or smoked paprika. Making your own sauce allows you to control the sweetness and spice levels. To store leftovers, let the dish cool down first. Then, place it in an airtight container. Make sure to store the tofu and veggies together for the best flavor. Keep it in the fridge for up to three days. If you want to keep it longer, consider freezing. To reheat, use the oven for the best taste. Preheat your oven to 350°F (175°C). Spread the tofu and veggies on a baking sheet. Heat for about 10-15 minutes or until warm. You can also use a microwave, but the oven keeps the texture better. You can freeze this dish, but it's best to freeze the tofu and veggies separately. Place them in freezer bags or airtight containers. They will stay fresh for up to three months. To enjoy, thaw in the fridge overnight before reheating. Yes, you can use different types of tofu. I recommend using firm or extra-firm tofu. Silken tofu may not hold its shape when baked. If you prefer a softer texture, try soft tofu. Just remember to adjust your cooking time. You want the tofu to be nicely crispy on the edges. You can swap in many veggies. For example, carrots, sweet potatoes, or asparagus work well. Cauliflower or Brussels sprouts add a nice touch too. Just keep your cooking times in mind. Some veggies cook faster than others. To make this dish gluten-free, use a gluten-free barbecue sauce. Many brands offer great options. Also, check if your tofu is gluten-free. Most firm tofu is safe, but it’s good to double-check. Yes, you can prepare this dish ahead of time. Marinate the tofu a day before and store it in the fridge. You can also chop the veggies in advance. Just keep them in an airtight container. When you're ready, bake everything together for a quick meal. BBQ tofu with roasted veggies brings great flavor and fun. You learned key ingredients, steps, and helpful tips to make it delicious. Now you can get creative with variations and enjoy leftovers easily. This dish is healthy, tasty, and simple to prepare. Experiment with your favorite veggies and sauces. Enjoy each bite knowing you made a great meal!

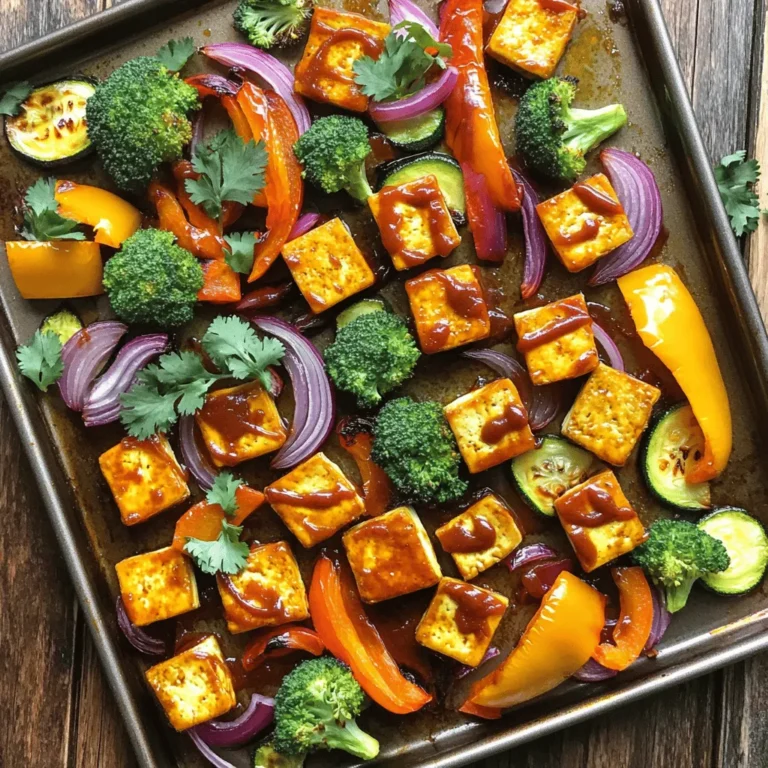
Satisfying Sheet-Pan BBQ Tofu with Roasted Veggies

PREV 1 … 6 7 8 … 18 NEXT
feastful focus

explore

DessertsDinnerAppetizersDrinks

Our Policies

  • Cookie Policy
  • Copyright Policy
  • Disclaimer
  • GDPR Policy
  • Terms Of Use
Back to Top
  • About
  • Contact Us
  • Privacy Policy
© 2025 feastful focus