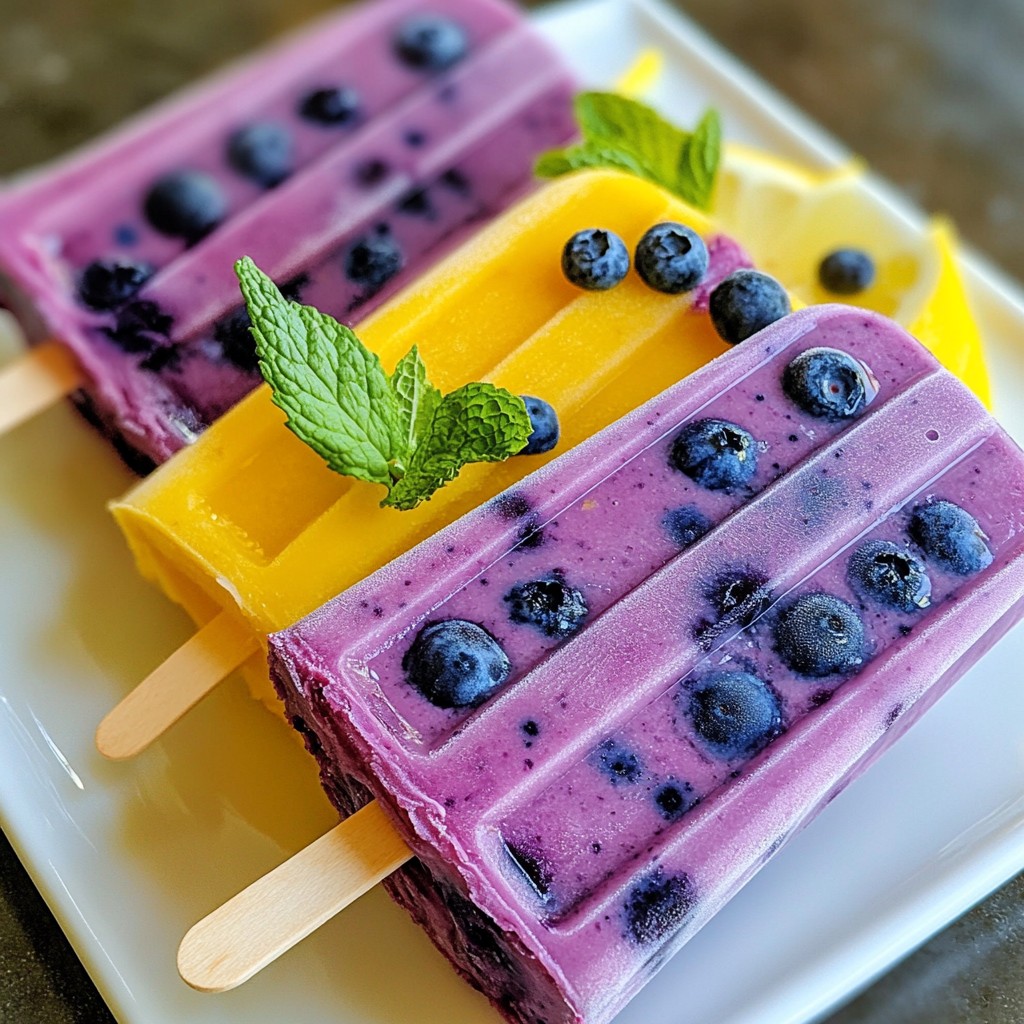
Looking for a cool and tasty summer treat? Blueberry Lemonade Popsicles are the perfect solution! They’re easy to make, refreshing, and bursting with flavor. With just a few simple ingredients like fresh blueberries and tangy lemon juice, you can create a fun and healthy snack for everyone. Join me as we dive into this delicious recipe that will keep you chilling all summer long!
Why I Love This Recipe
- Refreshing Flavor: The combination of blueberries and lemon creates a perfectly balanced sweet and tangy flavor that is incredibly refreshing on hot days.
- Easy to Make: This recipe requires minimal effort and just a handful of ingredients, making it a quick and fun project for anyone, even kids!
- Healthy Treat: Made with fresh fruit and natural sweeteners, these popsicles are a guilt-free treat that everyone can enjoy without compromising on health.
- Customizable: You can easily adjust the sweetness or even add other fruits to the mix, allowing you to personalize each batch to your taste preferences.
Ingredients
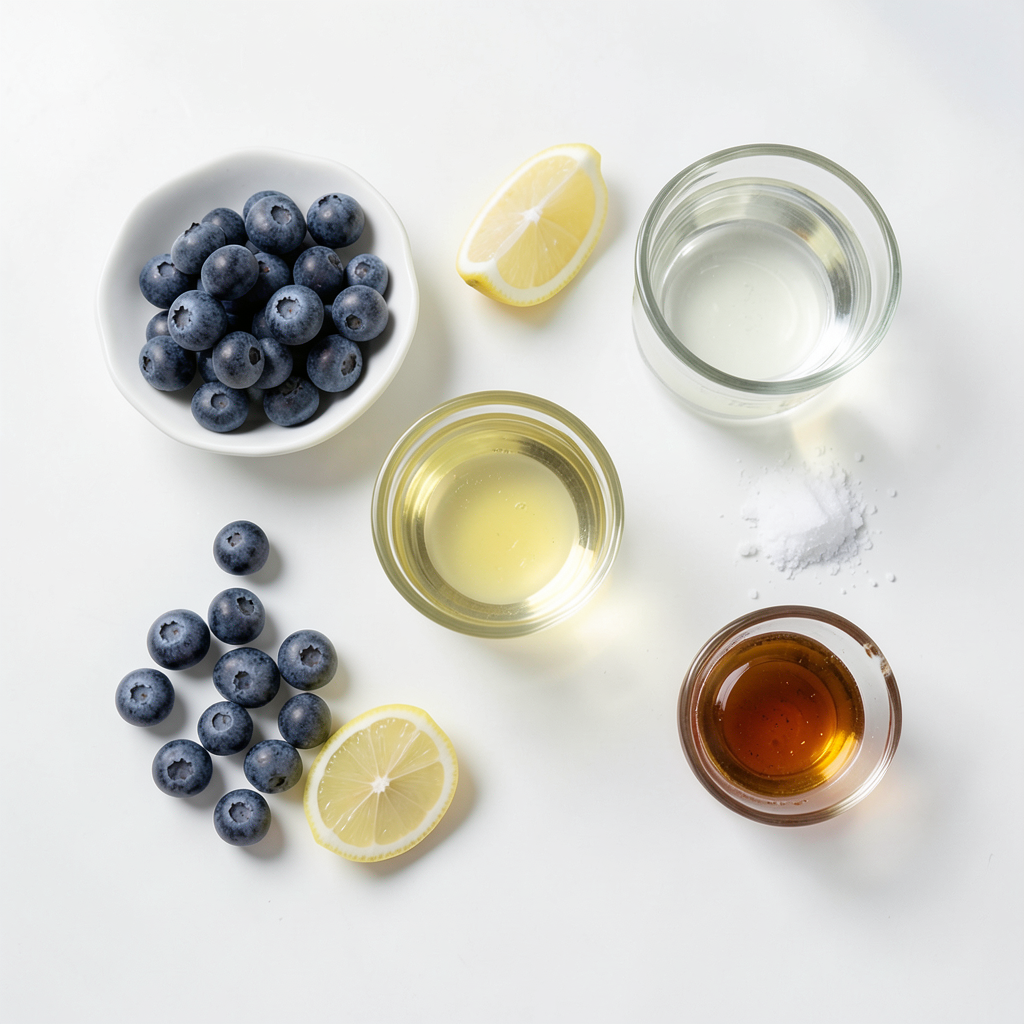
Fresh Blueberries
For these popsicles, you need 2 cups of fresh blueberries. Blueberries bring a sweet and tart flavor that makes the popsicles tasty. They also add a beautiful color. Rinse them well under cold water before use.
Lemon Juice
You will need 1 cup of freshly squeezed lemon juice. This amount comes from about 4-5 lemons. Fresh lemon juice gives the popsicles a zesty kick. It brightens the flavor and balances the sweetness.
Sweeteners (Honey or Agave Syrup)
Use 1/2 cup of honey or agave syrup. You can adjust this amount based on your taste. Honey adds a lovely flavor, while agave syrup is a great vegan option. Both sweeteners enhance the overall taste.
Water
You need 2 cups of water for this recipe. Water helps blend the ingredients smoothly. It also helps achieve the right popsicle texture.
Lemon Zest
Add 1 tablespoon of finely grated lemon zest. This ingredient gives a burst of lemon flavor. It adds depth and makes the popsicles even more refreshing.
A Pinch of Salt
Finally, include a small pinch of salt. Salt helps balance the sweetness. It brings out the flavors of the blueberries and lemon. Just a little goes a long way in enhancing taste.
Step-by-Step Instructions
Rinse the Blueberries
Start with fresh blueberries. Rinse them well under cold water. This step removes dirt and any residue. Make sure they are clean before using them.
Blend Ingredients
Place the rinsed blueberries in a blender. Add one cup of lemon juice. Use fresh juice for the best flavor. Next, add half a cup of honey or agave syrup. Pour in two cups of water and one tablespoon of lemon zest. Finally, add a pinch of salt. Blend on high until smooth. If you want some texture, blend just until it’s a bit chunky.
Adjust Sweetness
Taste the mixture after blending. If it needs more sweetness, add extra honey or agave syrup. Blend briefly to mix in the extra sweetness. This step ensures your popsicles taste just right.
Pour into Molds
Carefully pour the blueberry lemonade mixture into popsicle molds. Leave a little space at the top of each mold. This space allows for the mixture to expand as it freezes. Do not overfill the molds.
Insert Sticks and Freeze
Insert popsicle sticks into the center of each mold. Make sure they are straight and secure. Place the molds in the freezer. Freeze them for at least 4 to 6 hours. Wait until they are solid and firm before removing.
Release Popsicles from Molds
To take the popsicles out, run warm water over the outside of the molds. Do this for about 10 to 15 seconds. This helps loosen the popsicles. Then gently pull them out from the molds. Enjoy your refreshing treat!
Tips & Tricks
Best Blending Techniques
Start with fresh blueberries. Rinse them well to get rid of dirt. When you blend, use a high-speed blender. This makes the mixture smooth. If you want some texture, blend until just slightly chunky. This way, you get little bursts of blueberry in each bite.
Freezing Time Recommendations
After you pour the mixture into molds, freeze them for at least 4-6 hours. This gives them time to become solid. If you want them extra firm, leave them in the freezer longer. Just make sure you don’t forget about them!
Taste Testing for Sweetness
Before pouring the mixture into molds, taste it. If it’s too tart, add more honey or agave syrup. Blend it again briefly to mix. This way, you create a sweet treat that fits your taste. Everyone loves a popsicle that hits the right notes!
Presentation Tips for Serving
When ready to serve, take them out of the molds carefully. Run warm water over the outside for easier release. Place the popsicles on a colorful platter. Garnish with fresh mint leaves or extra blueberries. This not only looks great but adds a refreshing twist. Perfect for summer!
Pro Tips
- Choose Ripe Blueberries: For the best flavor, select ripe, sweet blueberries. Look for berries that are plump, firm, and deep blue in color.
- Adjust Sweetness to Taste: Taste your mixture before freezing. You can easily adjust the sweetness by adding more honey or agave syrup based on your preference.
- Experiment with Zest: Try adding different citrus zests such as lime or orange for a unique twist on the flavor profile of your popsicles.
- Keep Popsicles Smooth: For smoother popsicles, blend your mixture longer until completely smooth, ensuring there are no blueberry chunks left.
Variations
Adding Fresh Herbs (Mint or Basil)
You can boost the flavor of your popsicles with fresh herbs. Mint adds a cool taste, while basil offers a warm twist. Simply chop a handful of your chosen herb and blend it into the mixture before freezing. This little change makes a big difference in taste.
Using Different Fruit Combinations
Feel free to mix up the fruits in this recipe. You can swap blueberries for strawberries, raspberries, or peaches. Each fruit brings a unique flavor. You can even create a mixed fruit popsicle! Just keep the same lemon juice and sweetness for balance.
Alternative Sweeteners
If you want to cut down on sugar, try using different sweeteners. Maple syrup or stevia can work well. Adjust the amount based on your taste. Always taste your mixture before pouring it into molds. This way, you can get your preferred sweetness.
Different Popsicle Mold Ideas
Your popsicle molds do not have to be boring. Use fun shapes like stars or animals. You can even use paper cups for a simple option. Just insert sticks once the mixture is slightly frozen. This makes for a fun and creative way to enjoy your treats!
Storage Info
How to Store Leftover Popsicles
To keep your leftover blueberry lemonade popsicles fresh, place them in a zip-top bag. Make sure to remove as much air as possible before sealing. This helps prevent freezer burn and keeps them tasty.
Freezing Duration for Optimal Quality
For the best flavor and texture, store your popsicles for up to two months. After that, they may lose their taste and become icy. Always label your bags with the date. This way, you know when to enjoy them.
Thawing Tips Before Serving
When you are ready to eat your popsicles, run warm water over the mold for about 10-15 seconds. This makes it easier to pull them out. If they are still stuck, let them sit at room temperature for a minute or two. Enjoy your refreshing treat!
FAQs
How do I know when the popsicles are ready?
To check if your popsicles are ready, feel their firmness. If they feel hard to the touch, they are done. You should freeze them for at least 4-6 hours. If they are still soft or slushy, let them freeze longer.
Can I make these popsicles without sugar?
Yes, you can! Use fruit juice or ripe fruit to add sweetness. You can also try using stevia or monk fruit as natural sweeteners. Adjust the amount according to your taste.
What molds are best for making popsicles?
Silicone molds work great for popsicles. They are flexible, making it easy to remove the popsicles. You can also use plastic molds, but they may be harder to release the popsicles from. Choose molds that fit your freezer well.
How long do homemade popsicles last in the freezer?
Homemade popsicles can last up to 6 months in the freezer. After that, they may lose taste or texture. Wrap them in plastic wrap or store them in an airtight container for best results.
Can I use frozen blueberries instead of fresh?
Yes, you can use frozen blueberries! They work well in this recipe. Just blend them straight from the freezer without thawing. This option can make your popsicles even colder and more refreshing on hot days.
Making homemade popsicles with fresh blueberries is fun and easy. You rinse the blueberries, blend them with lemon juice, and sweeteners, then freeze them in molds. Use tips like taste testing and trying different flavors to make your popsicles unique and tasty. Remember to store leftovers properly for the best quality. With these steps, you can enjoy a refreshing treat that is healthy and delicious. Now, go ahead and make your popsicles! You will love the results.