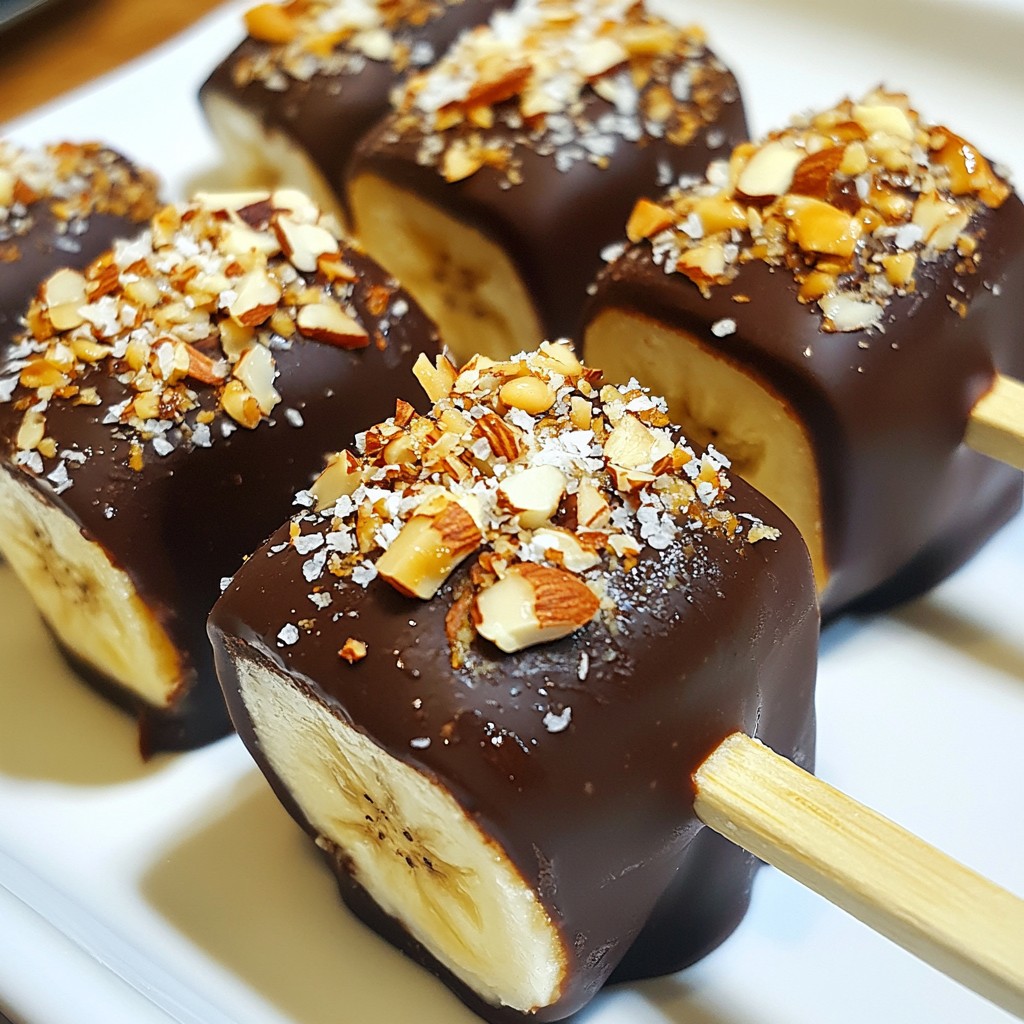
Ready for a sweet treat? Chocolate Covered Banana Pops are fun and so simple to make! In this guide, I'll share a step-by-step recipe that lets you create these tasty snacks in no time. With just a few ingredients, you can enjoy a chocolatey bite that’s both delicious and nutritious. Let’s get started and whip up a batch of these delightful pops!
Why I Love This Recipe
- Deliciously Nutritious: These chocolate-covered banana pops are a perfect blend of sweet and healthy, making them a guilt-free treat.
- Easy to Make: With just a few simple ingredients and quick steps, this recipe is perfect for both novice and experienced cooks.
- Customizable: You can easily personalize these pops with your favorite toppings, such as nuts, coconut, or even sprinkles.
- Perfect for Any Occasion: Whether it’s a summer party or a cozy movie night, these pops are a hit with kids and adults alike!
Ingredients
List of Ingredients
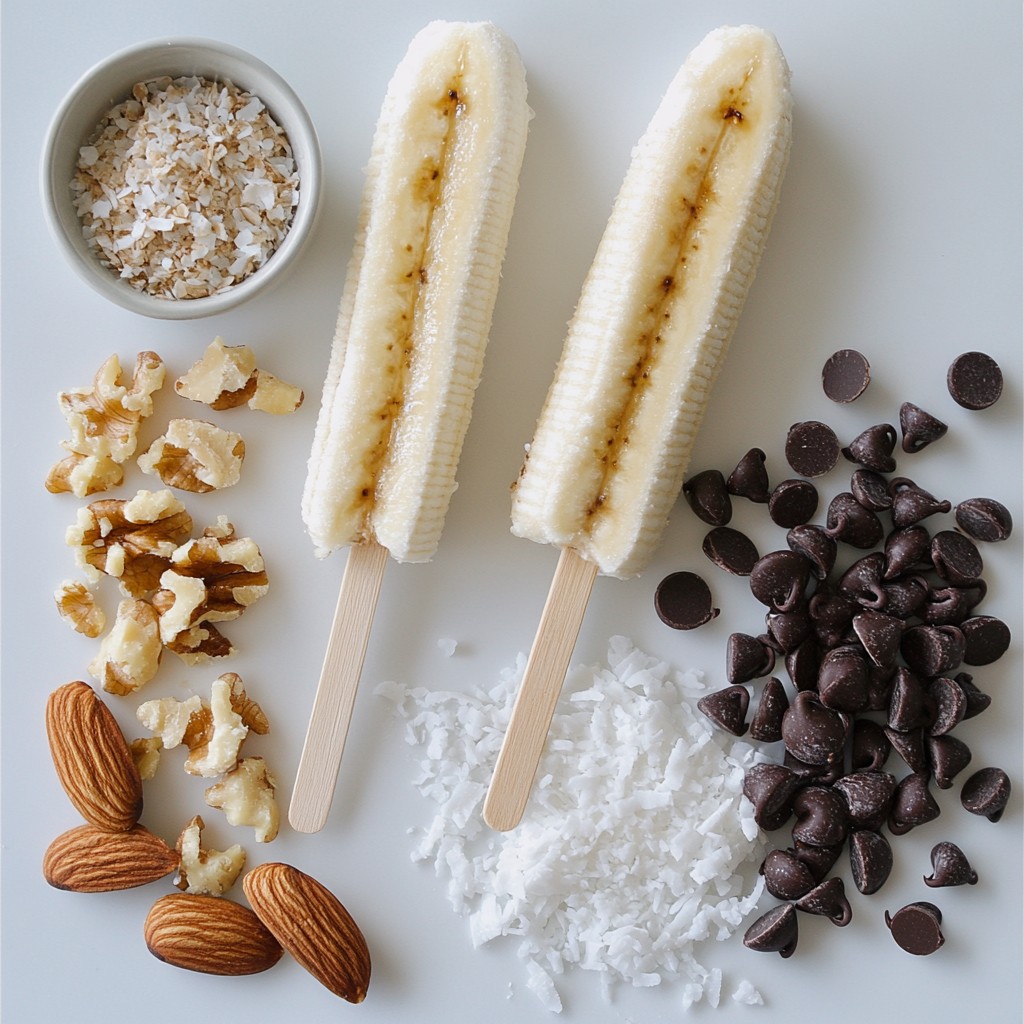
- 2 ripe bananas
- 1 cup dark chocolate chips
- 1 teaspoon coconut oil
- 1/4 cup crushed nuts (such as almonds or walnuts)
- 1/4 cup unsweetened shredded coconut
- 8 popsicle sticks
- Sea salt (optional)
To make chocolate-covered banana pops, start with ripe bananas. They should be sweet and soft. You will also need dark chocolate chips for a rich flavor. Coconut oil helps the chocolate melt smoothly and coat the bananas well. Crushed nuts add a nice crunch. Shredded coconut gives a tropical taste. You can also sprinkle sea salt for a salty-sweet combo. Make sure you have popsicle sticks to hold your tasty treats. These ingredients are simple yet create a fun dessert.
Step-by-Step Instructions
Preparation of Bananas
- First, peel the ripe bananas.
- Slice them in half crosswise.
- Insert a popsicle stick into each banana half. Make sure it goes in deep enough to hold the banana well.
Freezing the Bananas
- Arrange the banana halves on a tray lined with parchment paper.
- Place the tray in the freezer for about 30 minutes. This helps the bananas firm up.
Preparing the Chocolate Coating
- While the bananas freeze, prepare the chocolate.
- In a microwave-safe bowl, mix the dark chocolate chips and coconut oil.
- Heat the bowl in the microwave for 20 seconds at a time. Stir well after each time until the chocolate is smooth and melted.
Dipping and Decorating
- When the bananas are firm, take them out of the freezer.
- Dip each banana pop into the melted chocolate. Make sure to cover it fully.
- Allow any extra chocolate to drip off.
- Right after dipping, sprinkle crushed nuts or shredded coconut on the chocolate part while it’s still wet.
Setting the Chocolate Shell
- Place the decorated banana pops back on the parchment-lined tray.
- If you want, sprinkle a little sea salt on top.
- Return the tray to the freezer for about 1 hour. This lets the chocolate shell set completely.
Tips & Tricks
Achieving the Perfect Chocolate Coating
To get a smooth coat of chocolate, dip each banana pop fully. Start by holding the popsicle stick and submerge the banana in the chocolate. Move it around gently to cover every bite. Let any extra chocolate drop back into the bowl. This step keeps the coating even.
If you find too much chocolate on the banana, gently shake it. You can also tap the stick against the bowl's edge. This helps remove excess chocolate without losing the coating.
Creative Decoration Ideas
You can play with toppings beyond just nuts and coconut. Try crushed cookies, granola, or even mini chocolate chips. These options add crunch and flavor. You can also use colorful sprinkles to make them festive. Kids love sprinkles, and they add a fun look!
Another idea is to drizzle melted chocolate on top for a fancy touch. This looks great and tastes amazing.
Presentation Suggestions
How you serve these banana pops can make a big difference. Use a decorative tray or a rustic wooden board to show them off. For a fun twist, swap the popsicle sticks with colorful paper straws. This adds a playful vibe to your dessert.
You can also drizzle some melted chocolate over the pops just before serving. It makes them look even more tempting and delicious.
Pro Tips
- Use Quality Chocolate: Opt for high-quality dark chocolate for a richer flavor and smoother coating. This will elevate the overall taste of your banana pops.
- Experiment with Toppings: Get creative with your toppings! Try adding mini chocolate chips, sprinkles, or even crushed cookies for a fun twist on the classic recipe.
- Perfect Freezing Time: Ensure the bananas are well-frozen before dipping in chocolate. This helps the chocolate to set quickly and gives a nice, crisp finish.
- Storage Tips: Store the banana pops in an airtight container in the freezer. They can last for up to a week, making them a great make-ahead treat!
Variations
Alternate Chocolate Choices
You can change the chocolate type in this recipe. Use milk chocolate for a sweeter taste. White chocolate offers a creamy flavor that pairs well with bananas. For fun, add flavored extracts like vanilla or mint to the chocolate. This twist makes each bite unique and exciting.
Fruity Twists
Try adding other fruits for a fresh take. Strawberries or pineapple work great with bananas. You can make a fruit trio by combining banana with these fruits. Dip each piece in chocolate for a colorful and tasty treat. This adds variety and flavor to your pops.
Dietary Modifications
Want to make your pops vegan? Use dairy-free chocolate chips instead of regular ones. You can also skip the nuts if you need a nut-free option. For a sweet twist, try sugar substitutes like agave syrup or coconut sugar. These changes keep your banana pops tasty and safe for all diets.
Storage Info
Best Practices for Storing
You can store chocolate covered banana pops in two ways: refrigeration or freezing.
- Refrigeration: If you plan to eat them soon, keep them in the fridge. Just place them in an airtight container. They are best eaten within 2-3 days when stored this way.
- Freezing: For longer storage, freeze the pops. Wrap each one tightly in plastic wrap. Then, put them in a freezer-safe bag. This helps keep them fresh.
To prevent freezer burn, make sure no air is in the bag. You can also use parchment paper to separate the pops if you stack them.
Shelf Life of Chocolate Covered Banana Pops
Chocolate covered banana pops can last a while. When stored in the freezer, they can stay good for about 1-2 months.
- Signs of spoilage: If you notice any ice crystals or a change in color, it’s best to toss them out. Also, if they smell off, do not eat them. Always trust your senses!


FAQs
Can I use frozen bananas for this recipe?
No, frozen bananas do not work well. They become mushy when thawed. Fresh, ripe bananas have the right texture and flavor. Use ripe bananas for the best taste and feel.
How can I make these ahead of time?
You can prepare these banana pops a day ahead. After dipping them in chocolate, freeze them. Keep them covered to prevent freezer burn. When ready to serve, just take them out and enjoy!
What can I substitute for coconut oil?
You can use vegetable oil or butter. Both will help the chocolate melt smoothly. Choose what you have on hand. Each option gives a slightly different flavor.
Are these banana pops healthy?
Yes, they are a fun treat! Bananas are full of vitamins. Dark chocolate has antioxidants, and nuts add protein. Enjoy them in moderation for a tasty snack!
Can I use chocolate bars instead of chocolate chips?
Yes, chocolate bars work great too! Just chop them into small pieces. Melt them the same way as chocolate chips. You will still get that yummy chocolate coating.
In this article, we explored how to make delicious chocolate-covered banana pops. We covered the key ingredients, step-by-step instructions, and helpful tips to nail the coating. You learned about fun variations and important storage info to keep your treats fresh. Overall, making these snacks is easy and fun. Try them for a tasty treat or a creative dessert. Enjoy the process and share them with friends and family!