Looking for a fun and easy party treat? Chocolate Covered Oreo Cake Pops are the perfect choice! These delightful bites combine delicious Oreos and creamy filling, all dipped in rich chocolate. In this guide, I’ll show you how to make these tasty treats step by step. Whether you’re planning a birthday party or just want to impress your friends, these cake pops are sure to be a hit! Let’s get started!
Why I Love This Recipe
- Easy to Make: With just a few simple ingredients, these cake pops come together quickly, making them perfect for any occasion.
- Fun for Everyone: Rolling the cake pops is a fun activity for kids and adults alike, adding a personal touch to each treat.
- Customizable: You can easily customize these cake pops with different types of chocolate, toppings, or even by adding flavor extracts.
- Deliciously Decadent: The combination of creamy cream cheese and rich chocolate makes every bite a delightful indulgence!
Ingredients
List of Ingredients
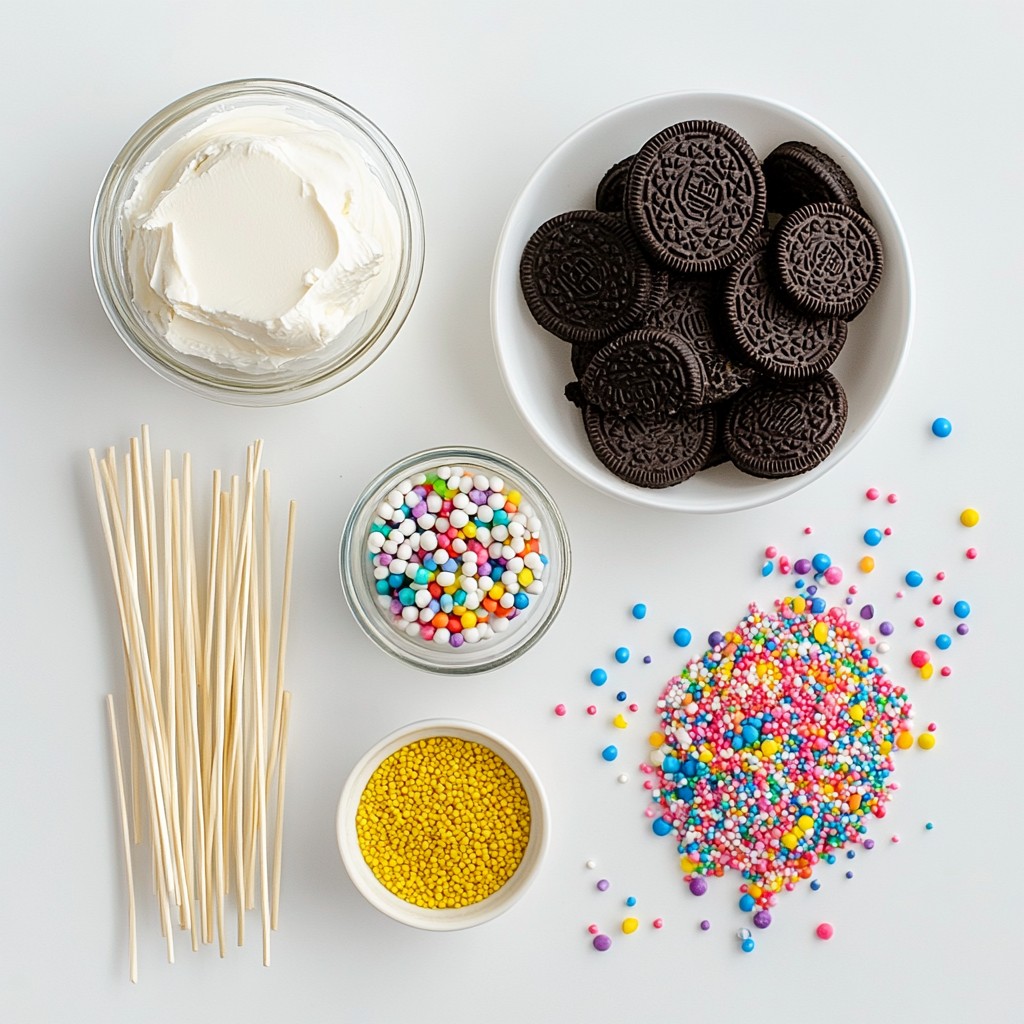
- Oreo cookies
- Cream cheese
- Semi-sweet chocolate chips
- Coconut oil or vegetable oil
- Sprinkles (optional)
- Lollipop sticks
To create these tasty Chocolate Covered Oreo Cake Pops, start with simple ingredients. You will need one package of Oreo cookies. This is about 14 to 15 cookies. Crush them into fine crumbs. You can use a food processor or a zip-lock bag and a rolling pin.
Next, grab 4 ounces of cream cheese. Make sure it is soft. This helps the mixture blend well. Combine the crushed cookies with the cream cheese in a big bowl. Mix until it forms a dough-like blend.
For the chocolate coating, you will need 1 cup of semi-sweet chocolate chips. Melt these in the microwave with 1 tablespoon of coconut oil or vegetable oil. The oil helps the chocolate become smooth.
Sprinkles are optional but fun! Choose your favorite colors for decoration. Lastly, don’t forget lollipop sticks. These will hold your cake pops together.
Now you have everything to make these delightful treats!
Step-by-Step Instructions
Preparation of Oreo Mixture
- Crushing the Oreos: Start by breaking the Oreos into small crumbs. You can use a food processor for a quick job. If you don't have one, put the cookies in a zip-lock bag. Then, smash them with a rolling pin until all pieces are tiny.
- Mixing with cream cheese: In a large bowl, add the crushed Oreos and the softened cream cheese. Mix them well until you get a dough-like texture. Make sure there are no dry bits left. This step makes the cake pop mixture tasty and easy to shape.
Forming and Setting Cake Pops
- Rolling into balls: Take small amounts of the Oreo mixture and roll them into balls. Aim for about 1 inch in size. Place the balls on a baking sheet lined with parchment paper. This makes it easy to clean up later.
- Inserting lollipop sticks: Gently push a lollipop stick into the center of each ball. Be careful not to poke through the other side. Once done, place the tray in the fridge for about 30 minutes. This helps the cake pops firm up.
Melting and Coating
- Melting chocolate with coconut oil: While the cake pops chill, melt the chocolate chips. Put them in a microwave-safe bowl with coconut oil. Heat in 30-second bursts, stirring between each time. Stop when the chocolate is smooth and melted.
- Coating the cake pops: Take the chilled cake pops out of the fridge. Dip each one into the melted chocolate. Make sure they are fully coated. Let any extra chocolate drip back into the bowl.
- Adding sprinkles: If you want to add sprinkles, do this while the chocolate is still warm. The heat will help the sprinkles stick well. You can use any color or type to match your party theme.
These steps will guide you to create fun and tasty Chocolate Covered Oreo Cake Pops that everyone will love!
Tips & Tricks
Achieving Perfect Cake Pops
To make great cake pops, you need a good dough. Start by mixing the crushed Oreos with cream cheese. The mix should feel like playdough. If it is too dry, add a bit more cream cheese. If too wet, add more crushed Oreos.
For even coating, dip each cake pop straight down into the melted chocolate. Then, lift it straight up. This avoids clumps and helps the chocolate flow evenly.
Decorating Ideas
Sprinkles add fun and color. You can use different types, like rainbow or chocolate sprinkles. Try adding crushed nuts or coconut flakes for a twist. You can even drizzle white chocolate on top for style.
Common Mistakes to Avoid
One big mistake is overheating the chocolate. Heat it in short bursts. Stir after each round to avoid burning.
Also, don’t skip chilling the mixture. If it’s not cold enough, the cake pops can fall apart when you dip them. Chilling helps keep their shape and makes coating easier.
Pro Tips
- Crush Oreos Thoroughly: Ensure that the Oreo cookies are crushed into fine crumbs for a smooth cake pop texture. Large chunks can lead to uneven coating and compromised stability.
- Chill Before Coating: Don’t skip the chilling step! Allowing the formed cake pops to chill for at least 30 minutes helps them hold their shape when dipped in warm chocolate.
- Use Quality Chocolate: Choose high-quality chocolate chips or melting chocolate for the best flavor and coating. This makes a significant difference in the overall taste of the cake pops.
- Decorate Quickly: Apply sprinkles or other decorations immediately after coating the cake pops in chocolate. The warm chocolate helps the toppings adhere better.
Variations
Flavor Enhancements
You can easily boost the flavor of your cake pops. Adding extracts like vanilla or peppermint can make a big difference. Just a teaspoon of extract can give your treats a fun twist.
Using flavored cream cheese is another great idea. You can find cream cheese with flavors like strawberry or chocolate. This change adds a new layer of taste that makes your cake pops even more special.
Alternative Chocolate Coatings
While semi-sweet chocolate is a classic choice, consider using white chocolate. It gives a sweet, creamy taste that pairs well with Oreos. You can also use milk chocolate if you want a richer flavor. Each option brings its own charm to your cake pops.
Different Cookie Bases
Why stick to Oreos? You can use other cookie types too. Chocolate chip cookies make a tasty base. If you love peanut butter, try using peanut butter cookies. Each cookie type brings a unique flavor and texture, making every bite exciting.
Storage Info
How to Store Cake Pops
- At room temperature: You can keep your cake pops at room temperature for up to two days. Place them in a cool, dry spot. Use a container with a lid to keep them fresh. Avoid direct sunlight or heat, as these can melt the chocolate coating.
- In the refrigerator: For longer storage, place the cake pops in the fridge. They will stay fresh for up to one week. Store them in an airtight container to prevent moisture and odors from affecting their taste.
Freezing Instructions
- Steps for freezing cake pops: To freeze cake pops, first let them cool completely after coating them in chocolate. Then, place them on a baking sheet, spaced apart. Freeze for about 1-2 hours until solid. Once frozen, transfer them to a freezer-safe bag or container. Label the bag with the date to keep track.
- Best practices for thawing: When you're ready to eat them, take the cake pops out of the freezer. Leave them in the fridge overnight to thaw. This method helps keep the chocolate from sweating and makes them taste fresh.
Shelf Life
- Duration for freshness: Cake pops last about 3 days at room temperature and up to one week in the fridge. If frozen, they can stay good for up to 3 months.
- Signs of spoilage: Check for any changes in color or smell. If the chocolate looks dull or the cake pops feel sticky, it's best to toss them. Always trust your senses to ensure your treats are safe to eat.
FAQs
Can I use reduced-fat cream cheese?
Yes, you can use reduced-fat cream cheese. It works well in this recipe. The flavor will be a bit lighter. However, the texture may be less creamy. This change can make the cake pops slightly less rich but still tasty.
What can I substitute for coconut oil?
You can use vegetable oil instead of coconut oil. It has a neutral flavor and works fine. Other options include canola or grapeseed oil. These oils will not change the taste much. Just remember to use a similar amount in the recipe.
How long do the cake pops last?
Cake pops last about 5 days at room temperature. Store them in an airtight container. If you keep them in the fridge, they can last up to 10 days. Always check for any signs of spoilage before enjoying them.
You now have all the tools to create delicious Oreo cake pops. We covered ingredients, preparation steps, and tips for the best results. Remember to chill your mixture well and check for consistency. Feel free to get creative with flavors and toppings. These treats can brighten any occasion or simply bring joy to your day. Enjoy making and sharing your cake pops, and watch as they delight family and friends. Happy baking!