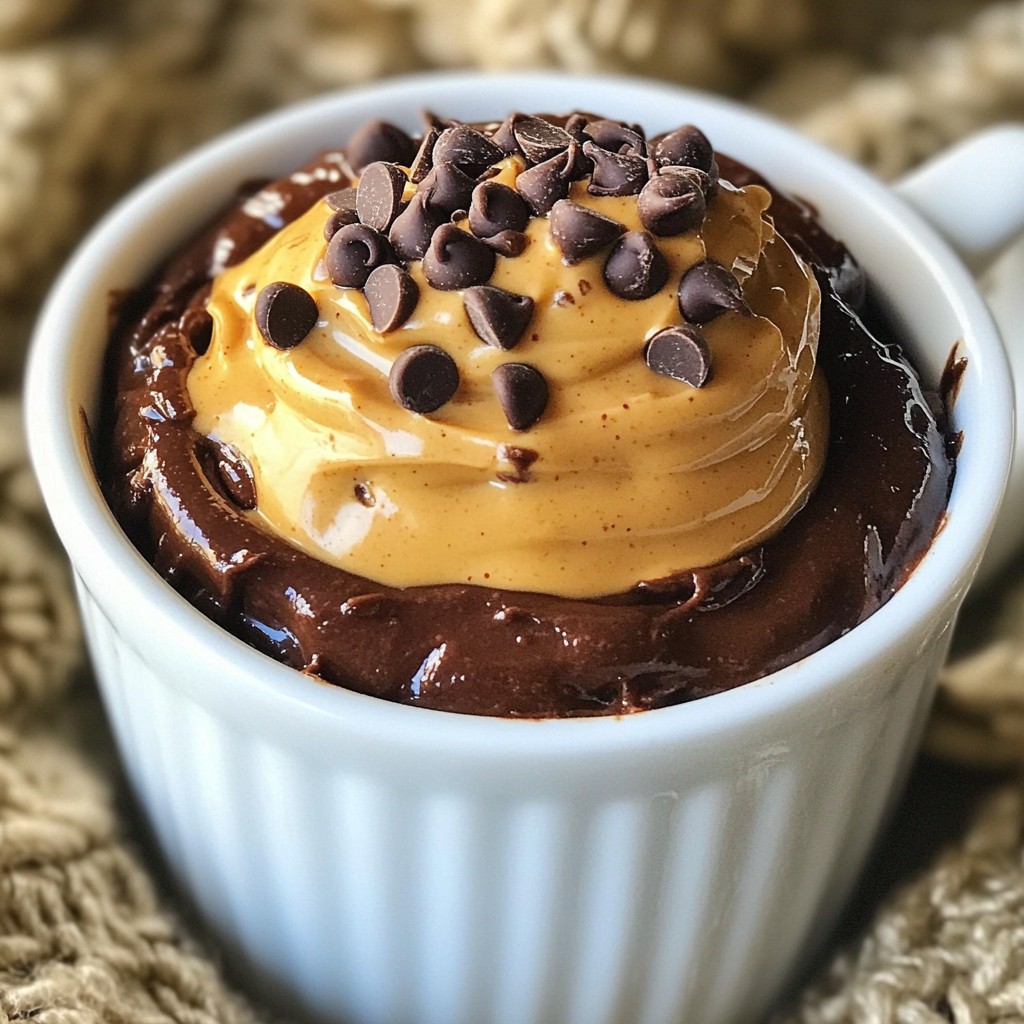
Craving something sweet but short on time? You’re in luck! This Chocolate Peanut Butter Mug Cake is a quick and easy treat that hits the spot. In just a few minutes, you can create a moist, delicious dessert that's perfect for any chocolate lover. Join me as we explore simple ingredients and easy steps to whip up this mouthwatering mug cake. Let's satisfy that sweet tooth right now!
Why I Love This Recipe
- Quick and Easy: This mug cake can be whipped up in under 5 minutes, making it the perfect last-minute dessert or snack.
- Decadent Flavor: The combination of chocolate and peanut butter creates a rich, indulgent flavor that satisfies any sweet tooth.
- Customizable: Add ingredients like chocolate chips or nuts for a personalized touch, tailoring it to your taste preferences.
- Single Serving: This recipe yields just one mug cake, allowing you to indulge without the temptation of leftovers.
Ingredients
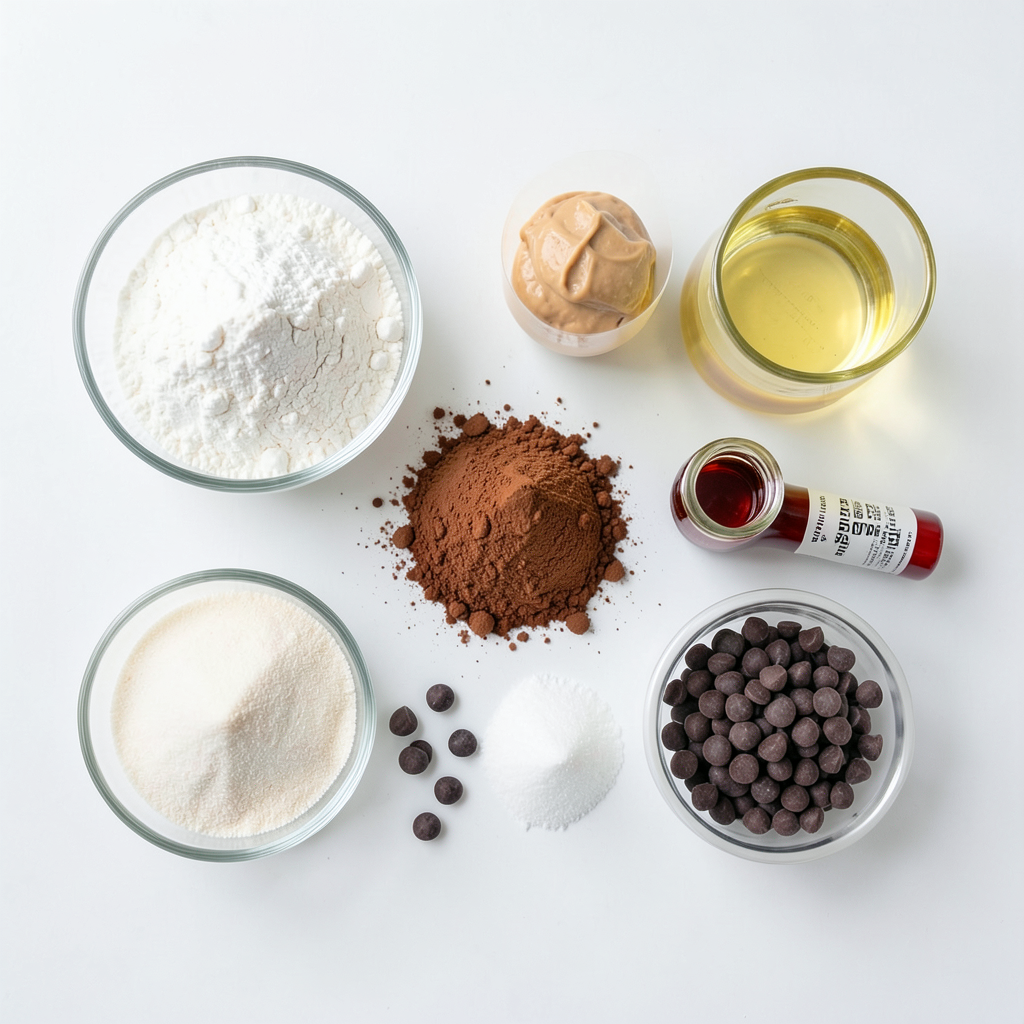
List of Ingredients
- 4 tablespoons all-purpose flour
- 1 tablespoon unsweetened cocoa powder
- 1/4 teaspoon baking powder
- 3 tablespoons granulated sugar
- 1/8 teaspoon salt
- 3 tablespoons milk (or a dairy-free option)
- 1 tablespoon vegetable oil
- 1 tablespoon creamy peanut butter
- 1/2 teaspoon vanilla extract
- Optional: a handful of chocolate chips
Measurement Details
Each ingredient plays a key role. The flour gives structure, while cocoa adds rich flavor. Baking powder helps the cake rise. Sugar sweetens the treat, and salt enhances taste. Milk keeps it moist, and oil adds softness. Peanut butter gives that creamy texture. Finally, vanilla adds a sweet aroma.
Optional Add-ins and Substitutions
Feel free to mix things up! You can swap all-purpose flour for almond flour for a gluten-free version. Use maple syrup instead of granulated sugar for a healthier option. You can also replace peanut butter with almond or sun butter if you have allergies. Consider adding nuts or extra chocolate chips for more flavor.
Step-by-Step Instructions
Preparation of Dry Ingredients
First, grab a microwave-safe mug. It should hold about 12 oz. Add these dry ingredients:
- 4 tablespoons all-purpose flour
- 1 tablespoon unsweetened cocoa powder
- 1/4 teaspoon baking powder
- 3 tablespoons granulated sugar
- 1/8 teaspoon salt
Use a fork or a small whisk to mix them well. Stir until there are no clumps. This step is key for a smooth cake.
Combining Wet Ingredients
Now, it’s time to add the wet ingredients. Pour in:
- 3 tablespoons milk (or your favorite dairy-free alternative)
- 1 tablespoon vegetable oil
- 1 tablespoon creamy peanut butter
- 1/2 teaspoon vanilla extract
Mix these ingredients together. Stir until you have a smooth batter. Take your time here to ensure there are no flour lumps. A well-mixed batter makes for a better cake.
Mixing and Cooking the Batter
If you like extra chocolate, fold in a handful of chocolate chips now. They add a nice touch! Place your mug in the microwave. Cook it on high for about 1 minute and 30 seconds.
Watch closely while it cooks. Every microwave is different. The cake is ready when it rises and feels set in the center. When the time is up, carefully take the mug out. It will be hot! Let the mug cake cool for about one minute before enjoying it.
Tips & Tricks
Microwave Cooking Tips
Cooking in the microwave is fast and fun. Use a mug that holds at least 12 oz. This prevents spills while cooking. Start with one minute and thirty seconds. Check the cake often. Microwaves heat differently, so adjust the time as needed. If the cake is not done, add ten more seconds.
Achieving the Perfect Texture
To get a soft and moist cake, mix well. Ensure no flour lumps remain in the batter. The batter should be smooth and creamy. For extra fluffiness, use fresh baking powder. Avoid overcooking; it makes the cake dry. The center should feel set but still soft when done.
Presentation Suggestions
Make your mug cake look special! Top it with a dollop of creamy peanut butter. A swirl of whipped cream also adds flair. Try a sprinkle of chopped peanuts for crunch. Extra chocolate chips on top can give a tasty finish. Serve it warm with a spoon for a cozy dessert.
Pro Tips
- Use a Large Mug: Choosing a larger mug helps prevent overflow during cooking, ensuring a mess-free experience.
- Experiment with Flavors: Feel free to swap vanilla extract for almond extract or add a pinch of cinnamon for a unique twist.
- Check Microwave Power: Since microwaves vary, start with shorter cooking times and add seconds as needed to avoid overcooking.
- Store Leftovers Wisely: If you have any leftover mug cake, keep it covered in the fridge for up to two days, and reheat gently in the microwave.
Variations
Different Flavor Additions
You can change up the flavor of your chocolate peanut butter mug cake in fun ways. Try adding a pinch of cinnamon for warmth. You can also mix in a tablespoon of instant coffee for a mocha twist. If you love fruit, mashed bananas or applesauce can add moisture and flavor. Just keep the same wet and dry ratios for best results.
Dietary Adjustments (Gluten-Free, Vegan, etc.)
If you want a gluten-free version, use a gluten-free flour blend instead of all-purpose flour. For a vegan option, swap the milk for almond milk or oat milk, and use a plant-based oil. You can find vegan chocolate chips too, which work great. Just make sure any substitutes fit your dietary needs.
Toppings and Serving Ideas
Toppings make your mug cake even better. A dollop of creamy peanut butter on top adds richness. You could also use whipped cream for a light touch. Sprinkle chopped peanuts or extra chocolate chips for a crunchy finish. Serve it warm right in the mug for a cozy dessert.
Storage Info
How to Store Leftovers
If you have leftover chocolate peanut butter mug cake, store it in an airtight container. This keeps the cake fresh and moist. You can also cover the mug with plastic wrap. If you want to save it for later, let it cool first. Store it in the fridge for up to two days.
Reheating Suggestions
When you're ready to enjoy your leftover mug cake, you can easily reheat it. Place the mug in the microwave for about 20 seconds. Check if it’s warm enough. If it needs more time, heat it in 10-second bursts. This keeps it from getting too hot.
Shelf Life Considerations
The shelf life of your chocolate peanut butter mug cake is short. It’s best to eat it within two days for the best flavor and texture. If you freeze it, it can last up to a month. Just remember to thaw it in the fridge before reheating. This way, you can still enjoy this delicious treat later on!
FAQs
Can I make this mug cake in the oven?
Yes, you can! To bake this cake in the oven, use a small oven-safe dish. Preheat your oven to 350°F (175°C). Pour the batter into the dish and bake for about 15-20 minutes. Check for doneness with a toothpick. If it comes out clean, your cake is ready!
What can I use instead of peanut butter?
If you need a substitute for peanut butter, try almond butter or sunflower seed butter. Both options work well and still provide a rich, nutty flavor. If you want a nut-free version, try using a thick Greek yogurt or a banana for moisture.
How do I prevent the cake from overflowing in the microwave?
To avoid overflow, use a larger mug, at least 12 oz. Fill the mug only halfway with batter to give it room to rise. Keep an eye on the cake while it cooks, and stop the microwave if it looks like it's about to spill over. You can always add a few extra seconds later if needed!
You learned about the key ingredients for the mug cake, along with their measurements. We discussed how to prepare your batter step-by-step. The tips shared help with microwave cooking, texture, and presentation ideas. Variations offer options for different diets and tastes. Finally, proper storage keeps your leftovers fresh.
Now you can create your own delicious mug cake. Enjoy the process and get creative with flavors. Baking should be fun and easy!