Are you ready to elevate your dessert game? Key Lime Pie Bars are a delightful twist on the classic treat, boasting that perfect balance of tangy and sweet. I’ll walk you through the essential ingredients, easy step-by-step instructions, and clever tips that will ensure your bars come out just right. Whether you crave a simple dessert or want to impress guests, these bars are sure to satisfy. Let’s dive in!
Why I Love This Recipe
- Bright and Zesty Flavor: These Key Lime Pie Bars deliver a refreshing burst of citrus that’s perfect for any occasion, making them a crowd favorite.
- Easy to Make: With simple ingredients and straightforward steps, this recipe is perfect for both novice and experienced bakers.
- Great for Sharing: Cut into bar form, they’re easy to serve and share at gatherings, picnics, or parties.
- Customizable Toppings: Add your personal touch with whipped cream, lime slices, or fresh mint for an extra special presentation.
Ingredients
Essential Ingredients for Key Lime Pie Bars
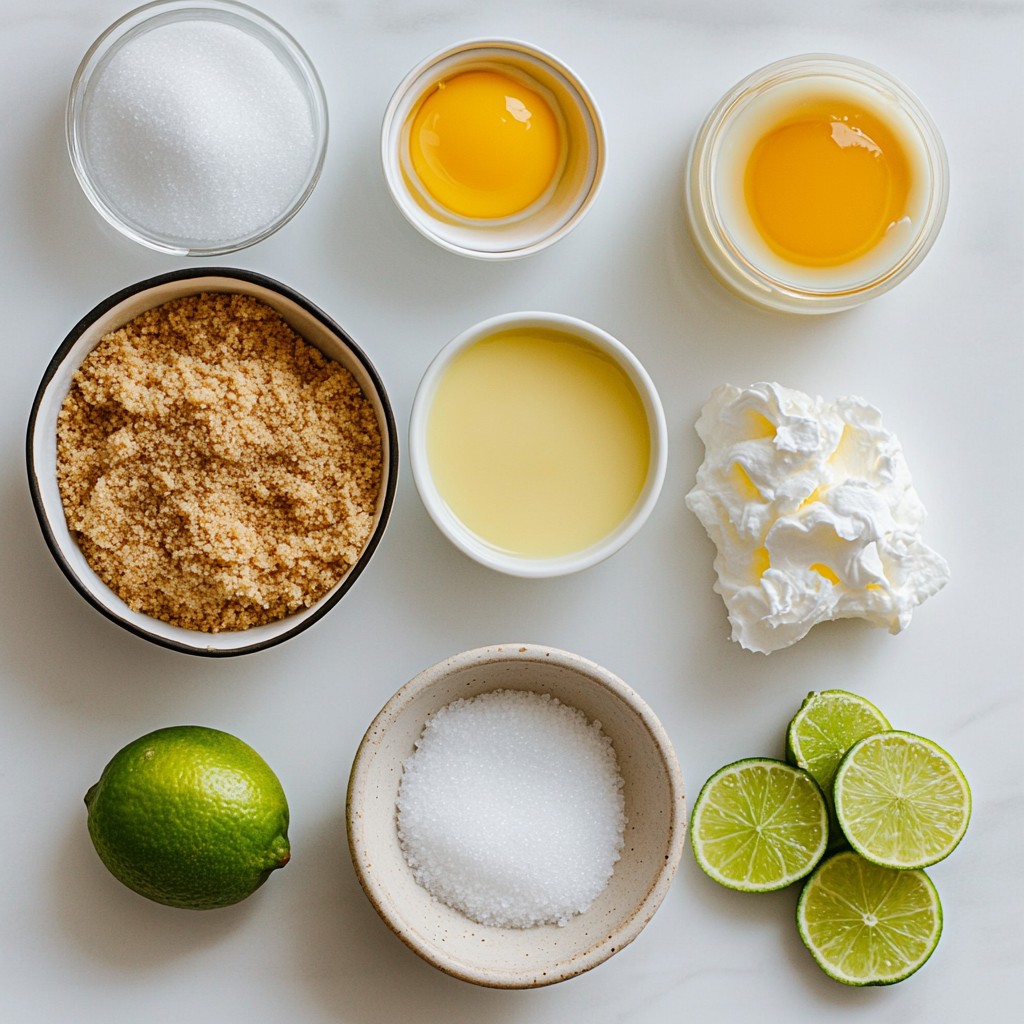
To make delicious key lime pie bars, you need a few key ingredients. Here’s what you will need:
- 1 cup graham cracker crumbs
- 1/4 cup granulated sugar
- 1/2 cup unsalted butter, melted
- 1 (14 oz) can sweetened condensed milk
- 1/2 cup fresh key lime juice
- 1 tablespoon lime zest
- 3 large egg yolks
- 1/4 teaspoon salt
- Whipped cream, for serving
- Lime slices, for garnish
These ingredients create a perfect balance of sweet and tangy flavors. The graham cracker crust is buttery and crumbly. The filling is zesty and creamy. Each bite will make your taste buds dance with joy.
Tips for Selecting Fresh Key Limes
When choosing key limes, look for small, firm limes. They should feel heavy for their size. This weight means they are juicy. The skin should be bright green and smooth, not dull or blemished. If you can find them, smell them! Fresh key limes have a sweet, citrus scent.
You might also find key lime juice in a bottle. While it’s convenient, fresh juice always tastes better. To get the best flavor, squeeze the limes just before using them.
Recommended Substitutes for Ingredients
If you can’t find some ingredients, don’t worry! Here are some substitutes you can use:
- Graham cracker crumbs: Use crushed digestive biscuits or vanilla wafer cookies.
- Unsalted butter: You can use coconut oil or margarine in equal amounts.
- Sweetened condensed milk: Try using evaporated milk mixed with sugar.
- Fresh key lime juice: Regular limes work, but the taste will change slightly.
These swaps will keep your key lime pie bars tasty. Enjoy experimenting with different flavors!
Step-by-Step Instructions
Preparation: Oven and Pan Setup
First, preheat your oven to 350°F (175°C). This step is key for even baking. While it heats, get an 8x8-inch baking pan. Grease it or line it with parchment paper. If you use parchment, leave some hanging over the sides. This helps lift the bars out later.
Making the Graham Cracker Crust
In a medium bowl, mix 1 cup of graham cracker crumbs with 1/4 cup of granulated sugar. Then, pour in 1/2 cup of melted unsalted butter. Stir until the crumbs look like wet sand. Next, press this mixture into your prepared pan. Use your hands or a glass bottom to make it even. Bake the crust for about 10 minutes. It should be lightly golden and smell great. After baking, let it cool for a few minutes.
Preparing the Key Lime Filling
Now, grab a large bowl. Whisk together a 14-ounce can of sweetened condensed milk, 1/2 cup of fresh key lime juice, 1 tablespoon of lime zest, 3 large egg yolks, and 1/4 teaspoon of salt. Mix until smooth, making sure there are no lumps. This mixture is what makes your bars tangy and sweet.
Baking and Cooling Process
Carefully pour the lime filling over the cooled crust. Use a spatula to spread it evenly across the crust. Place the pan back in the oven and bake for 15 to 20 minutes. The edges should be set, but the center may jiggle a bit. Once done, take it out and let the bars cool to room temperature.
Chilling for Firmness
After the bars cool, put them in the fridge. Let them chill for at least 2 hours. This helps them firm up for nice, clean slices. When you’re ready, lift the bars out using the parchment paper overhang. Slice them into squares.
Final Serving Tips
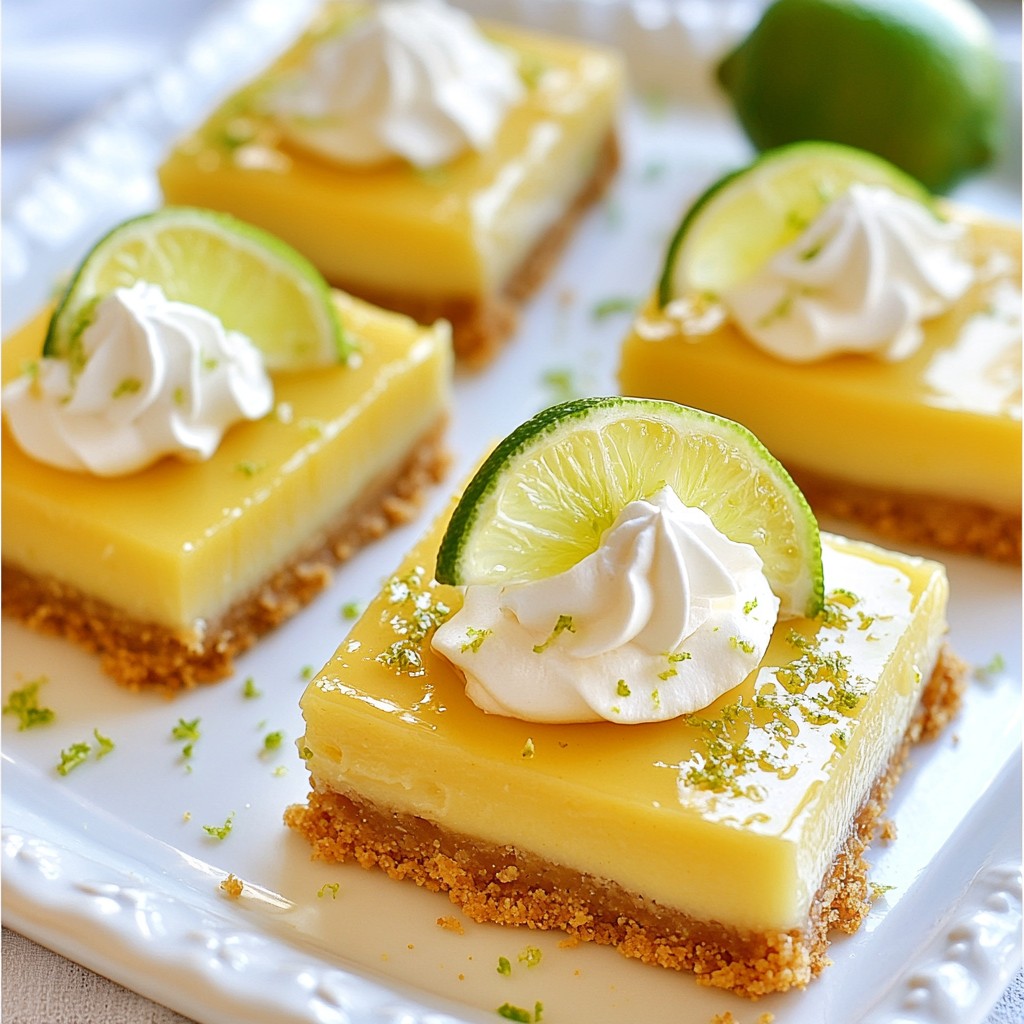
Serve these zesty bars cold. Top each piece with a dollop of whipped cream. Add a slice of lime for extra flair. For a nice touch, arrange the bars on a pretty platter. Sprinkle more lime zest on top and add fresh mint leaves for color and aroma. Enjoy your delightful treat!
Tips & Tricks
How to Achieve the Perfect Crust
To make the best crust, start with fresh graham cracker crumbs. You can crush them yourself for a finer texture. Mix the crumbs with sugar and melted butter. This mix should feel like wet sand. Press it firmly into the pan for a solid base. Bake it until it’s golden, which takes about 10 minutes. Let it cool before adding the filling. A well-made crust holds the bars together and adds flavor.
Ensuring a Smooth Filling
A smooth filling starts with good mixing. Whisk the sweetened condensed milk, key lime juice, lime zest, and egg yolks well. Make sure there are no lumps. This step is key for a nice texture. Use fresh key lime juice for the best taste. If you want even more flavor, add a bit of lime zest. This adds a nice touch to your filling and keeps it bright and zesty.
Serving Suggestions and Presentation Ideas
When serving, slice the bars into even squares. Place them on a nice platter. Top each bar with whipped cream and a slice of lime. For extra flair, sprinkle lime zest on top. You can also add fresh mint leaves for color. These small touches make your dessert look stunning and appetizing.
Common Baking Mistakes to Avoid
One mistake is not cooling the crust enough. If it’s warm, the filling can melt and mix in. Another mistake is overbaking the filling. It should jiggle slightly in the center when done. Lastly, don’t skip chilling the bars after baking. This step ensures they firm up for clean slicing. Avoiding these mistakes helps you make perfect key lime pie bars every time!
Pro Tips
- Use Fresh Ingredients: For the best flavor, always opt for fresh key limes instead of bottled juice. The difference in taste is remarkable!
- Chill for Better Texture: After baking, allow the bars to chill in the refrigerator for at least 2 hours. This helps them set properly and makes slicing easier.
- Garnish Creatively: Enhance the presentation by adding lime zest and fresh mint leaves on top before serving. It adds a pop of color and a refreshing aroma.
- Don’t Overbake: Keep an eye on the filling while it bakes; it should be slightly jiggly in the center when you take it out. Overbaking can lead to a tough texture.
Variations
Alternative Flavorings for Key Lime Pie Bars
You can switch up the flavor of your Key Lime Pie Bars. Instead of key limes, try using regular limes or lemons. This gives a fresh twist. Add a splash of coconut milk for a tropical taste. You can also mix in a bit of orange juice for a bright citrus blend. Each of these options brings a new twist to the classic recipe.
Gluten-Free Crust Options
If you need a gluten-free option, use almond flour or gluten-free graham crackers. Combine the flour with sugar and melted butter just like the original crust. Press it firmly into your pan. This way, you can enjoy the same great taste without gluten. Always check labels to ensure all ingredients are gluten-free.
Vegan Key Lime Pie Bars Recipe
To make vegan Key Lime Pie Bars, replace the eggs with flaxseed meal. Use 1 tablespoon of flaxseed mixed with 2.5 tablespoons of water for each egg. For the filling, switch sweetened condensed milk with coconut cream. Mix it with fresh lime juice and zest for flavor. This keeps the bars creamy without dairy. The result is a delicious vegan dessert everyone can enjoy.
Storage Info
How to Store Key Lime Pie Bars
To store your key lime pie bars, place them in an airtight container. Keep them in the fridge. This helps maintain their tangy flavor and creamy texture. Make sure to cover the bars with plastic wrap or foil if you don’t have a container. This will prevent them from absorbing other odors from the fridge.
Best Practices for Freezing
If you want to freeze key lime pie bars, you can do so! First, let them cool completely. Once cooled, slice the bars into squares. Wrap each square in plastic wrap, then place them in a freezer-safe bag. This helps keep them fresh and prevents freezer burn. They can last up to three months in the freezer. When you're ready to eat them, simply thaw overnight in the fridge.
Shelf Life and Freshness Tips
Key lime pie bars can stay fresh in the fridge for about five days. After that, they may lose some of their flavor and texture. To check freshness, look for any changes in color or smell. If they smell off, it’s best to throw them away. Always remember to keep them covered to maintain their delightful taste.
FAQs
What is the difference between key lime pie and key lime pie bars?
Key lime pie is a classic dessert in a pie crust. It has a smooth filling and is often topped with meringue or whipped cream. Key lime pie bars, on the other hand, are baked in a square pan. They have a similar filling but are cut into bars. This makes them easier to serve and share.
Can I use regular limes instead of key limes?
Yes, you can use regular limes. However, key limes have a unique taste. They are more tart and aromatic. Regular limes will give you a different flavor, but the bars will still be tasty.
How do I know when the bars are done baking?
The bars are done when the edges are set. The center should still jiggle slightly. This means they are not overcooked. Let them cool completely after baking.
Can I make key lime pie bars ahead of time?
Yes, you can make them ahead. They taste great after chilling in the fridge. Prepare them a day before your event for best results. Just keep them covered to stay fresh.
How do I garnish key lime pie bars for serving?
Garnish with whipped cream on top. You can also add lime slices for color. A sprinkle of lime zest looks nice and adds flavor. Fresh mint leaves are a great touch too!
Key lime pie bars are simple yet delightful. We covered essential ingredients, baking steps, and useful tips. Selecting fresh key limes and mastering the crust are key to your success. Remember, variations and storage tips help you enjoy these bars longer.
With practice, you’ll create a dessert that impresses your friends and family. Enjoy your baking journey and savor each bite of your key lime pie bars!