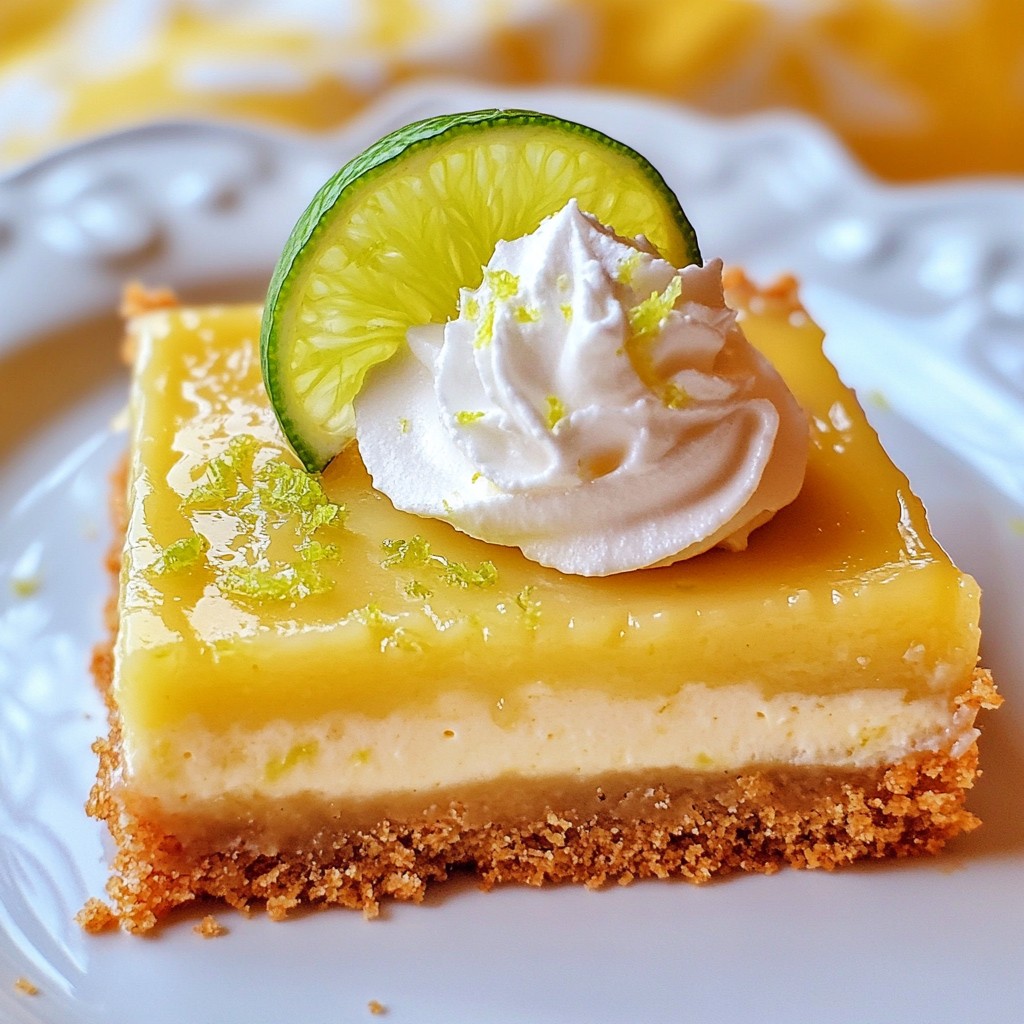
Are you ready for a delicious twist on a classic dessert? These Key Lime Pie Bars are simple to make and bursting with flavor. With a crunchy crust, creamy filling, and zesty lime notes, this sweet treat is perfect for any occasion. Follow my easy step-by-step guide to whip up these mouthwatering bars. Let’s dive in and bring this refreshing dessert to life in your kitchen!
Why I Love This Recipe
- Refreshing Flavor: The zesty key lime juice gives these bars a bright and refreshing taste that is perfect for any occasion.
- Easy to Make: This recipe is straightforward and only requires a few simple ingredients, making it accessible for bakers of all levels.
- Perfectly Balanced: The combination of sweet and tart flavors creates a delightful balance that is sure to please your taste buds.
- Chill Factor: These bars are best served chilled, making them a refreshing dessert option, especially in warm weather.
Ingredients
Detailed Ingredient List
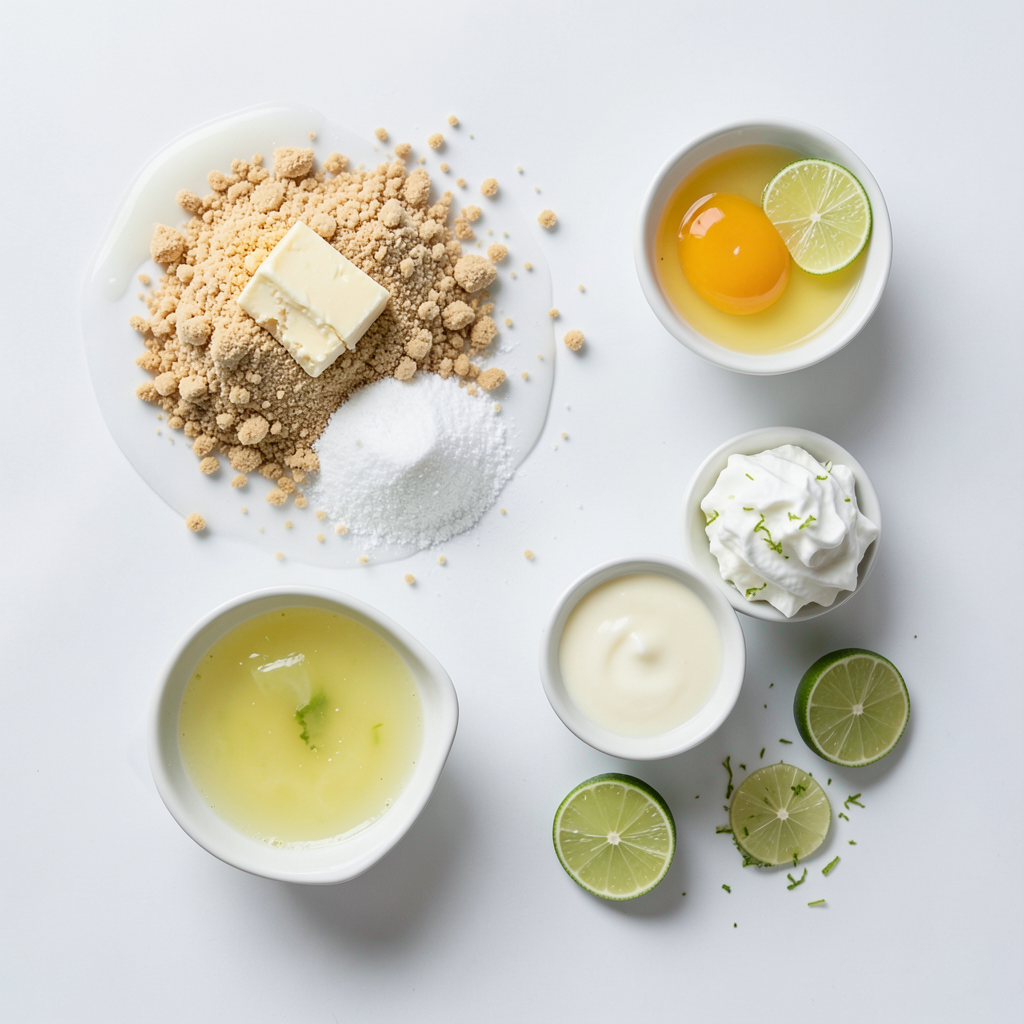
- 1 ½ cups graham cracker crumbs
- ½ cup unsalted butter, melted
- ⅓ cup granulated sugar
- 2 cups sweetened condensed milk
- ½ cup fresh key lime juice (about 10-12 small key limes)
- 3 large egg yolks
- Zest from 2 key limes
- Whipped cream for topping
- Thin slices of lime for garnish
Gather all these items before you start. The graham cracker crumbs form the base of your bars. The unsalted butter adds richness and helps hold the crust together. Granulated sugar sweetens the crust just right.
Next, you need sweetened condensed milk. This gives the filling a creamy texture and sweetness. Fresh key lime juice brings that iconic tangy flavor. Don't forget the egg yolks; they help thicken the filling. The zest from key limes adds a punch of flavor.
For serving, whipped cream is a must. It contrasts nicely with the tartness of the bars. Thin lime slices make a lovely garnish that adds a pop of color and taste. Enjoy making your Key Lime Pie Bars with these fresh and simple ingredients!
Step-by-Step Instructions
Preparing the Crust
1. Preheat your oven to 350°F (175°C).
2. In a bowl, mix together:
- 1 ½ cups graham cracker crumbs
- ½ cup unsalted butter, melted
- ⅓ cup granulated sugar
3. Stir until the mix is crumbly and well combined.
4. Grease a 9x9-inch baking dish.
5. Press the crumb mixture firmly into the dish's bottom.
6. Bake for 8-10 minutes until golden.
7. Let it cool for a few minutes.
Making the Filling
1. In a large bowl, combine:
- 2 cups sweetened condensed milk
- ½ cup fresh key lime juice
- 3 large egg yolks
- Zest from 2 key limes
2. Whisk the ingredients until the mixture is smooth and blended.
Baking the Bars
1. Pour the filling over the cooled crust.
2. Spread it evenly with a spatula.
3. Bake for 15-20 minutes until set around the edges.
4. The center should still jiggle slightly.
Chilling and Serving
1. Allow the bars to cool to room temperature.
2. Place them in the fridge for at least 3 hours.
3. Once chilled and firm, cut into squares.
4. Serve with whipped cream and a lime slice on top.
Tips & Tricks
Perfecting the Bars
To keep the filling creamy, avoid overbaking. The center should jiggle slightly when you take it out. This ensures a smooth and tasty bite. Use fresh key lime juice for the best flavor. It makes a big difference in taste.
For clean squares, use a sharp knife. Dip the knife in warm water before cutting. Wipe it clean after each cut. This helps prevent the filling from sticking and keeps your bars looking nice.
Presentation Ideas
Serve the bars with a dollop of whipped cream on top. Add a thin slice of lime for color and zest. This makes the dessert look fresh and inviting.
Consider a beautiful platter for serving. Place the bars in a neat row. Add lime slices around the edges for a pop of color. You can sprinkle lime zest on the whipped cream too. This adds extra flair and taste.
Pro Tips
- Use Fresh Limes: Always opt for fresh key limes for the best flavor. The zest and juice from fresh fruit will enhance the overall taste of your pie bars.
- Chill for Best Results: Allow the bars to chill for a minimum of 3 hours. This helps them to set properly and makes cutting easier.
- Even Baking: Make sure to bake the filling until it's just set around the edges. A slight jiggle in the center is perfect for a creamy texture.
- Garnish Creatively: Experiment with garnishes! Besides lime slices, consider adding toasted coconut or mint leaves for a unique twist.
Variations
Flavor Adjustments
You can make Key Lime Pie Bars even more fun by adding other flavors. Try orange or lemon for a twist. These fruits bring a bright taste that pairs well with key lime. Simply mix their juice and zest into your filling. Start with the same amount of juice, then adjust to your taste.
You can also switch up the crust. If you want something new, try oat or cookie crusts. Oat crusts add a nutty flavor, while cookie crusts give a sweet crunch. Just replace the graham cracker crumbs with your choice, and follow the same steps.
Dietary Alternatives
If you need gluten-free options, there are great substitutes. Look for gluten-free graham crackers. Many brands offer these, and they work just like regular ones. You can also use almond flour or ground oats for a homemade crust.
For a dairy-free filling, use coconut milk instead of sweetened condensed milk. This gives a creamy texture and adds flavor. You can also replace the egg yolks with silken tofu for a vegan option. Blend it until smooth, then mix it with lime juice and zest.
Storage Info
Short-Term Storage
Once your key lime pie bars are ready, let them cool. Place the bars in the fridge. Use an airtight container to keep them fresh. They will stay good for about 4-5 days. This keeps the bars cold and tasty. Just make sure to cover them well.
Long-Term Storage
If you want to save your bars for later, you can freeze them. First, cut them into squares. Wrap each square in plastic wrap. Then place them in a freezer bag. This keeps them safe from freezer burn. They can last up to three months in the freezer.
Tips for Thawing and Serving
When you are ready to enjoy them, take the bars out of the freezer. Let them thaw in the fridge overnight. This helps keep their tasty flavor. Serve them cold from the fridge. Top with whipped cream and a lime slice for extra fun!
FAQs
What is the difference between Key Lime Pie and Key Lime Pie Bars?
Key Lime Pie is a classic dessert in a round pie form. It has a rich filling with a flaky crust. Key Lime Pie Bars are a fun twist on this dessert. They are square, easier to cut, and serve. The flavor and texture remain similar, but bars are more portable and convenient.
Can I use regular limes instead of key limes?
Yes, you can use regular limes. However, they have a different taste. Key limes are more tart and aromatic. If you use regular limes, your bars will taste different. You may need to adjust the sugar to balance the flavors.
How can I tell when the bars are fully baked?
You can tell when the bars are done by checking the edges. The edges should be set, while the center may have a slight jiggle. This means the filling is still creamy. Overbaking can make them too firm, so keep an eye on them.
What can I do with leftover key lime filling?
If you have leftover filling, you can use it in many ways. Consider making mini tartlets with leftover crust. You can also make a parfait by layering the filling with whipped cream. It is great on pancakes or waffles too!
You’ve learned how to make delicious Key Lime Pie Bars from scratch. We covered ingredients, step-by-step instructions, and helpful tips. You can create variations and store your bars for later enjoyment. Keep experimenting with flavors and enjoy the process! Making these treats will impress your family and friends. Remember, the key is creamy filling and a crunchy crust. Don't hesitate to make these bars your own! Now, get started and have some fun in the kitchen.