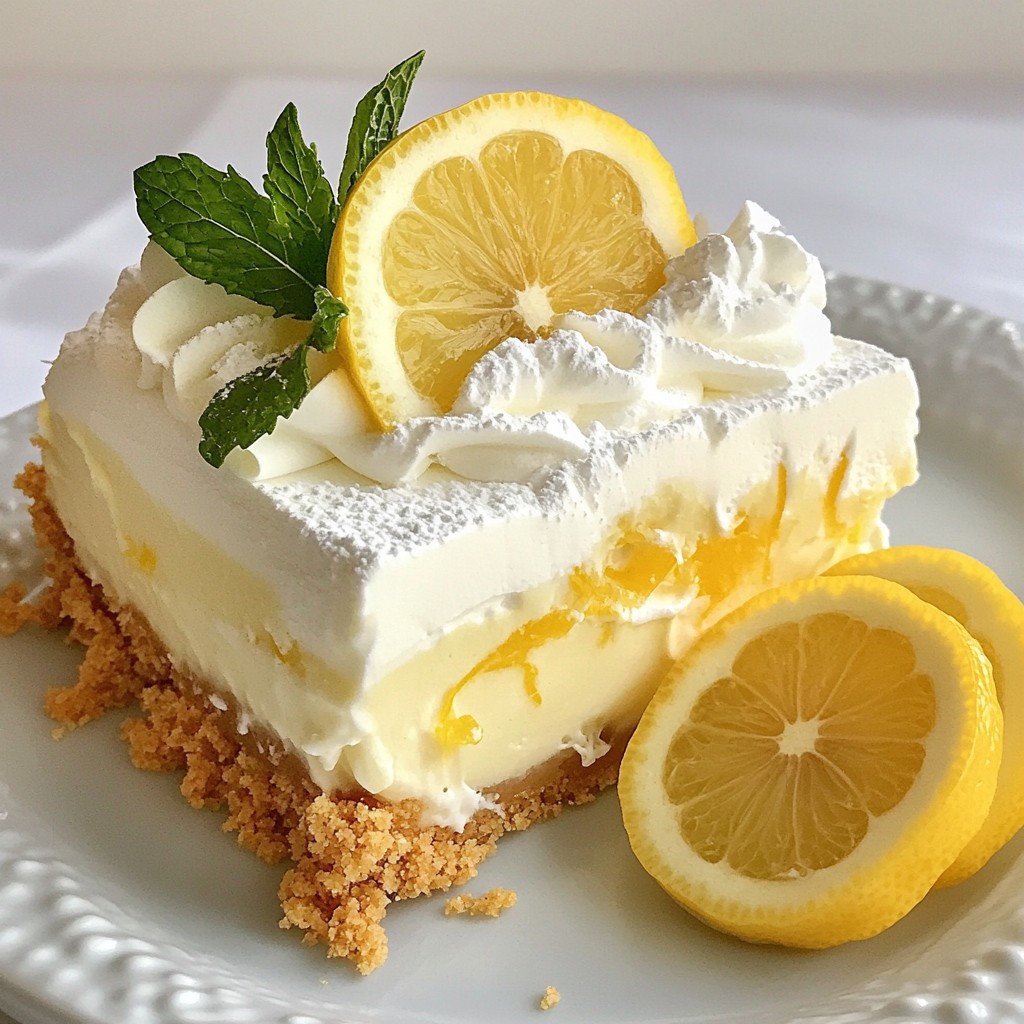
Looking for a delightful dessert that’s easy to make? My No-Bake Lemon Icebox Pie is a must-try. It’s tangy, refreshing, and perfect for any occasion. With a smooth lemon filling and a crisp crust, it’s sure to impress. Even better, I’ll guide you through simple steps, tips, and variations that keep this treat fresh and exciting. Let’s dive into making this delicious pie together!
Why I Love This Recipe
- Easy to Make: This no-bake recipe is perfect for those who want a delicious dessert without the hassle of baking. Just mix, fold, and chill!
- Refreshing Flavor: The combination of fresh lemon juice and zest creates a bright and zesty flavor that’s incredibly refreshing, especially on warm days.
- Perfect for Any Occasion: Whether it’s a family gathering, a picnic, or a casual dinner party, this pie is a crowd-pleaser that fits any occasion.
- Customizable Toppings: Feel free to get creative with garnishes! Fresh mint, whipped cream, or additional citrus slices can elevate your pie presentation.
Ingredients
Detailed Ingredient List
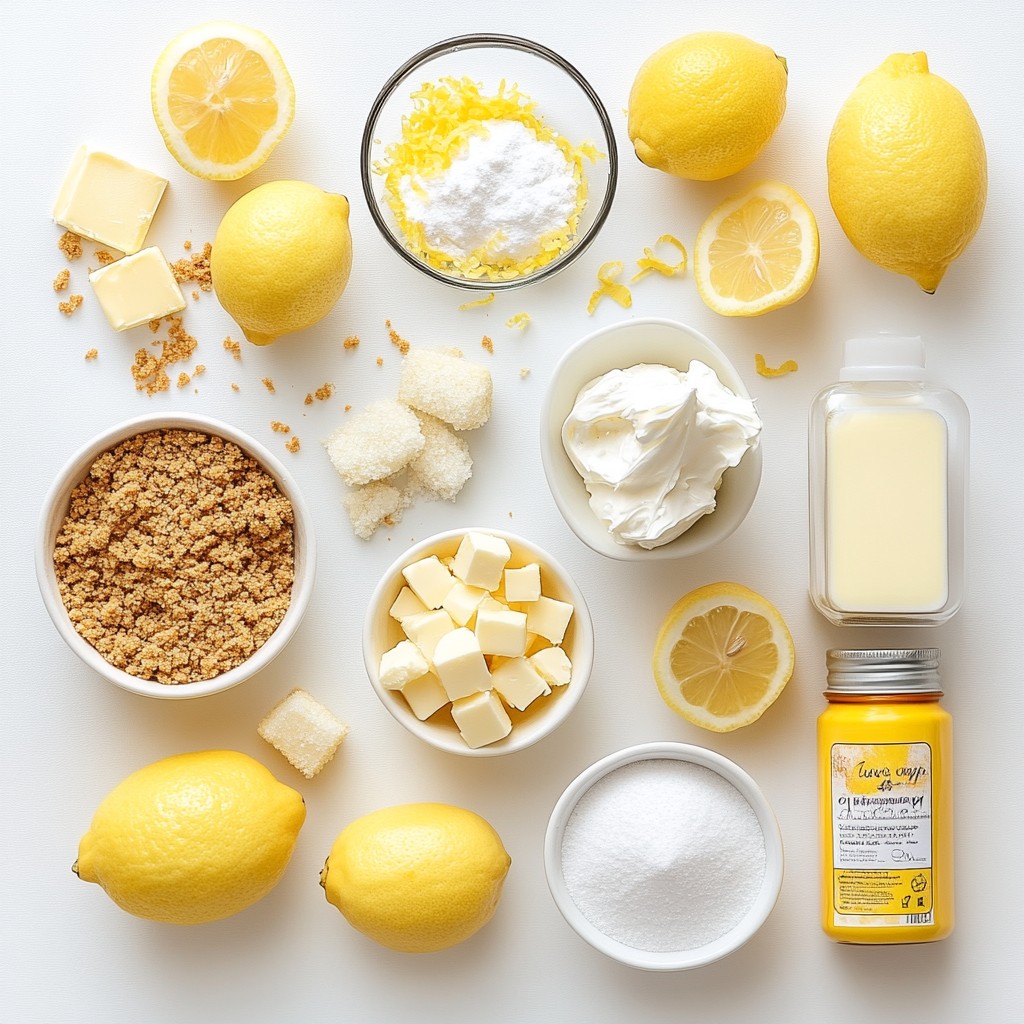
To make your no-bake lemon icebox pie, gather these simple ingredients:
- 1 1/2 cups graham cracker crumbs
- 1/3 cup granulated sugar
- 1/2 cup unsalted butter, melted
- 1 can (14 oz) sweetened condensed milk
- 1/2 cup freshly squeezed lemon juice (about 3-4 medium lemons)
- Zest of 2 lemons
- 1 teaspoon vanilla extract
- 1 cup heavy whipping cream
- 2 tablespoons powdered sugar (for the whipped cream)
Ingredient Substitutions
You can swap some ingredients if needed. For the graham cracker crust, try crushed cookies like Oreos or digestive biscuits. If you need a lower-calorie option, use a sugar substitute in place of the granulated sugar. You can also use coconut cream instead of heavy cream for a dairy-free version. Fresh lime juice works great if you want a twist on the lemon flavor!
Tips for Freshness and Flavor
Always use fresh lemons for juice and zest. This makes your pie taste bright and zesty. Avoid bottled lemon juice; it lacks flavor. Keep your whipped cream separate until you’re ready to serve. This keeps it light and fluffy. If you want to add more zing, try adding a pinch of salt to the filling. This enhances the sweet and tangy notes of the pie, making each bite even better!
Step-by-Step Instructions
Preparing the Crust
To start, gather your ingredients for the crust. In a medium bowl, mix 1 ½ cups of graham cracker crumbs, 1/3 cup of granulated sugar, and 1/2 cup of melted unsalted butter. Use your hands or a fork to blend them well. The crumbs should look like wet sand.
Next, take the crumb mix and press it into a 9-inch pie dish. Use your fingers or the bottom of a measuring cup to pack it tightly. Make sure the crust is even across the bottom and up the sides. Once done, set it aside to rest.
Making the Lemon Filling
Now, let’s move to the lemon filling. In a large bowl, combine a 14 oz can of sweetened condensed milk, 1/2 cup of freshly squeezed lemon juice, the zest of 2 lemons, and 1 teaspoon of vanilla extract. Stir the mix with a whisk or spatula until it’s smooth and creamy. The lemon juice makes it tangy and bright, while the zest adds extra flavor.
Whipping the Cream
For the whipped cream, grab another bowl. Using an electric mixer, beat 1 cup of heavy whipping cream until soft peaks form. This takes a few minutes. Once you see soft peaks, slowly add in 2 tablespoons of powdered sugar. Keep mixing until stiff peaks form. This means your cream is fluffy and holds its shape well.
Now, the fun part! Carefully fold the whipped cream into the lemon mix in three parts. Use a rubber spatula and make gentle sweeping motions. This helps keep the cream light and airy. Once it’s mixed well, you’re ready to fill the crust.
Tips & Tricks
Achieving the Perfect Crust
To get a great crust, blend graham cracker crumbs, sugar, and melted butter. Mix until it looks like wet sand. Press this mix tightly into your pie dish. Make sure it is even all around. A firm crust holds the filling well. If it crumbles too much, it may fall apart when served. Let it rest for a bit after pressing. This helps it set better.
How to Fold Whipped Cream Properly
Whipping cream adds lightness to the filling. First, beat the heavy cream until soft peaks form. Then, add powdered sugar slowly. When you have stiff peaks, it’s ready. To fold it into the lemon mix, use a rubber spatula. Gently scoop from the bottom and fold over the top. Repeat this three times. Be careful not to stir too hard. You want to keep that fluffiness.
Serving and Presentation Suggestions
When serving the pie, slice it into wedges. Each slice looks nice with a bit of lemon zest on top. You can also add a dollop of whipped cream. For more color, use fresh mint leaves as a garnish. Lemon rounds on the side add a fresh touch, too. These tips make your pie look and taste even better. Enjoy this bright, refreshing dessert!
Pro Tips
- Use Fresh Lemons: For the best flavor, always use freshly squeezed lemon juice and zest instead of bottled lemon juice. This enhances the overall taste of your pie.
- Chill the Whipped Cream: To achieve better stability in your whipped cream, chill your mixing bowl and beaters in the refrigerator for about 15 minutes before whipping.
- Let It Set Overnight: For even better texture and flavor, consider letting the pie set in the refrigerator overnight before serving. This allows the filling to firm up nicely.
- Garnish Creatively: Elevate your presentation by garnishing with additional lemon zest and fresh mint leaves. This adds a lovely touch of color and freshness to each slice.
Variations
Flavor Variations
You can change the flavor of your no-bake lemon icebox pie. Try a key lime version. Just swap lemon juice for key lime juice. This gives a fun twist. You can also add berries. Mash fresh strawberries or blueberries and fold them in. This adds color and taste. For a tropical touch, use coconut cream with the lemon filling. Each of these options offers a fresh take on the classic pie.
Alternative Crust Options
The crust can also change. Instead of graham crackers, use Oreo cookies. Crush them and mix with melted butter. This gives a chocolatey flavor. You can also use a nut crust. Ground almonds or pecans mixed with butter create a crunchy base. Both options add a new taste and texture to your pie.
Dairy-Free and Vegan Options
If you want a dairy-free pie, swap the sweetened condensed milk with coconut milk. This keeps the creamy texture while being dairy-free. Use cashew cream or coconut whipped cream instead of heavy whipping cream. They create a fluffy topping. These changes make the pie vegan, but still delicious. Enjoy this refreshing treat, no matter your dietary needs!
Storage Info
How to Store Leftover Pie
To store leftover pie, first cover it well. Use plastic wrap or foil to keep it fresh. Place the pie in the fridge. The cool air helps the flavors stay bright and tangy. Enjoy the pie within three days for the best taste. If you leave it out, it can spoil quickly.
Freezing Instructions
Freezing this pie is a great way to save it for later. Start by cutting it into slices. Wrap each slice tightly in plastic wrap. Then, place the slices in a freezer-safe bag. Remove as much air as possible before sealing. This way, the pie stays fresh for up to two months. When you want a slice, thaw it in the fridge overnight.
Shelf Life and Best Practices
The shelf life of this pie depends on how you store it. In the fridge, it lasts about three days. In the freezer, it can last two months. For the best taste, enjoy it fresh. If you notice any changes in smell or texture, it’s best to toss it. Always check for signs of spoilage to keep your treats safe.
FAQs
Can I make this pie ahead of time?
Yes, you can make this pie ahead of time. It works well for meal prep. I suggest making it the night before. This way, the flavors blend and the pie sets perfectly. Just cover it tightly with plastic wrap and keep it in the fridge. It will stay fresh for up to three days.
What types of lemons are best for this recipe?
I recommend using fresh, juicy lemons for the best taste. Meyer lemons are a great choice. They are sweeter and less acidic than regular lemons. If you use standard lemons, choose ones that are firm and heavy for their size. This indicates juiciness. Always use freshly squeezed juice for the best flavor.
How can I make the filling thicker?
To thicken the filling, you can add more lemon zest or use less lemon juice. Another option is to fold in more whipped cream. If you want a firmer filling, try adding a bit of cream cheese. Just make sure to blend it well so it mixes smoothly. This will give you a rich and thick texture.
This blog post covered key ingredients and steps for creating a delicious pie. I shared tips for crust, filling, and cream. You learned about variations and how to store leftovers for later. Making your pie can be fun and rewarding. I hope you feel inspired to try new flavors and techniques. Enjoy the process and the tasty results!