If you crave a sweet treat that doesn't involve the oven, you’re in luck! This No-Bake Oreo Cheesecake is easy to make and a crowd-pleaser. Imagine layers of creamy cheesecake filling and crunchy Oreo goodness. Perfect for any occasion, it’s a delightful dessert that needs no baking. I’ll walk you through each step, so you can impress friends and family with this simple yet delicious recipe. Let’s get started!
Why I Love This Recipe
- Decadent Flavor: This cheesecake combines the rich, creamy texture of traditional cheesecake with the delightful crunch of Oreo cookies, creating a dessert that’s truly irresistible.
- No-Bake Convenience: Perfect for warm days or when you want a quick dessert, this no-bake recipe eliminates the hassle of turning on the oven while still delivering a show-stopping treat.
- Easy to Make: With just a few simple ingredients and straightforward steps, this cheesecake is perfect for both novice and experienced bakers looking for a delicious dessert.
- Customizable: Feel free to get creative with toppings or add-ins! This recipe can easily be customized with different flavors of cookies or whipped cream variations.
Ingredients
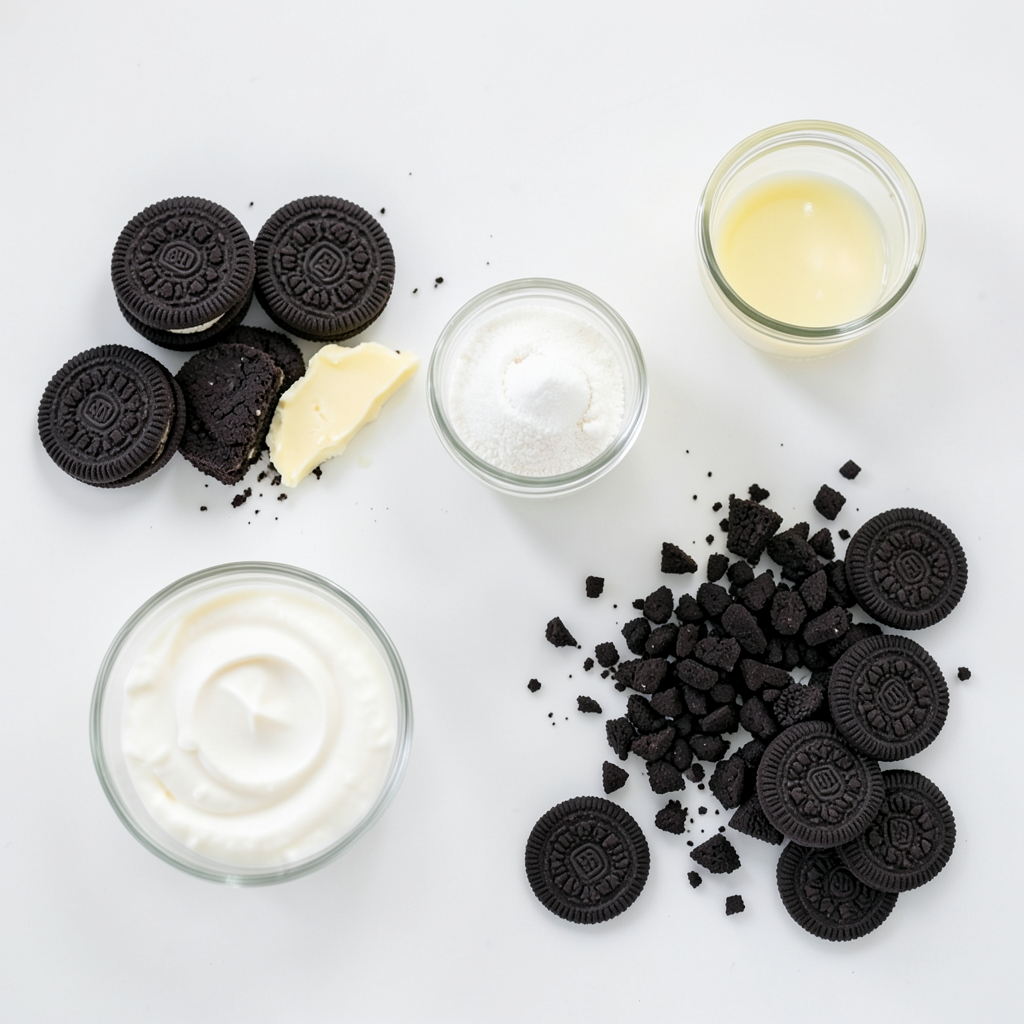
Here are the ingredients you will need for this tasty no-bake Oreo cheesecake:
- 24 Oreo cookies, finely crushed
- 4 tablespoons unsalted butter, melted
- 16 oz cream cheese, softened
- 1/2 cup granulated sugar
- 1 teaspoon pure vanilla extract
- 2 cups heavy whipping cream, chilled
- 10 Oreo cookies, coarsely chopped (for filling)
- Additional Oreo cookies for garnishing
These ingredients come together to create a rich and creamy treat. The crushed Oreo cookies add a delightful crunch to the crust. The cream cheese makes the filling smooth and rich. The heavy cream gives it a light texture. You can use any brand of cookies, but Oreos offer a unique flavor that pairs well with cream cheese.
Make sure your cream cheese is at room temperature. This helps it blend smoothly with the sugar and vanilla. Chilled heavy cream whips up nicely, creating that lovely fluffy texture.
You can also customize your cheesecake with different toppings or flavors. Feel free to experiment with the recipe!
Step-by-Step Instructions
Preparing the Crust
- First, take 24 Oreo cookies and crush them finely. I use a food processor for this.
- In a medium bowl, mix the crushed cookies with 4 tablespoons of melted butter. Stir until the mix looks like wet sand.
- Next, press the cookie mixture firmly into the bottom of a 9-inch springform pan. Make sure it's even and strong.
- Place the pan in the fridge to chill while you make the filling. This helps the crust set well.
Making the Filling
- In a large bowl, beat 16 ounces of softened cream cheese until it's creamy. This takes about 2 to 3 minutes.
- Gradually add in 1/2 cup of granulated sugar and 1 teaspoon of vanilla extract. Mix until it’s fluffy and smooth.
- In another bowl, whip 2 cups of chilled heavy cream. Whip until stiff peaks form. This takes about 3 to 4 minutes. Be careful not to over-whip the cream.
Combining Ingredients
- Gently fold the whipped cream into the cream cheese mix. Start with a little cream to lighten the mixture, then add the rest.
- Next, add 10 coarsely chopped Oreo cookies to the mix. Fold them in until they are evenly spread.
- Pour this creamy filling over your chilled cookie crust. Smooth the top with a spatula to make it even.
Chilling and Serving
- Cover the springform pan with plastic wrap and place it in the fridge. Chill for at least 4 hours to let the cheesecake set well.
- After chilling, carefully remove the sides of the springform pan.
- For a nice touch, garnish the cheesecake with whole Oreo cookies on top. It makes for a pretty presentation!
Tips & Tricks
Perfecting the Cheesecake
To make the best no-bake Oreo cheesecake, start with cream cheese at room temperature. Cold cream cheese will not mix well. It can stay lumpy. Let it sit out for about 30 minutes before you mix. This helps create a smooth filling.
Next, be careful not to over-whip the heavy cream. Whipping should stop when stiff peaks form. If you whip too long, the cream may turn to butter. This will make your cheesecake dense instead of light and airy.
Serving Suggestions
Serve your cheesecake cold for the best taste. I recommend letting it chill for at least four hours. When ready to serve, cut each slice with a warm knife for clean edges.
For a fun touch, top each slice with whipped cream and a whole Oreo. You can even sprinkle crushed Oreos around the plate for added flair. This makes the dessert look extra special!
Common Mistakes to Avoid
One common mistake is not preparing the crust properly. Make sure to press the cookie mixture firmly into the pan. A weak crust may crumble when you slice it.
Also, don’t skip the chilling time. Your cheesecake needs to set for at least four hours. If you cut it too soon, the filling won't hold together. Patience is key for this delicious treat!
Pro Tips
- Chill Your Mixing Bowl: Before whipping the cream, place your mixing bowl and beaters in the refrigerator for a few minutes. This helps the cream whip faster and achieve a better volume.
- Use Room Temperature Ingredients: Ensure your cream cheese is at room temperature before mixing. This allows for a smoother, lump-free cheesecake filling.
- Don’t Over-Whip the Cream: When whipping the heavy cream, stop as soon as stiff peaks form. Over-whipping can lead to a grainy texture.
- Allow Proper Chilling Time: For the best texture, let the cheesecake set in the refrigerator for at least 4 hours, but overnight is even better for deeper flavor.
Variations
Flavor Variations
You can switch up the flavors in your cheesecake. Try using different cookies for the crust. Think about using chocolate chip cookies or even peanut butter cookies. These flavors can change the whole vibe of your treat. You can also mix in other chocolates. White chocolate or dark chocolate can add a fun twist to your cheesecake.
Dietary Modifications
If you need gluten-free options, use gluten-free cookies for the crust. Many brands offer tasty gluten-free Oreos. For those who avoid dairy, find a dairy-free cream cheese. Brands like Tofutti or Kite Hill work well. These swaps let everyone enjoy this dessert.
Additional Toppings
Toppings can take your cheesecake to the next level. Drizzle some chocolate ganache on top for a rich finish. Fresh fruit like strawberries or raspberries can add a burst of color and flavor. For parties, think about using themed decorations. Sprinkles or colorful candies can make your cheesecake festive and fun!
Storage Info
Storing the Cheesecake
After making your no-bake Oreo cheesecake, you want to store it right. Keep it in the fridge if you have leftovers. Use plastic wrap or aluminum foil to cover it. This keeps it fresh and tasty. Make sure it is in a sealed container to avoid smells from other foods.
If you want to save it for later, you can freeze it. Cut it into slices before freezing. Wrap each slice in plastic wrap, then place them in a freezer-safe bag. This makes it easy to grab a piece whenever you want.
Shelf Life
In the fridge, your cheesecake lasts about 3 to 5 days. Just check for any changes in smell or texture before eating. If you freeze it, it can last up to 2 months. For the best taste, eat it within the first month.
Reheating Tips
When you want to eat your frozen cheesecake, you need to thaw it. Move it from the freezer to the fridge. Let it sit for about 4 hours or overnight. This keeps it creamy.
If you need to refresh it before serving, you can whip up some fresh cream. Add a dollop on top to make it look and taste fresh. You can also add a few crushed Oreos for a nice touch.
FAQs
How long does the cheesecake need to chill?
The cheesecake needs to chill for at least 4 hours. This time helps it set properly. If you can, leave it in the fridge overnight for the best results.
Can I use low-fat cream cheese?
Yes, you can use low-fat cream cheese. It may change the taste and texture slightly. The cheesecake might be less rich but still delicious.
What can I substitute for heavy whipping cream?
If you want a substitute for heavy whipping cream, you can use coconut cream or whipped topping. Both options will change the flavor a bit, so choose what you like best.
How do I know when the cheesecake is set?
You will know the cheesecake is set when it feels firm to the touch. It should hold its shape and not jiggle in the middle.
Can I make this cheesecake in advance?
Absolutely! You can make this cheesecake a day or two ahead of time. Just cover it well and keep it in the fridge. This can save you time on the day you plan to serve it.
Is it possible to use another type of cookie for the crust?
Yes, you can use different cookies for the crust. Try using chocolate cookies or even graham crackers. Each type will give a unique flavor to your cheesecake.
This blog post covered how to make a delicious Oreo cheesecake. We explored the ingredients, step-by-step instructions, and tips to perfect it. You learned about flavor variations and storage tips too. Remember, using room-temperature cream cheese and chilling the cheesecake are key for success. Don't hesitate to get creative with toppings or flavors. This cheesecake is not only tasty, but it’s also a crowd-pleaser. Now, it’s time to gather your ingredients and start baking. Your sweet treat awaits!