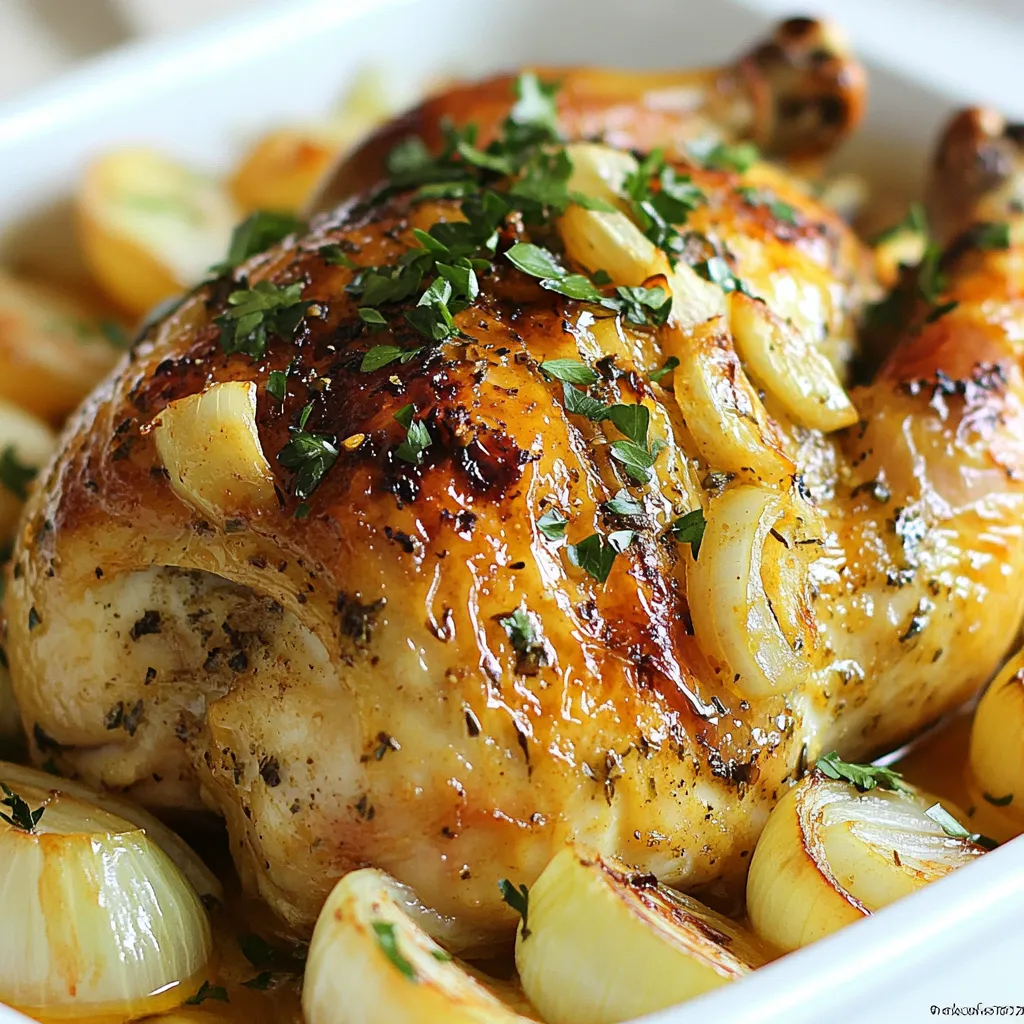
Are you ready to savor a dish that’s packed with flavor? In my latest post, I’ll show you how to make Roasted Garlic Butter Chicken—it’s juicy, tender, and simply divine. With fresh ingredients and easy steps, you’ll create a meal that impresses everyone! Plus, I’ll share tips for perfecting this recipe and suggest delicious variations. Let’s dive into the art of roasting chicken like a pro!
Why I Love This Recipe
- Flavor Explosion: This recipe is packed with bold garlic and herb flavors that create a deliciously aromatic dish that everyone will love.
- Simple Preparation: With just a few steps and easily accessible ingredients, this dish is perfect for both novice cooks and seasoned chefs alike.
- Impressive Presentation: The golden-brown skin and garnished with fresh parsley make this roast chicken a stunning centerpiece for any dinner table.
- Moist and Tender: Thanks to the garlic herb butter and basting technique, the chicken comes out incredibly juicy and flavorful every time.
Ingredients
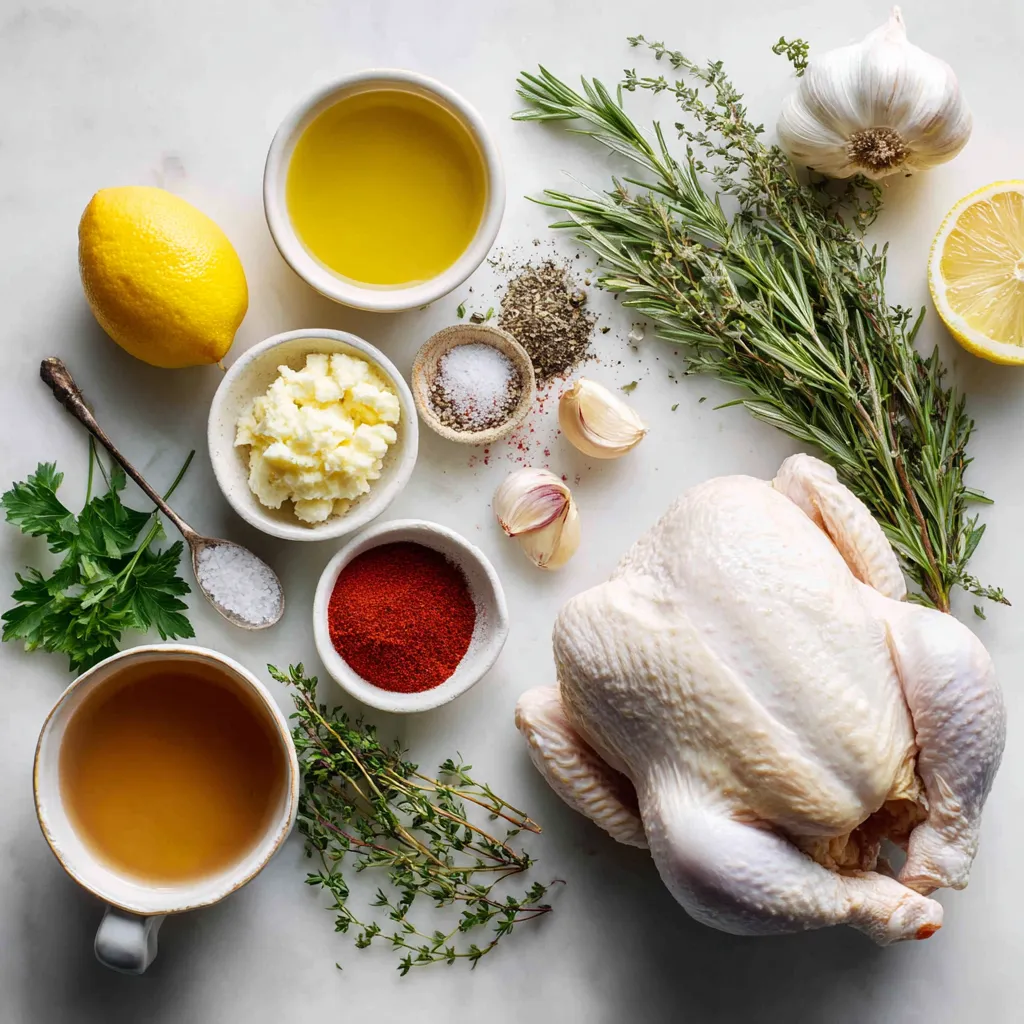
List of Ingredients
– 1 whole chicken (3-4 pounds)
– 1 cup unsalted butter, softened to room temperature
– 10 cloves of garlic, finely minced
– 1 tablespoon fresh rosemary, finely chopped
– 1 tablespoon fresh thyme, finely chopped
– Zest and juice of 1 lemon
– Salt and freshly ground black pepper, to taste
– 1 teaspoon smoked paprika
– Fresh parsley, chopped, for garnish
– 1 onion, cut into quarters
– 1 cup low-sodium chicken broth
Importance of Fresh Ingredients
Using fresh ingredients is key to great flavor. Fresh garlic, herbs, and chicken bring out the best taste. They also improve the dish’s aroma and texture. When you use fresh herbs like rosemary and thyme, the dish becomes vibrant. The lemon zest adds brightness, making each bite exciting. Fresh ingredients ensure your Roasted Garlic Butter Chicken is juicy and savory.
Suggested Ingredient Substitutions
If you can’t find a specific ingredient, don’t worry! You can swap some items easily. For example, if you don’t have fresh rosemary, dried rosemary works too. Just use less since dried herbs are stronger. You can also use other herbs like sage or oregano for unique flavors. If you want a lighter option, you can use olive oil instead of butter. Chicken thighs can replace whole chicken if you prefer smaller pieces. These swaps can help you create a tasty dish with what you have on hand.
Step-by-Step Instructions
Preheating the Oven
First, set your oven to 425°F (220°C). Preheating is key. A hot oven helps the chicken cook evenly. It also gives the skin a nice, crispy finish.
Making the Garlic Herb Butter
Next, grab a mixing bowl. Combine 1 cup of softened butter, 10 minced garlic cloves, and 1 tablespoon each of chopped rosemary and thyme. Add the zest and juice of 1 lemon, salt, pepper, and 1 teaspoon of smoked paprika. Mix well to create a rich garlic herb butter. This butter will add lots of flavor to the chicken.
Preparing and Stuffing the Chicken
Now, take your whole chicken and pat it dry with paper towels. This step is important for crispy skin. Rub the garlic herb butter all over the chicken. Make sure to get under the skin for the best taste. Then, place quartered onion inside the chicken’s cavity. If there’s leftover butter, spoon it in too.
Setting Up for Roasting
Place the chicken breast-side up in a roasting pan. Pour 1 cup of low-sodium chicken broth into the pan. This broth keeps the chicken moist and creates a tasty sauce.
Roasting Time and Temperature
Put the pan in the oven. Roast the chicken for about 1 hour and 15 minutes. Use a meat thermometer to check that the internal temperature reaches 165°F (75°C). The skin should turn a beautiful golden brown.
Basting Process
Every 20 minutes, open the oven and baste the chicken. Use the melted garlic butter from the pan. Basting adds flavor and keeps the chicken moist. This step makes a big difference!
Resting the Chicken
Once the chicken is done, carefully take it out of the oven. Let it rest for 10-15 minutes. This waiting time helps the juices spread throughout the meat, making it tender and juicy. After resting, carve the chicken and serve it with the pan juices. Enjoy your delicious roast!
Tips & Tricks
How to Achieve Crispy Skin
To get crispy skin, start with a dry chicken. Use paper towels to remove moisture. A dry bird will roast better. Next, rub the garlic herb butter under the skin. This adds flavor and helps with crispiness. Finally, roast at a high temperature. Set your oven to 425°F. This will give you a golden and crunchy skin.
Best Practices for Basting
Basting is key for flavor and moisture. Open the oven every 20 minutes to baste. Use a spoon to drizzle the melted garlic butter over the chicken. This keeps the meat juicy and adds richness. Make sure to use the juices from the pan. They are packed with flavor and will enhance your dish.
Utilizing Leftover Garlic Herb Butter
Don’t waste any garlic herb butter! Use the extra to flavor vegetables or bread. Spread it on corn or toss it with potatoes. You can also mix it into pasta for a quick sauce. The garlic flavor will elevate any dish. It’s a great way to use what you have.
Timing for Perfect Roast
Timing is very important for a perfect roast. Aim for about 1 hour and 15 minutes. Check the chicken with a meat thermometer. The internal temperature should reach 165°F. This ensures the chicken is safe to eat. Let it rest for 10-15 minutes after roasting. This helps the juices stay inside the meat, making it tender and juicy.
Pro Tips
- Pat Dry for Crispiness: Make sure to thoroughly pat the chicken dry with paper towels before applying the garlic herb butter. This helps achieve that coveted crispy skin during roasting.
- Use a Meat Thermometer: To ensure perfectly cooked chicken, use a meat thermometer inserted into the thickest part of the thigh. The internal temperature should reach 165°F (75°C).
- Experiment with Herbs: Feel free to substitute or add other herbs like oregano or basil to the garlic herb butter for unique flavor profiles that suit your taste.
- Save the Pan Juices: After roasting, don’t discard the pan juices! They can be used as a delicious sauce or gravy to drizzle over the carved chicken for added flavor.
Variations
Adding Vegetables for Roasting
You can enhance your roasted garlic butter chicken by adding vegetables. Root veggies like carrots, potatoes, or turnips work great. Chop them into even pieces. Toss them with some olive oil, salt, and pepper. Arrange them around the chicken in the roasting pan. They will soak up the chicken juices and become tender and tasty. You can also add broccoli or Brussels sprouts for a colorful touch.
Herb Variations and Adjustments
Feel free to play with herbs in this recipe. You can swap rosemary and thyme for herbs like oregano or sage. Fresh herbs give great flavor, but dried herbs work too. Use about one-third of the amount if using dried herbs. Mixing in a bit of basil or parsley can add freshness. Experiment with your favorites to find the best taste for you.
Oven vs. Air Fryer Cooking Methods
Both the oven and air fryer can cook this dish well. The oven gives a nice, even roast. It can handle larger chickens too. An air fryer cooks faster and gives a crispy skin. Set the air fryer to 375°F (190°C). Cook for about 50 minutes or until the chicken is done. Both methods yield juicy chicken, so choose the one that fits your time and tools.
Storage Info
How to Store Leftover Chicken
After enjoying your roasted garlic butter chicken, you might have some leftovers. First, let the chicken cool down to room temperature. Then, place it in an airtight container. You can keep the chicken in the fridge for up to three days. Make sure to store any leftover garlic herb butter separately. This butter adds great flavor when reheating. If you want to keep it longer, you can freeze it.
Reheating Tips and Methods
When you’re ready to eat your leftover chicken, it’s best to reheat it gently. Preheat your oven to 350°F (175°C). Place the chicken in a baking dish and cover it with foil. This helps keep the moisture in. Heat it for about 20-30 minutes or until it’s warm all the way through. You can also use a microwave for quick reheating. Just cover it with a damp paper towel to avoid drying it out. Heat in short bursts of 1-2 minutes.
Freezing Options and Tips
If you want to save your roasted chicken for later, freezing is a great option. First, let the chicken cool completely. Cut the chicken into pieces for easier storage. Wrap each piece tightly in plastic wrap, then place them in a freezer bag. Be sure to remove as much air as possible. You can freeze the chicken for up to three months. When ready to eat, thaw it in the fridge overnight before reheating.
FAQs
How long should I roast a whole chicken?
Roast a whole chicken for about 1 hour and 15 minutes. This time works well for a 3-4 pound bird. Always check the chicken’s internal temperature. It should reach 165°F (75°C) for safe eating.
Can I use chicken pieces instead of a whole chicken?
Yes, you can use chicken pieces. Adjust the cooking time based on the size of the pieces. Smaller pieces will cook faster, about 30-45 minutes, depending on thickness.
What can I serve with Roasted Garlic Butter Chicken?
You can serve many sides with this dish. Some great options are:
– Roasted vegetables
– Mashed potatoes
– Rice pilaf
– A fresh green salad
These sides complement the chicken’s rich flavors.
How do I know when the chicken is fully cooked?
To check if the chicken is fully cooked, use a meat thermometer. Insert it into the thickest part of the thigh, avoiding the bone. It should read 165°F (75°C). The juices should run clear, not pink.
Can I make this recipe in advance?
Yes, you can prepare the garlic herb butter ahead of time. Rub it on the chicken and store it in the fridge for up to 24 hours. Roast it just before serving for the best flavor and texture.
This guide shows you how to roast a delicious garlic butter chicken. We covered key ingredients and their freshness, easy steps, tips for success, and fun variations. Don’t forget proper storage and reheating methods to enjoy leftovers. Cooking can be fun and simple. With practice, you’ll master roasting chicken and impress everyone. Enjoy every bite and the great flavors you creat