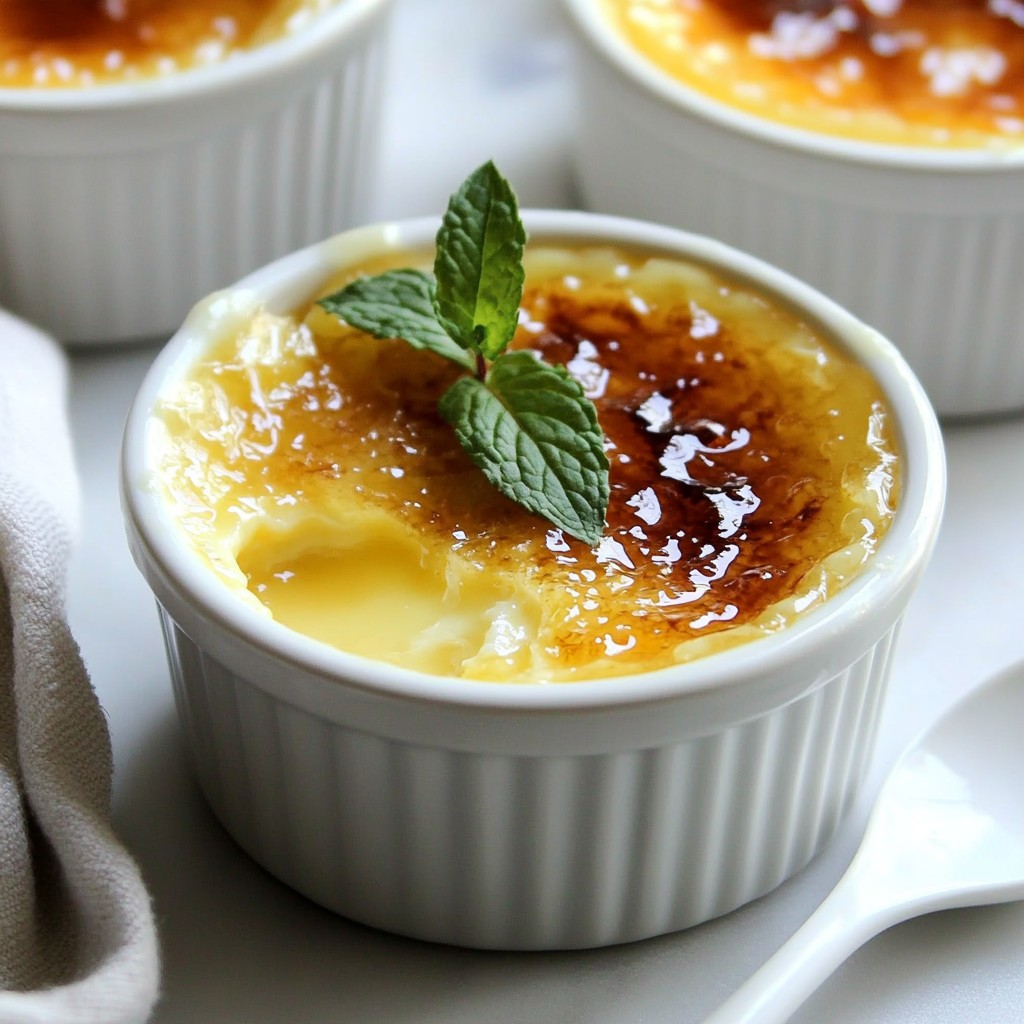
Are you ready to impress your friends with the ultimate luxurious treat? Vanilla bean crème brûlée is not just a dessert; it’s a delightful experience! With its creamy custard and a perfectly caramelized top, this recipe will make you the star of any dinner party. In this blog post, I’ll share easy steps and tips to create your own stunning crème brûlée. Let’s dive into the sweet details!
Why I Love This Recipe
- Rich and Creamy Texture: This crème brûlée has a luxurious, velvety texture that melts in your mouth, making it the perfect indulgent dessert.
- Elegant Presentation: With its crisp caramelized sugar topping and smooth custard, this dessert is visually stunning and impresses guests at any occasion.
- Versatile Flavor Options: While vanilla bean is classic, you can easily experiment with flavors like chocolate, citrus, or coffee for a unique twist.
- Simple Yet Sophisticated: The recipe may seem fancy, but it's surprisingly easy to make at home, allowing you to enjoy a gourmet experience without the restaurant price.
Ingredients
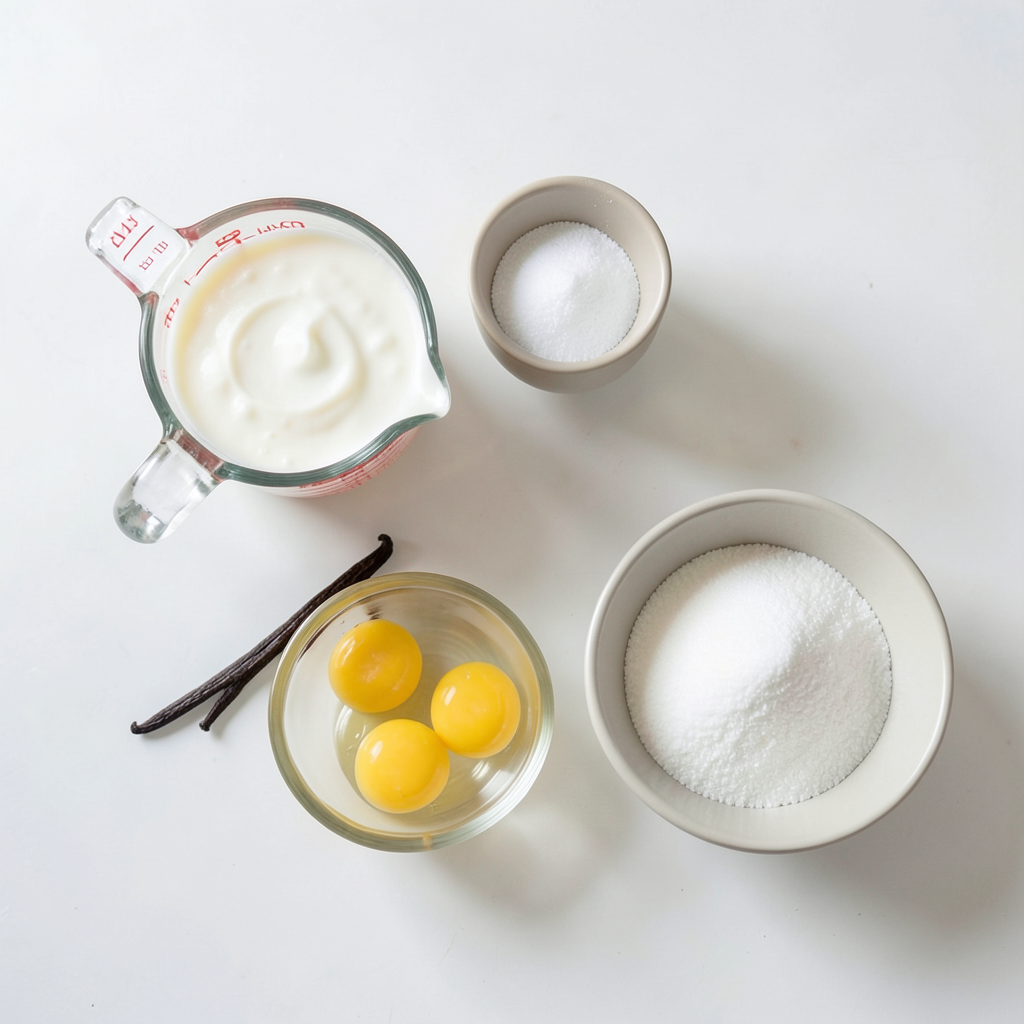
List of Essential Ingredients
- Heavy cream: Use 2 cups for a rich base.
- Vanilla bean vs. vanilla extract: Choose 1 vanilla bean for the best flavor. If not available, 1 tablespoon of pure vanilla extract works too.
- Egg yolks and sugar proportions: You'll need 4 large egg yolks and 1/2 cup of granulated sugar. This mix gives the dessert its creamy texture and sweetness.
Optional Ingredients for Flavor Enhancement
- Sea salt usage: A pinch of sea salt balances the sweetness. It adds depth to the flavor.
- Possible additions for variation: You can add a splash of coffee or a dash of orange zest. These options give a fun twist to the classic taste.
Step-by-Step Instructions
Prepping the Oven and Ramekins
Start by preheating your oven to 325°F (160°C). This temperature is key for even cooking. Choose a baking dish or individual ramekins. Place them in a larger roasting pan. This will hold the water bath later.
Preparing the Cream Mixture
Next, heat 2 cups of heavy cream in a medium saucepan over medium heat. Watch it closely until it simmers, but do not let it boil. If you use a vanilla bean, split it open. Scrape the seeds into the cream and add the pod too. This step brings out the best flavor. Once simmering, take it off the heat. Let it steep for 10-15 minutes.
Combining Egg Yolks with Cream
While the cream is steeping, crack 4 large egg yolks into a mixing bowl. Add 1/2 cup granulated sugar and a pinch of sea salt. Whisk them together until the mix turns pale and thick. This makes it smooth and airy, which is essential.
After steeping, remove the vanilla pod from the cream. Slowly pour the warm cream into the egg yolk mix while whisking. This helps avoid curdling the eggs. If you use vanilla extract, add it now.
Baking the Custards
Strain the combined mixture through a fine mesh sieve into a clean bowl. This step ensures a silky smooth custard. Now, pour the custard into the prepared ramekins, filling them just below the rim.
Carefully add hot water to the roasting pan. The water should reach halfway up the sides of the ramekins. This water bath helps cook the custard gently. Place the roasting pan in the oven. Bake for 30-35 minutes. The custard should be set but still slightly wobbly in the center.
When done, remove it from the oven. Let it cool in the water bath for about 10 minutes. Then, transfer the ramekins to the refrigerator. Chill them for at least 2 hours, or overnight for a creamier texture.
Tips & Tricks
Achieving the Perfect Texture
The water bath is key for a smooth crème brûlée. It helps cook the custard gently. This method stops the edges from cooking too fast. Always make sure the water reaches halfway up the ramekins. This keeps the heat even.
After baking, let the ramekins cool in the water bath for ten minutes. Then, move them to the fridge. Chill them for at least two hours. For the best results, let them chill overnight. This rest time makes the texture creamy and rich.
Caramelizing the Top
Caramelizing the sugar creates that lovely crunchy top. You can use a kitchen torch to do this. Hold the torch about six inches above the sugar. Move the flame back and forth until the sugar melts. Watch it closely to avoid burning.
If you don’t have a torch, no worries! You can use your oven. Set it to broil and keep a close eye. Broil the custards for one to two minutes. This will also create a nice crispy layer.
Remember to let the crème brûlée sit for a few minutes after caramelizing. This lets the sugar harden. Enjoy the contrast of creamy custard and crunchy top!
Pro Tips
- Use Fresh Ingredients: Always use fresh heavy cream and high-quality vanilla for the best flavor. Fresh ingredients make a significant difference in the final taste of your crème brûlée.
- Control the Baking Time: Keep a close eye on your custard as it bakes. A perfectly set crème brûlée should be slightly wobbly in the center when you take it out of the oven.
- Cool Gradually: Let the crème brûlée cool in the water bath for a bit before transferring it to the refrigerator. This helps it set evenly and prevents cracks.
- Perfect Caramelization: When caramelizing the sugar, move the torch in a circular motion to ensure even melting. This will help achieve a uniformly crispy top.
Variations
Flavor Variations to Try
You can change up the classic vanilla flavor in your crème brûlée. Here are some fun ideas:
- Chocolate Infusion: Melt dark or milk chocolate into the warm cream. This gives a rich taste.
- Coffee Twist: Add a shot of espresso or brewed coffee to the cream. This gives a nice coffee kick.
- Citrus Zest: Grate some lemon or orange peel into the cream for a fresh burst. The zest adds a bright flavor.
If you want dairy-free options, use coconut cream or almond milk instead of heavy cream. These swaps keep the dessert creamy and tasty.
Serving Suggestions
For a stunning presentation, serve the crème brûlée in its ramekin. Top it with fresh berries or a sprig of mint. This adds color and a fresh touch.
You can also pair the dessert with fruit sauces. A berry coulis or a drizzle of caramel adds sweetness. A side of whipped cream can balance the rich custard, too. Enjoy these ideas to make your crème brûlée shine!
Storage Info
How to Store Leftover Crème Brûlée
To keep your leftover crème brûlée fresh, use airtight containers. Glass containers work best. They help keep flavors strong and prevent spills. Cover each ramekin tightly with plastic wrap if you don’t have a container. Store the crème brûlée in the refrigerator. It will stay good for up to three days.
Reheating Instructions
When you want to enjoy your crème brûlée again, reheat it gently. Place the ramekins in a warm water bath. This helps keep the custard smooth. Avoid using the microwave, as it can change the texture. Warm it in the oven at a low temperature of 250°F (120°C) for about 10 minutes. Enjoy your delicious dessert as if it were fresh!
FAQs
What can I substitute for vanilla bean?
You can use pure vanilla extract. A tablespoon of extract works well. Another option is vanilla paste. It gives a similar taste and nice flecks. You can also try almond extract, but it will change the flavor a bit.
How do I know when crème brûlée is done baking?
Look for a slight wobble in the center. The edges should be set and firm. You can gently shake the ramekin to check. If it jiggles a bit, it is ready. Let it cool a bit before chilling.
Can I make crème brûlée ahead of time?
Yes, you can prepare it a day in advance. Just chill it in the fridge. This allows the flavors to blend well. When ready to serve, caramelize the top right before serving.
Is a kitchen torch necessary for caramelizing?
A kitchen torch is great but not a must. You can use your oven’s broiler instead. Just place the ramekins under the broiler for a couple of minutes. Keep a close watch to avoid burning the sugar.
Making crème brûlée is a rewarding journey. You learned about key ingredients, like heavy cream and the difference between vanilla bean and extract. I walked you through each step, from prepping your oven to baking custards perfectly.
Remember the tips for achieving that smooth texture and how to caramelize the top safely. Explore flavor variations to match your taste and enjoy serving suggestions. With proper storage and reheating, you can savor your creamy dessert even longer. Dive in and enjoy making this classic treat.