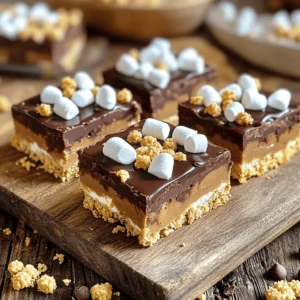
Peanut Butter S’mores Bars
Indulge in the deliciousness of Peanut Butter S’mores Bars that combine all your favorite flavors in one easy recipe! With creamy peanut butter, rich chocolate chips, and gooey marshmallows, these bars are perfect for any occasion. Ready in just an hour, they’re a delightful treat that everyone will love. Click through to explore the full recipe and elevate your dessert game today!